BRING YOUR VISION INTO ACTION
Learn how a chess piece becomes the ultimate hero with a tactic called pinning.
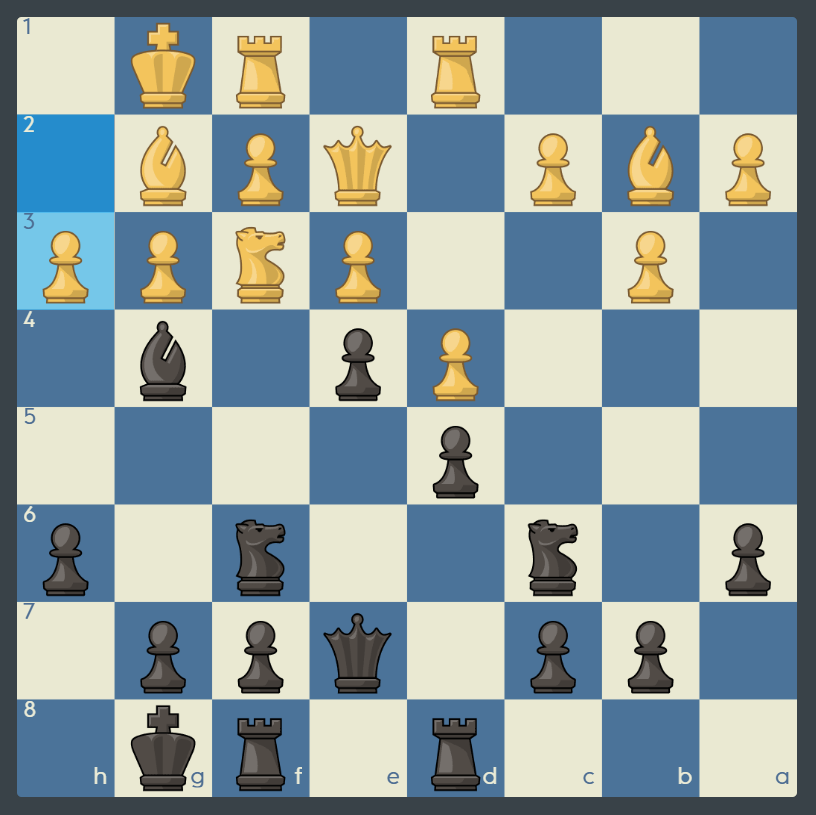
TOPIC 1
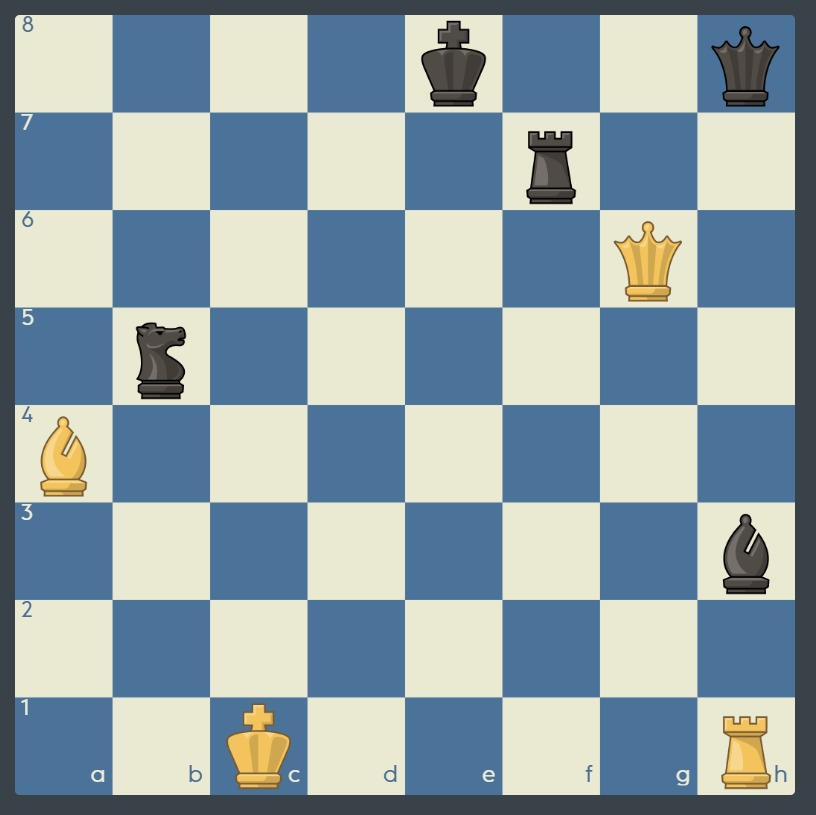
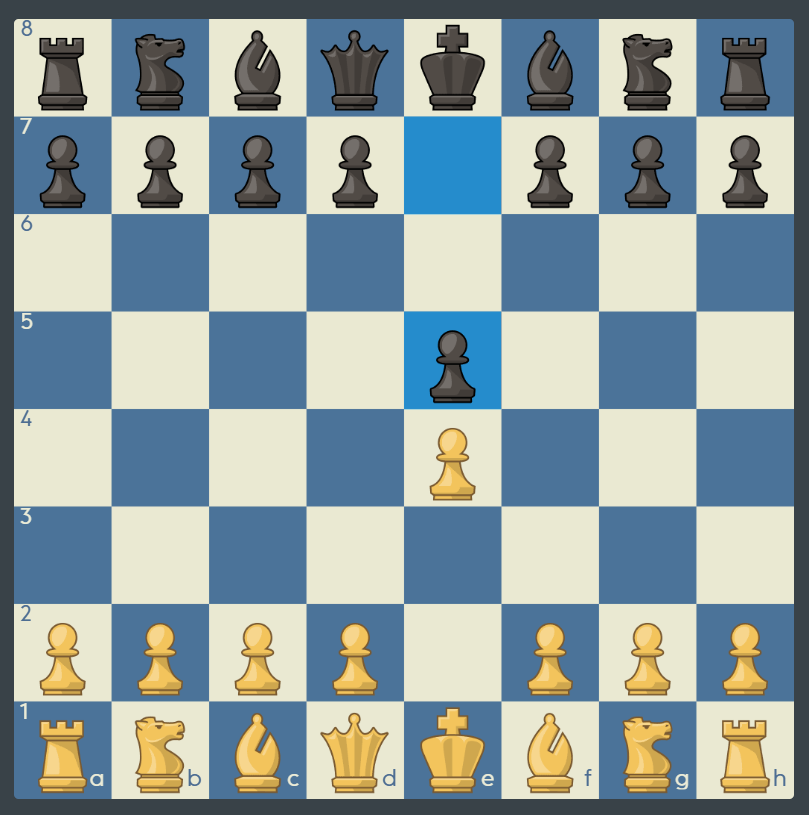
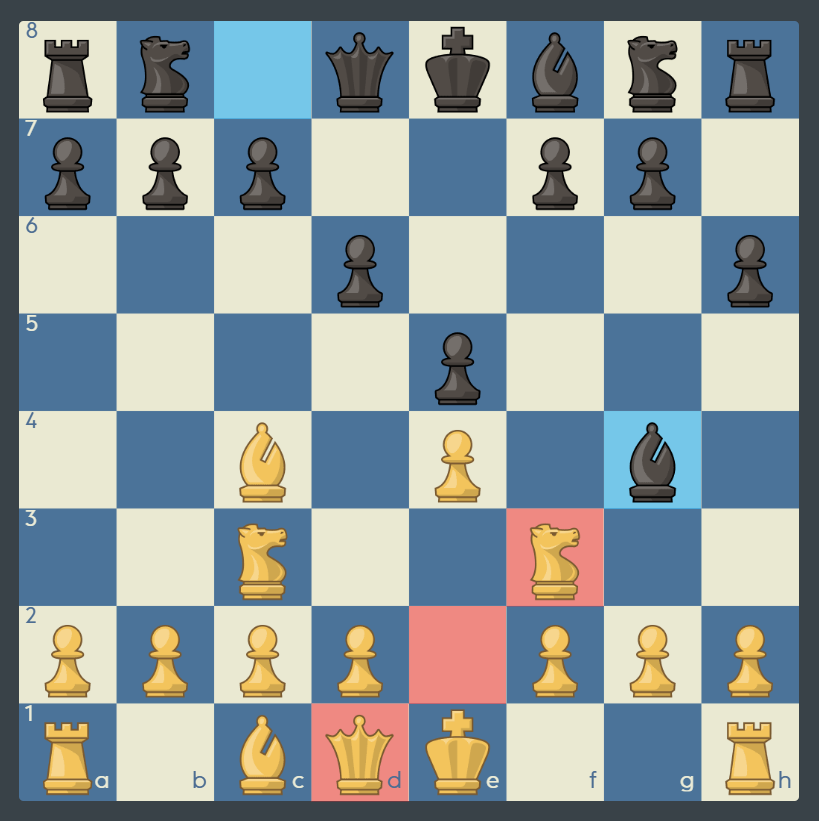
Pins occur only on the straight lines of the chessboard, meaning the ranks, files and diagonals. Find which pinned piece can be captured for free, and play that move.
Great job! There are three pins in this position, but only one of the pinned pieces could be captured for free.
TOPIC 2
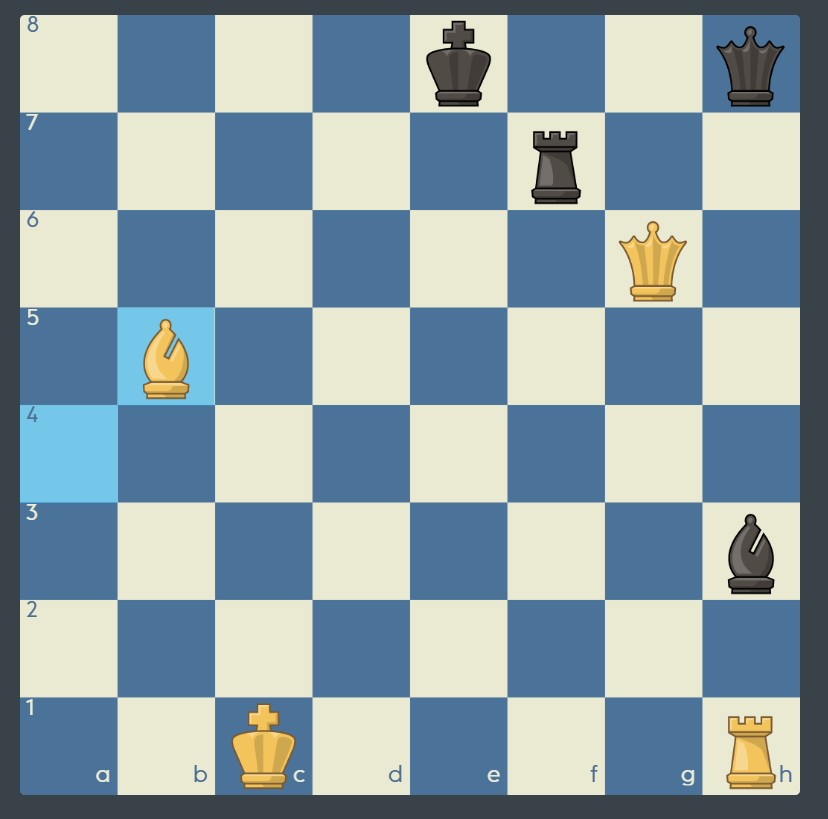
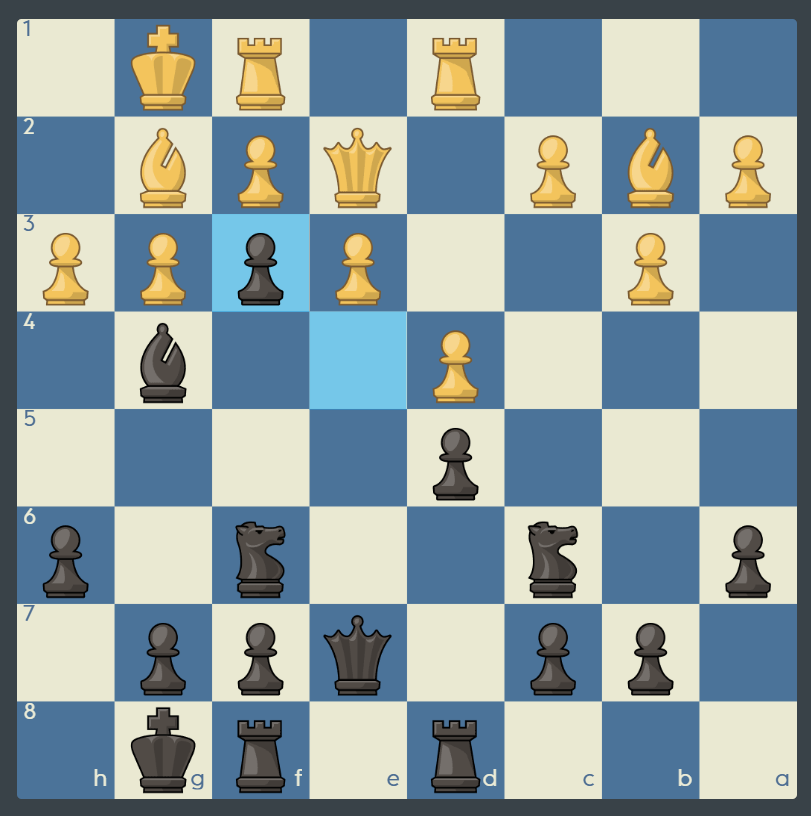
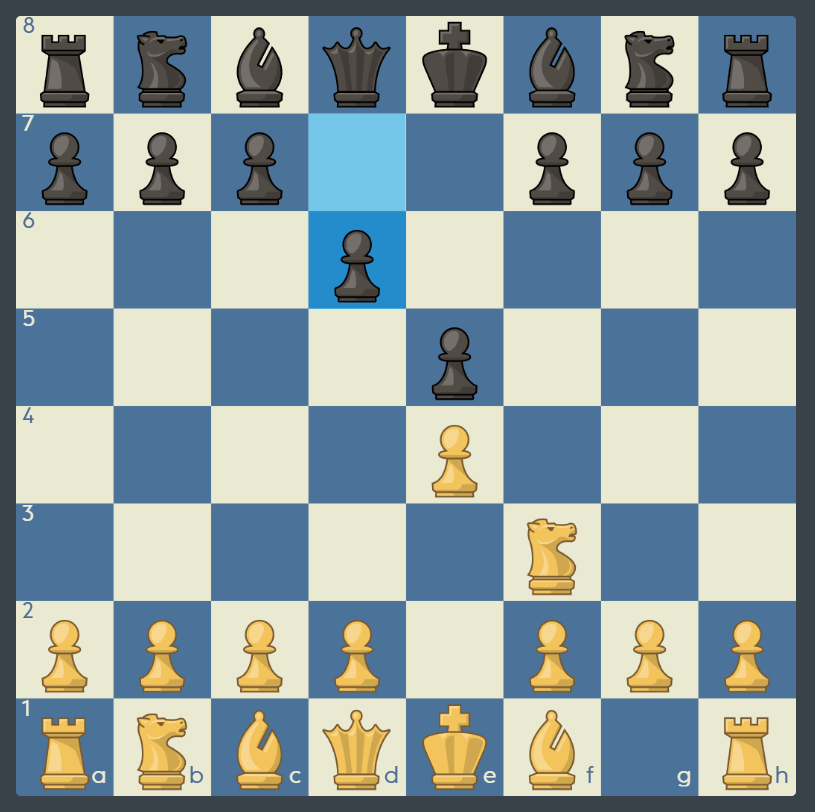
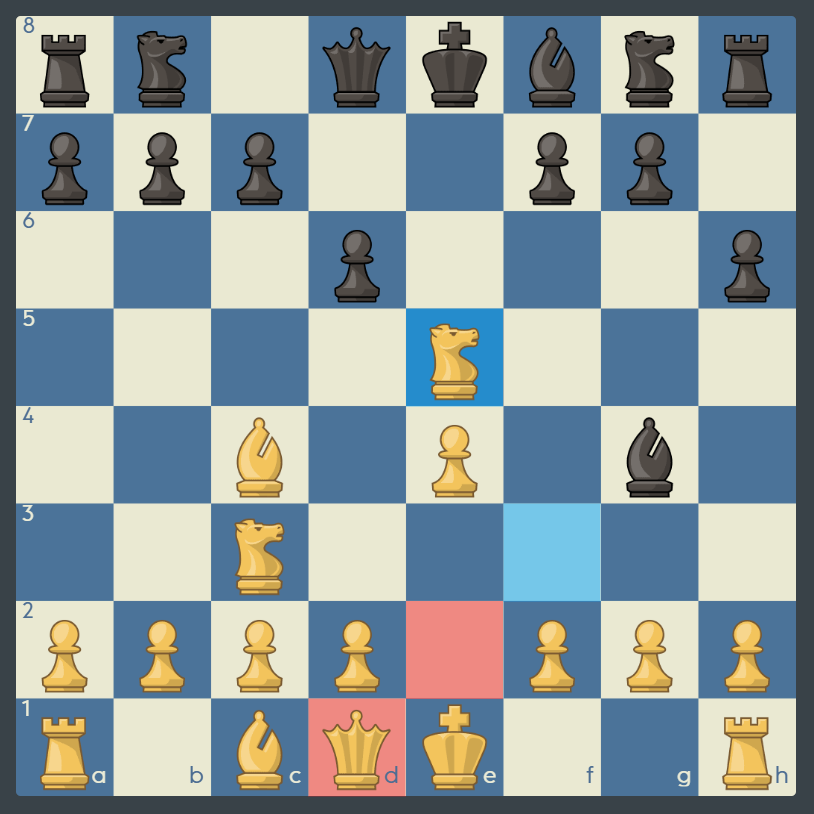
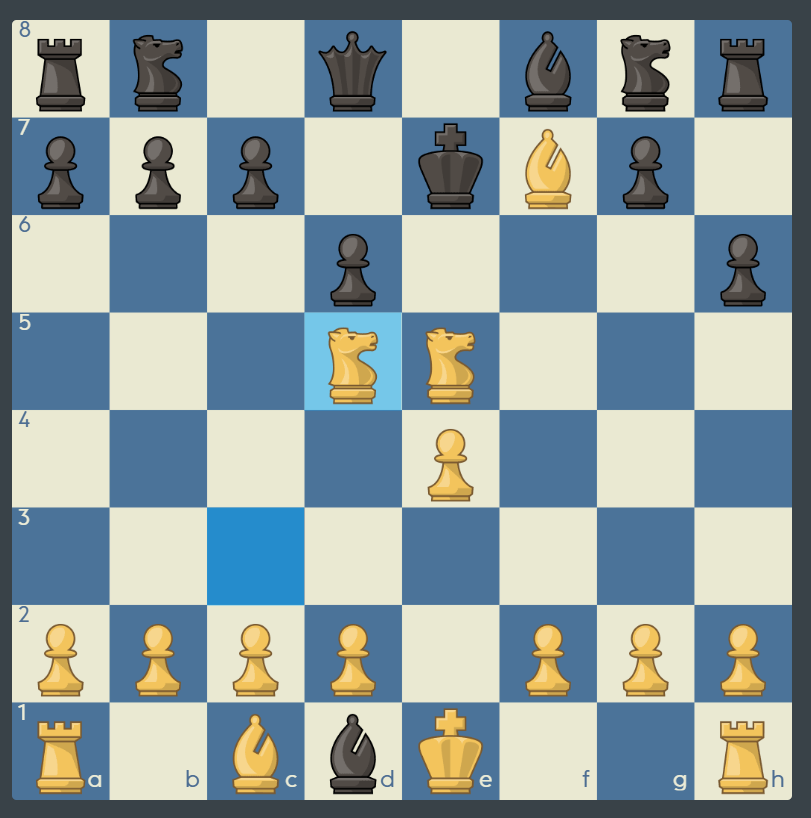
Pieces that cannot move can be attacked and captured. Can you see which black piece is pinned and how to attack it again?

Great job! Instead of just capturing, you were patient and found an even stronger move. Before capturing a pinned piece, you should first look for ways to attack it more times and win it for free!
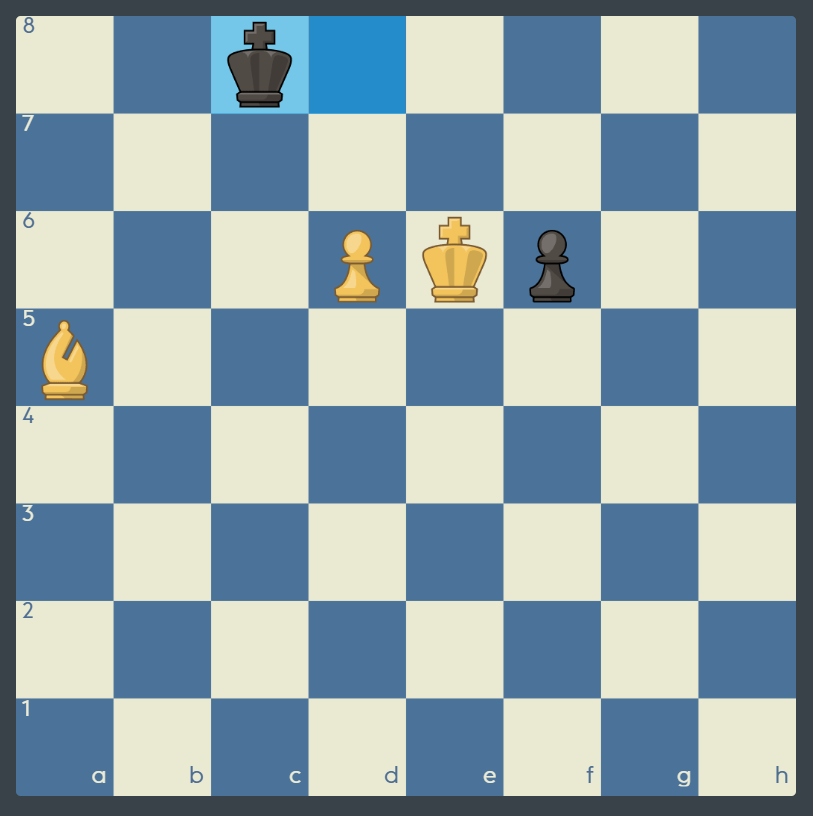
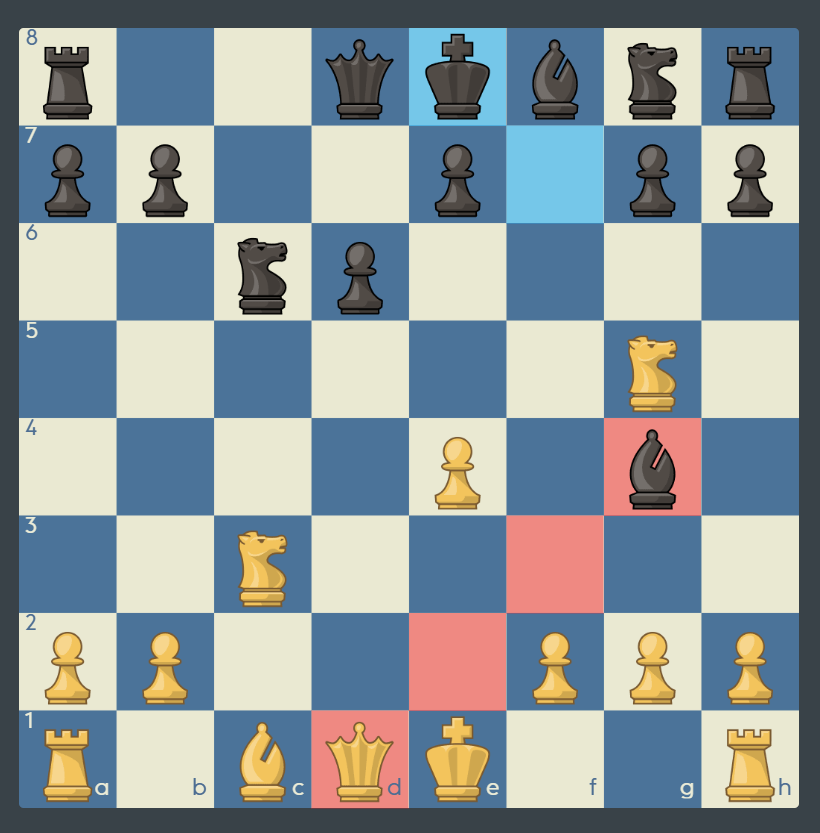
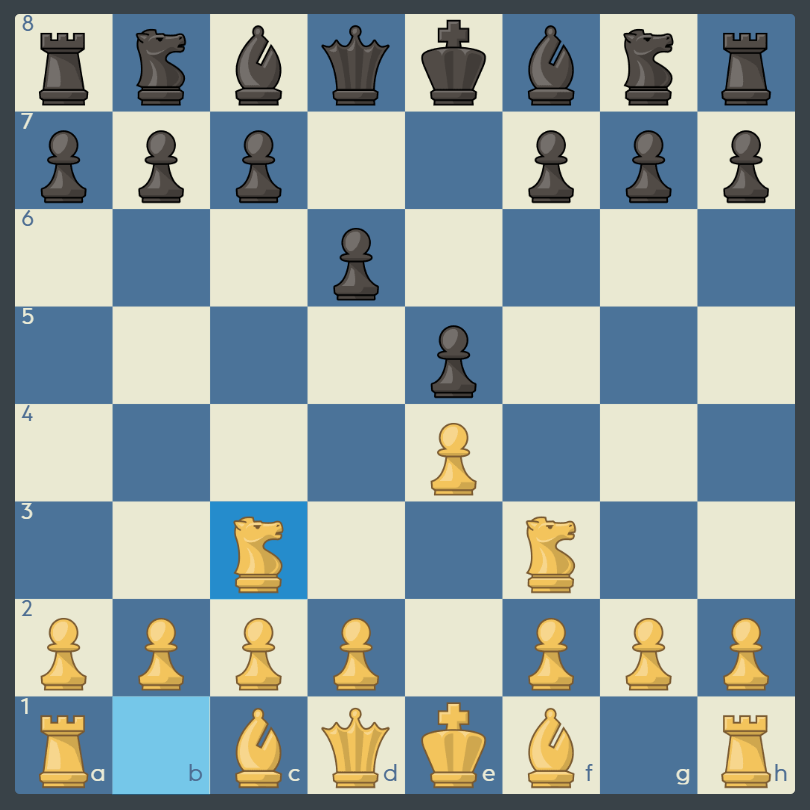
Black could not move the rook away yet, but now that it is out of the pin, it is ready to run free.
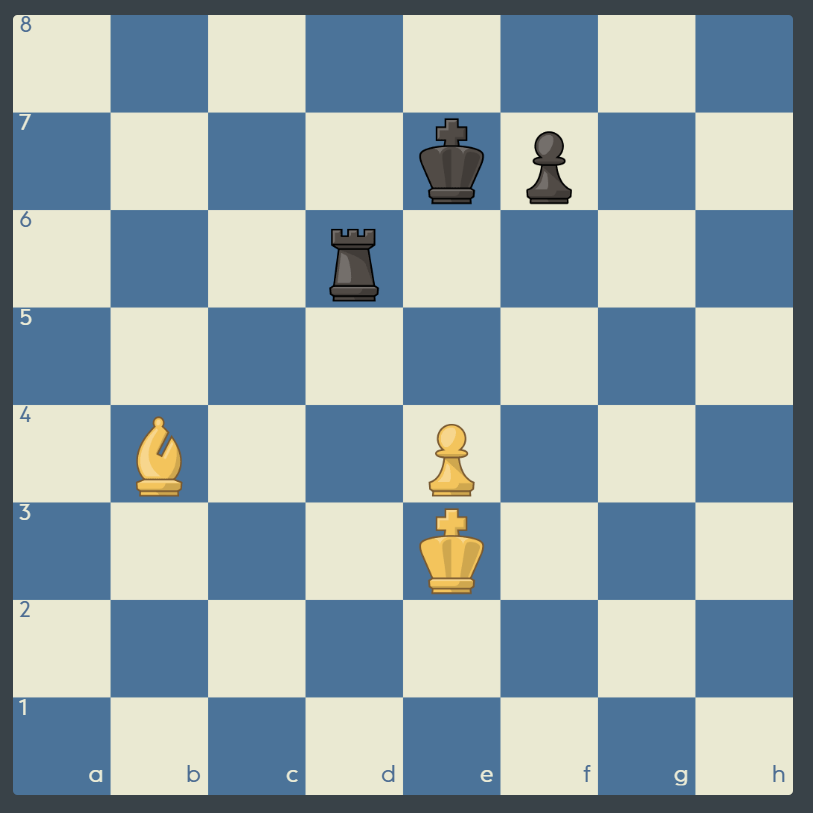
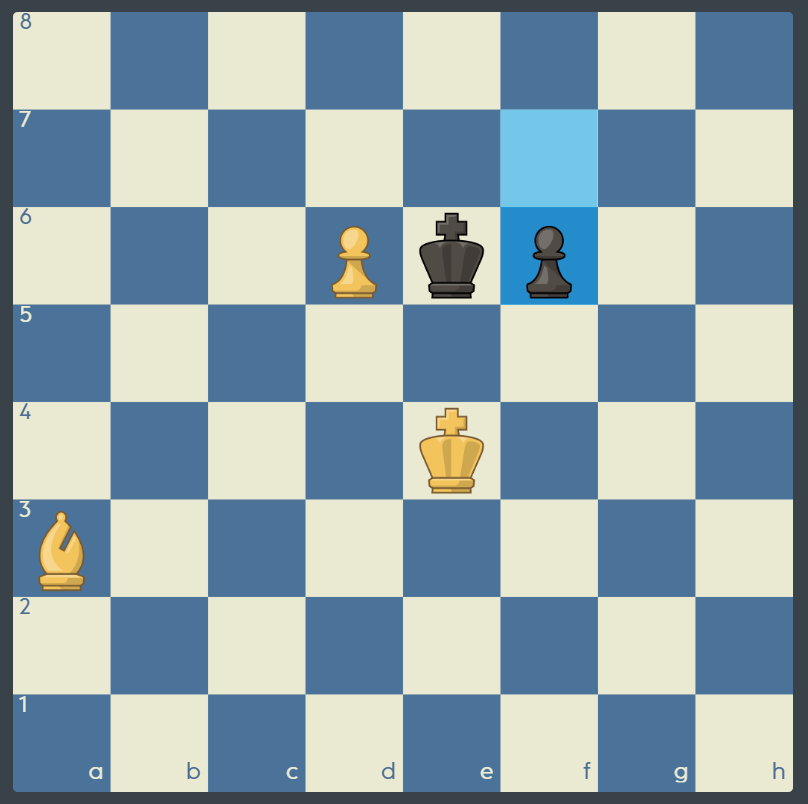
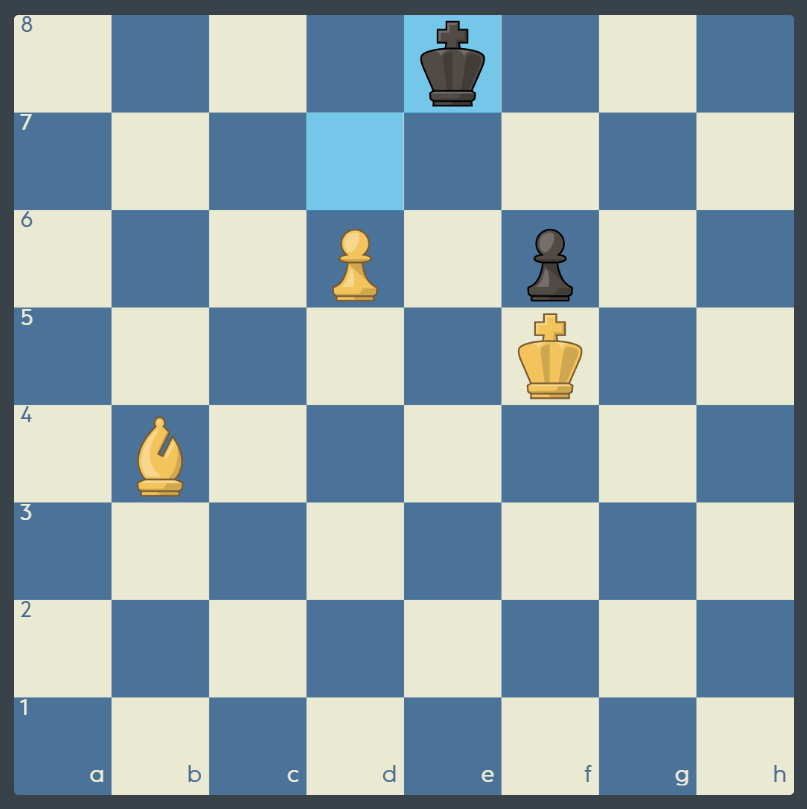
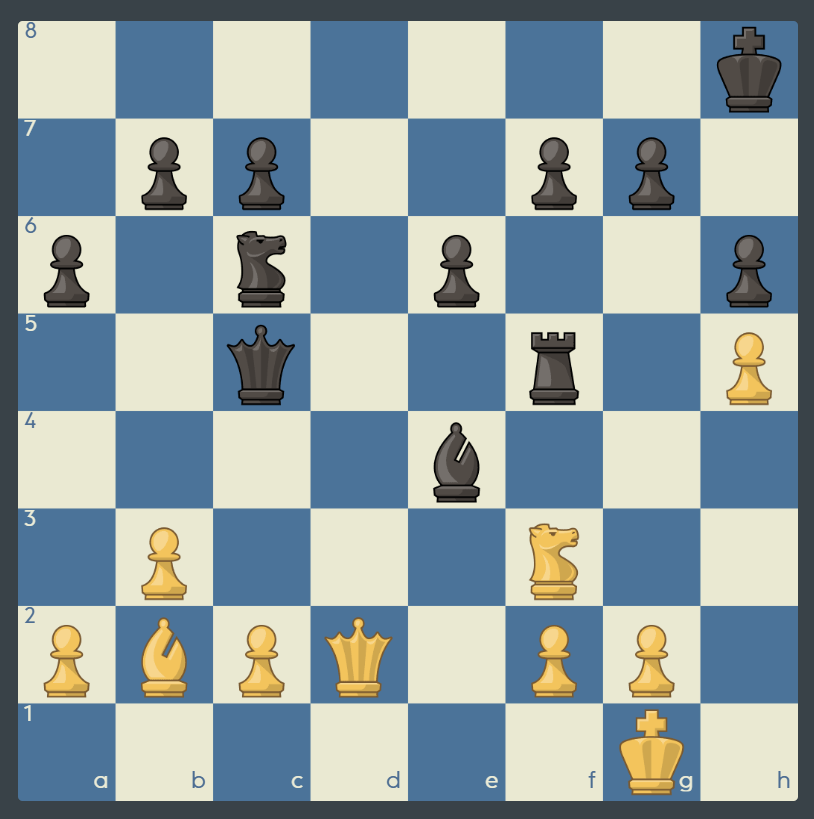
White is attacking the rook two ways, and it is only defended by the king. But what is the best way to capture the rook? This is tough!
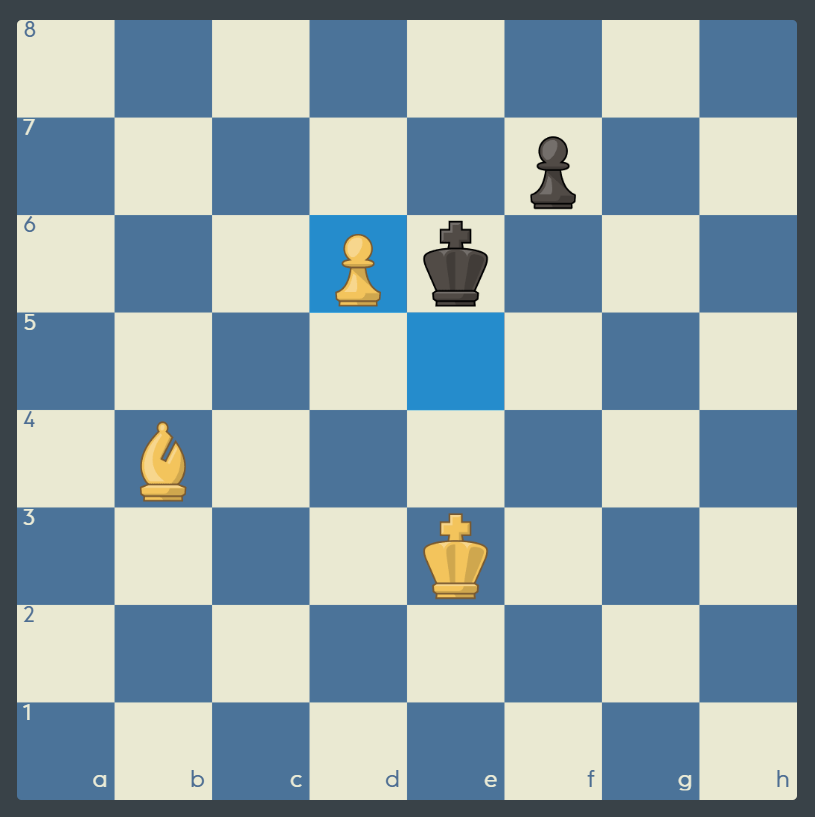
Great job! Capturing it with the bishop would be a big mistake, since Black would then play …f6, forcing the trade of White’s last pawn, which cannot get away. Since a bishop alone is not enough to checkmate, the game would be a draw.
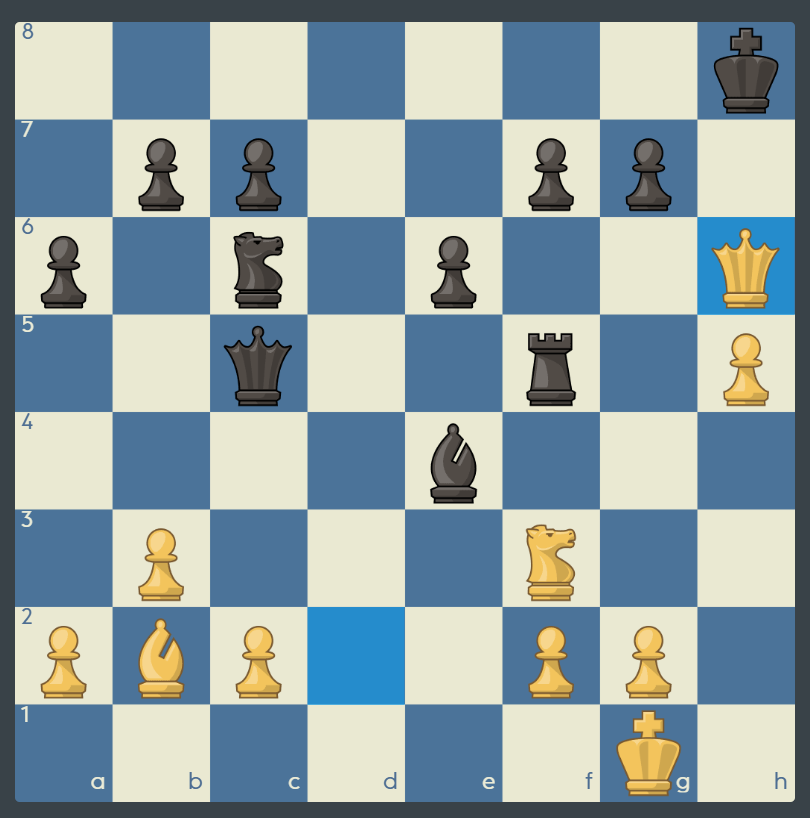
Black cannot do much but just wait.
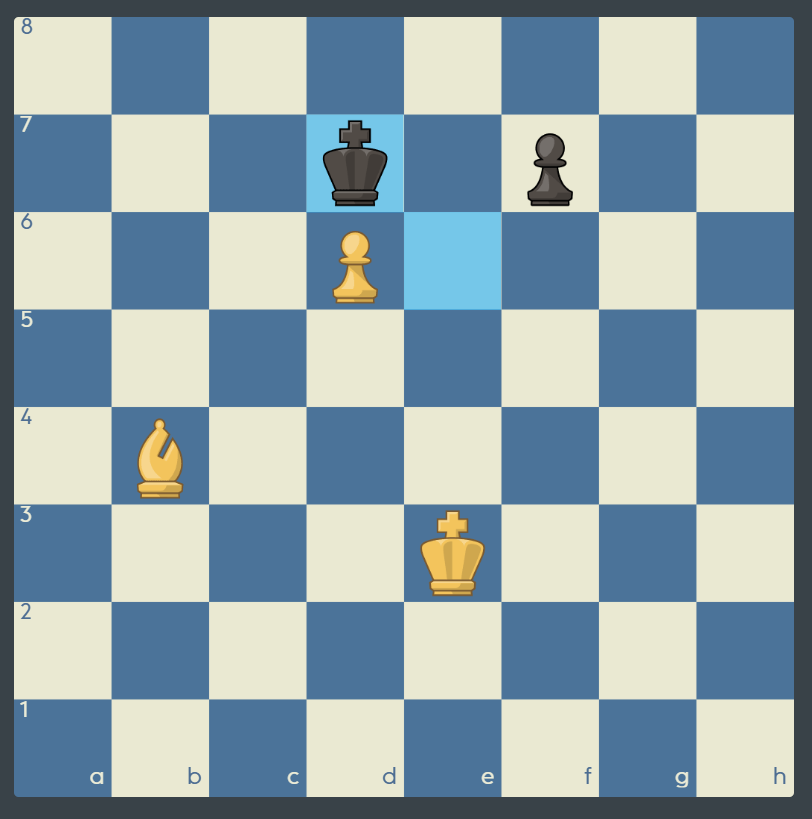
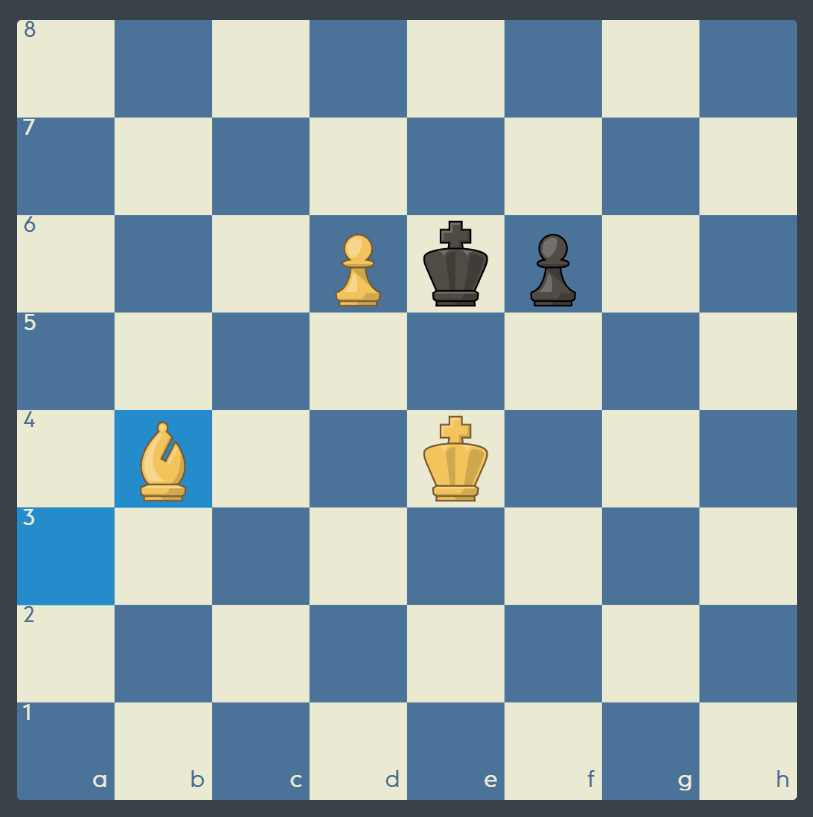
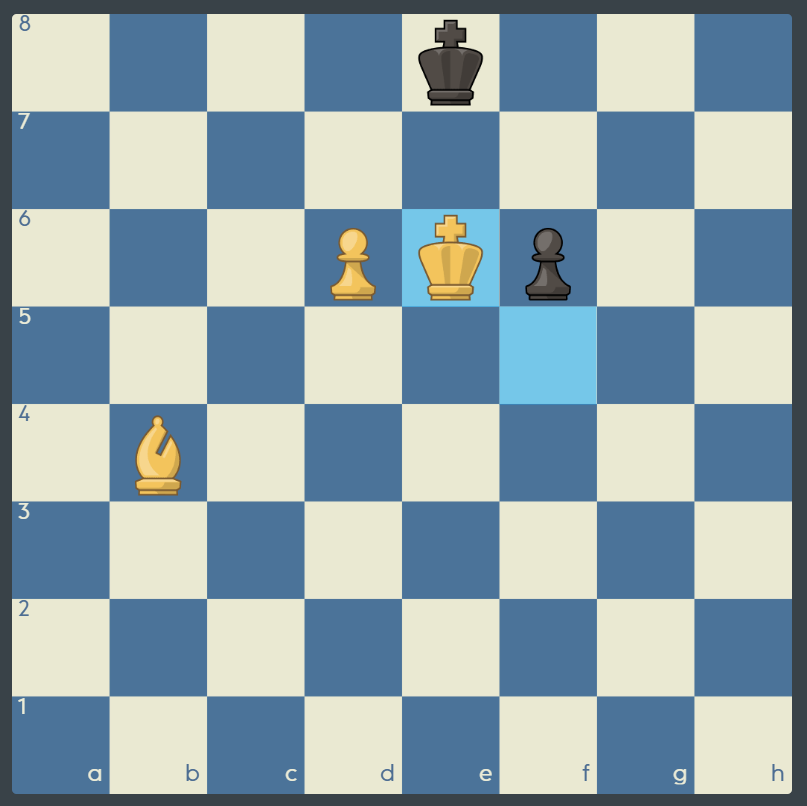
Let’s click through the next few moves to see how fast White can win this endgame by activating and using the king.
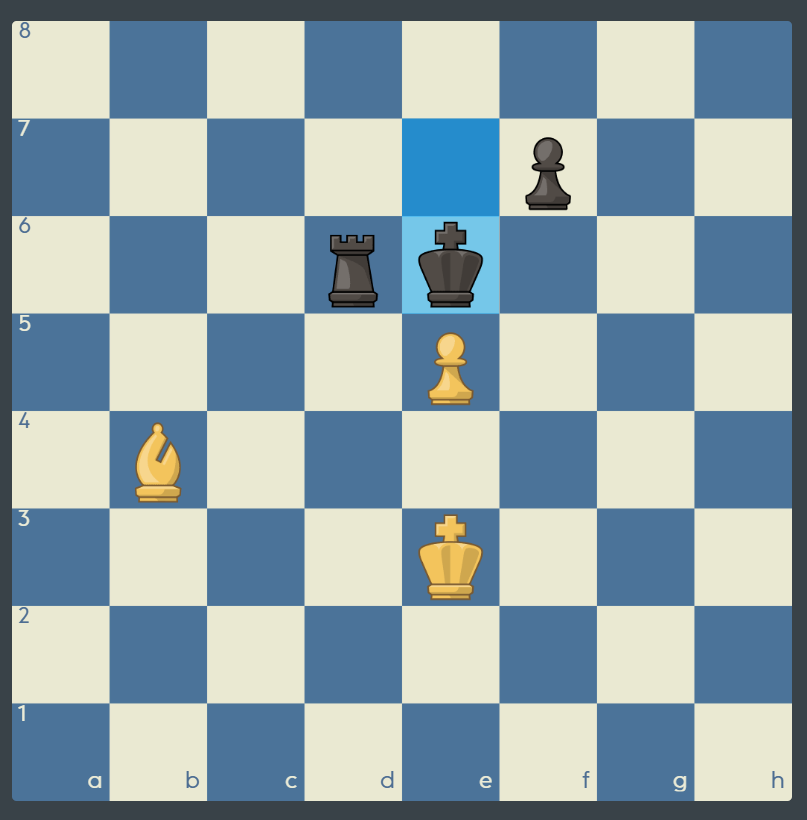
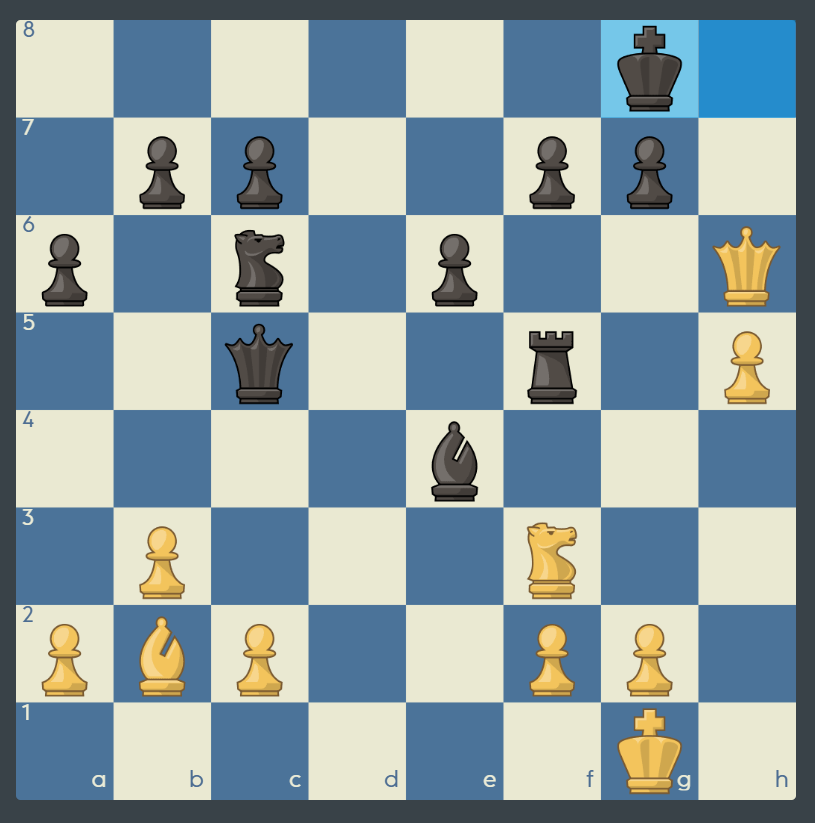
The king moves up.
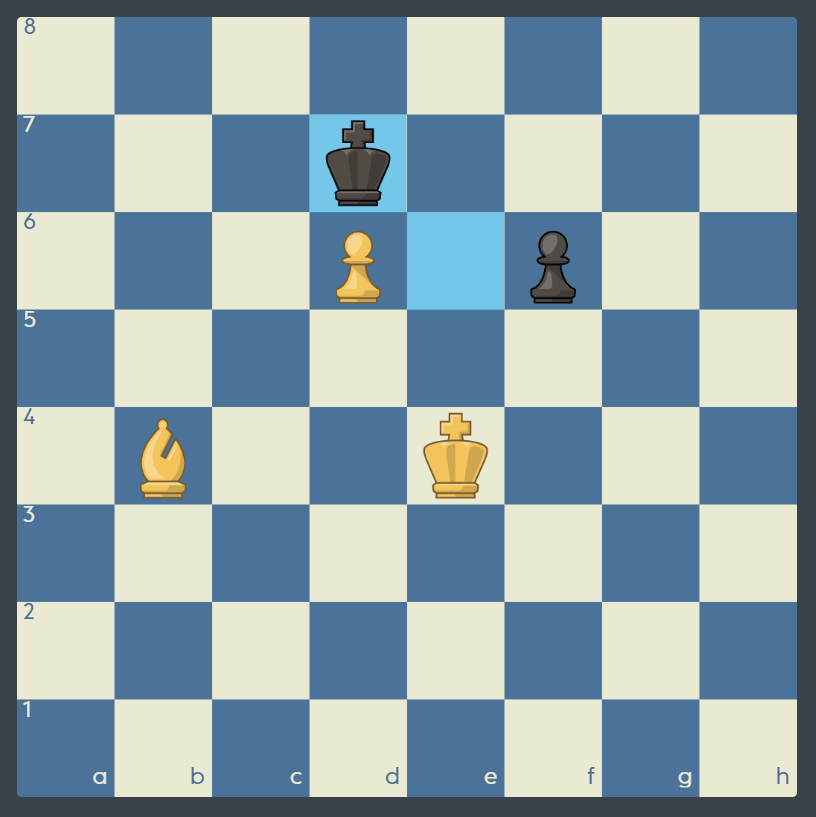
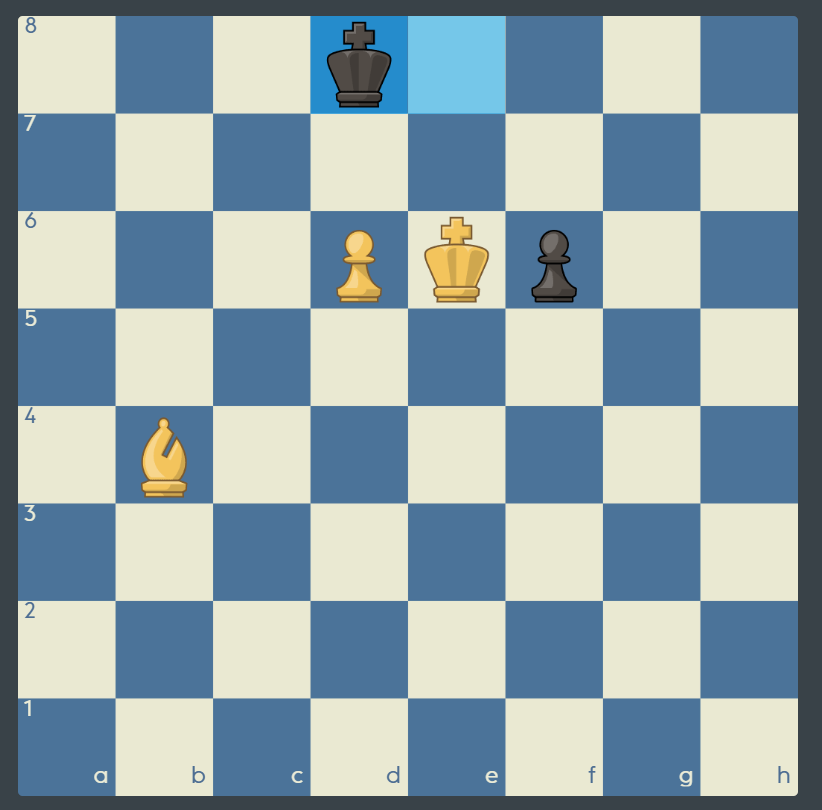
Black tries to stop White from invading.
Click through again and read why White plays the move he does.

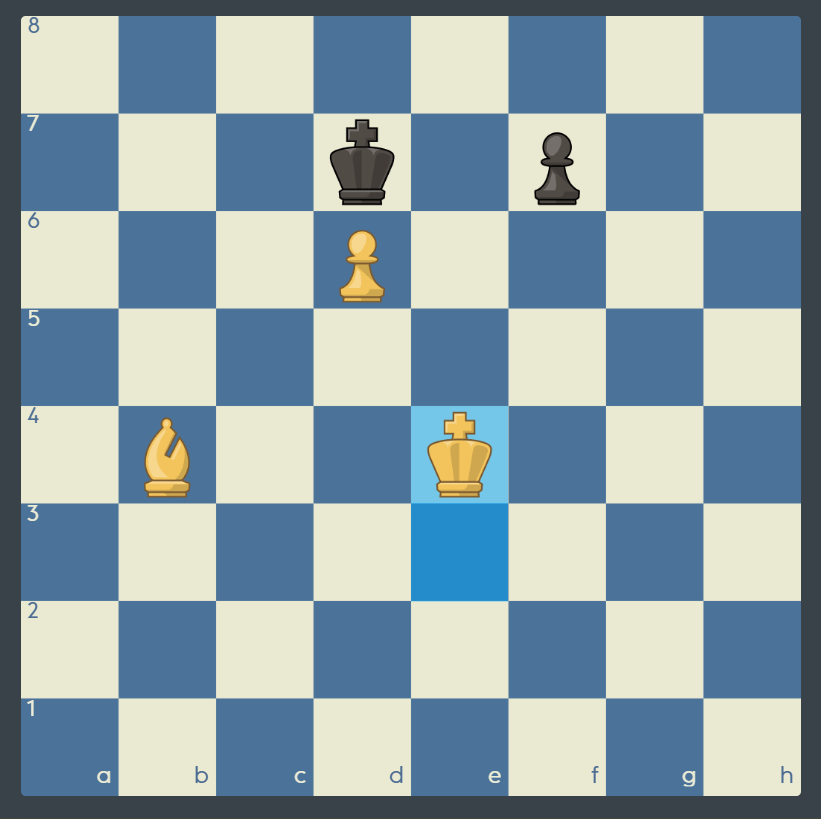
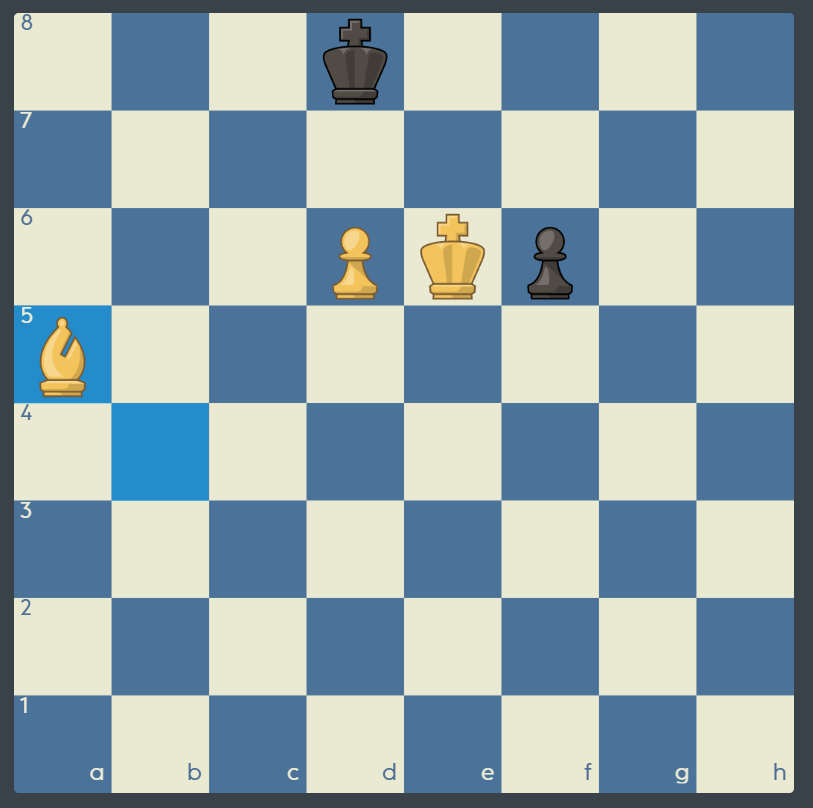
Sometimes it is important to know how to do nothing! White just moves the bishop back, and Black has to decide — either move his king away and let the white king advance, or push his f-pawn.
After …Kd7, Kd5 would bring the king up further.
Again White just waits, which Black cannot do.
If instead …f5+ Kf4, Black would lose the f-pawn, since he cannot sit where he is and …Kf6, d7 queens the pawn. Now White can come forward again.
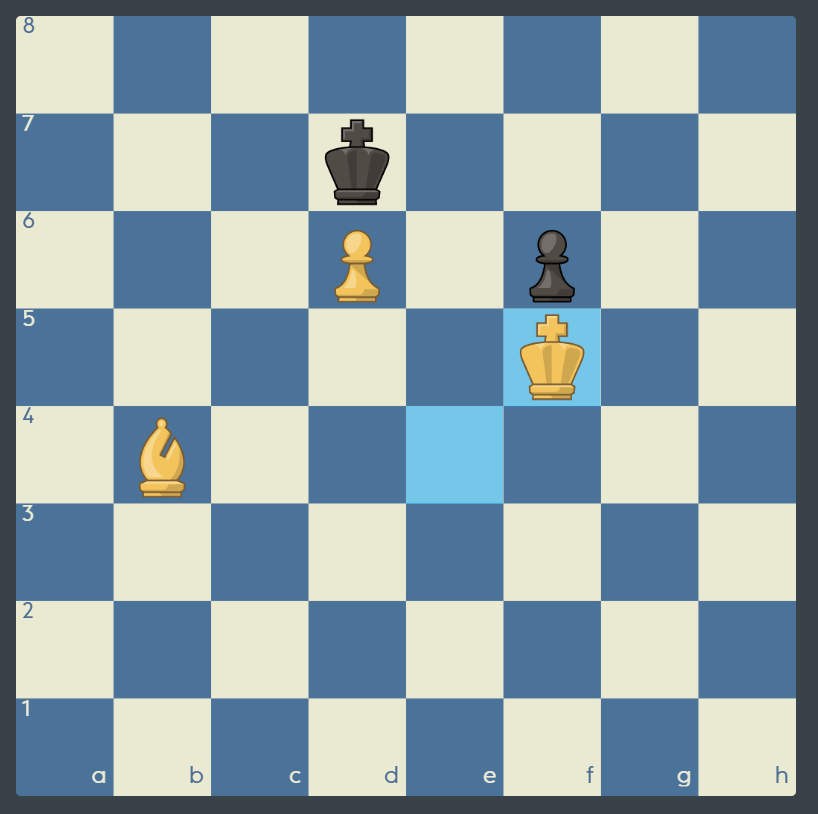
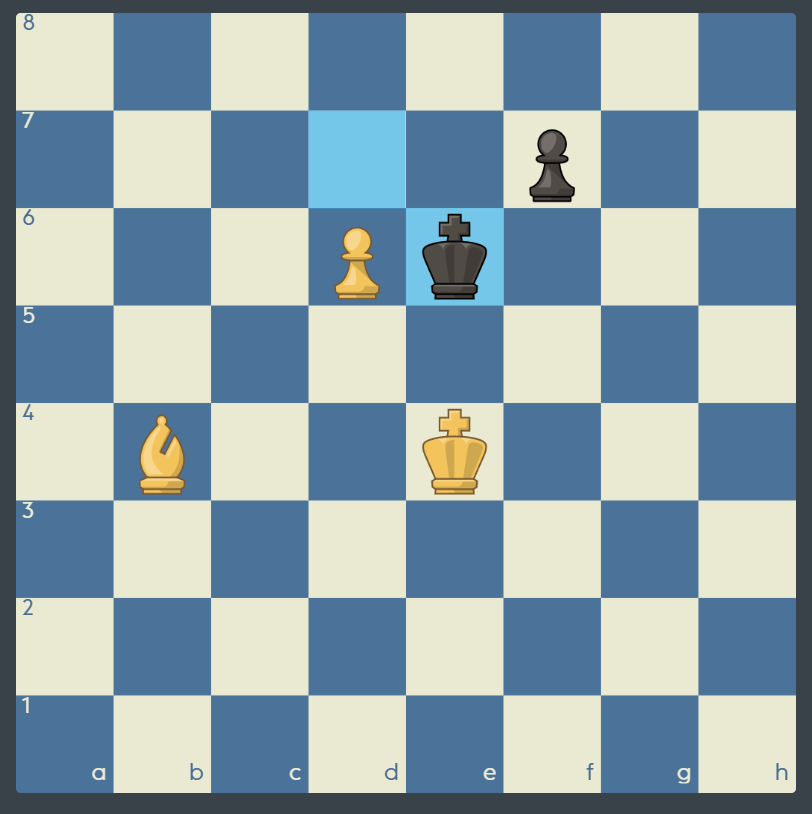
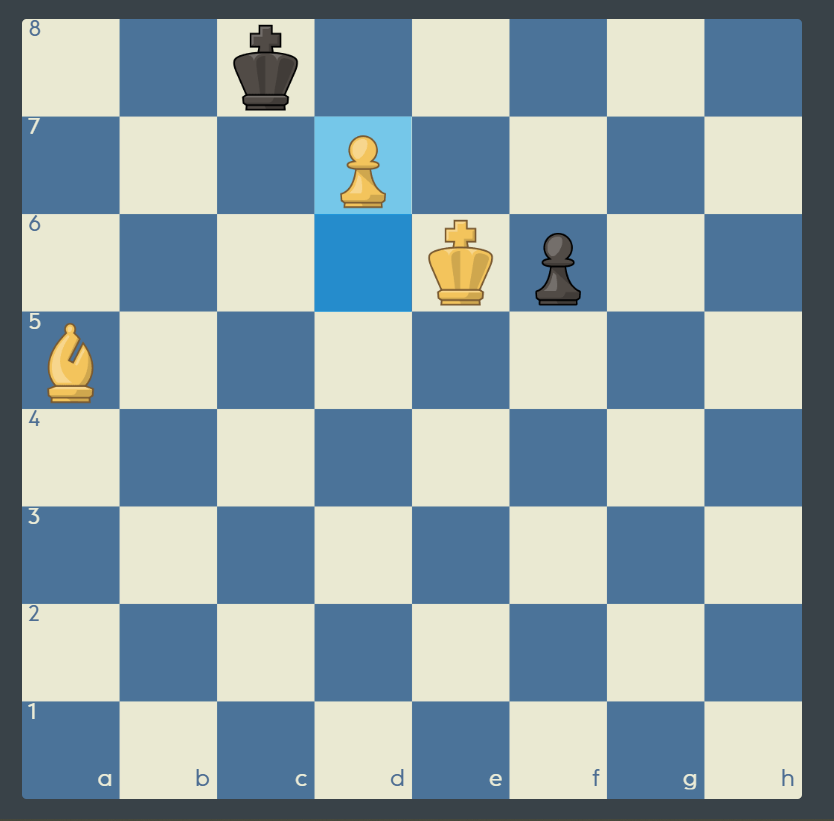
The king makes some more progress. Now the f-pawn is a goner!
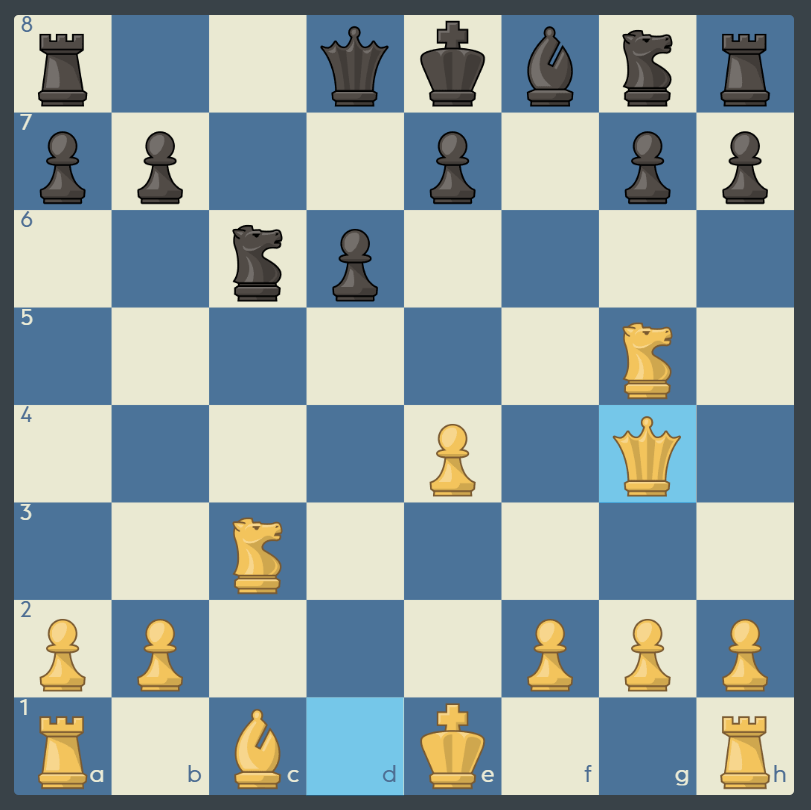
Black’s big problem is that he cannot sit on d7 and skip moves. If he could skip moves, then it would be a draw! But he cannot, which is why White’s winning method involves…waiting! The king now gets even closer.
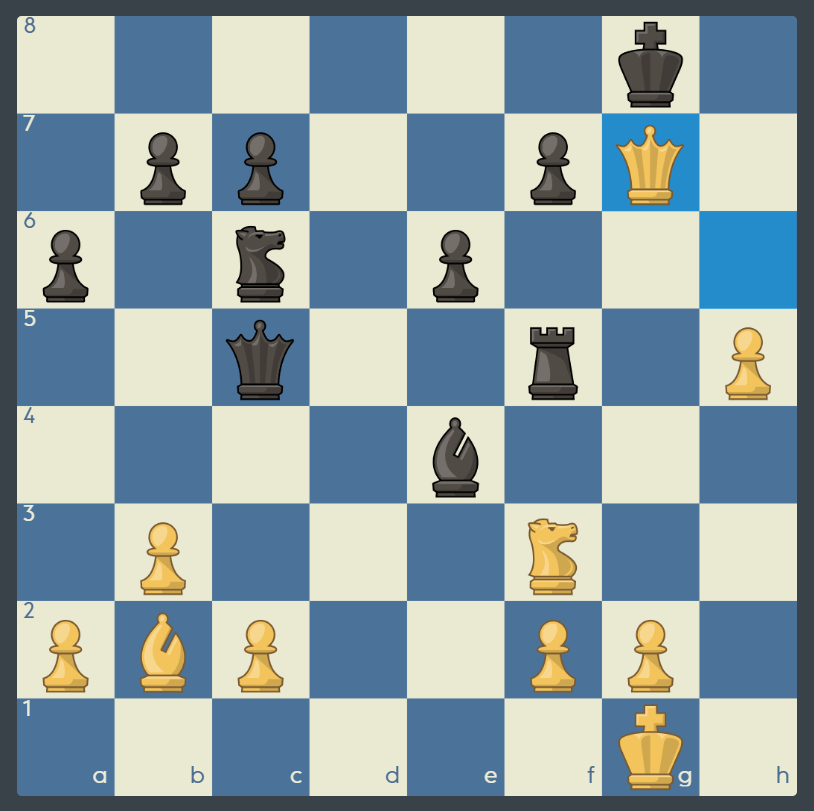
Taking the f6-pawn was not bad, but there was no need to do that. Now White is going to queen the d-pawn.
Forcing the king to a square where the d-pawn can advance with check.
Black meets the same fate on …Ke8.
Now play the final, powerful move that forces Black to resign.
And White promotes the pawn to a queen and will win the game shortly thereafter.
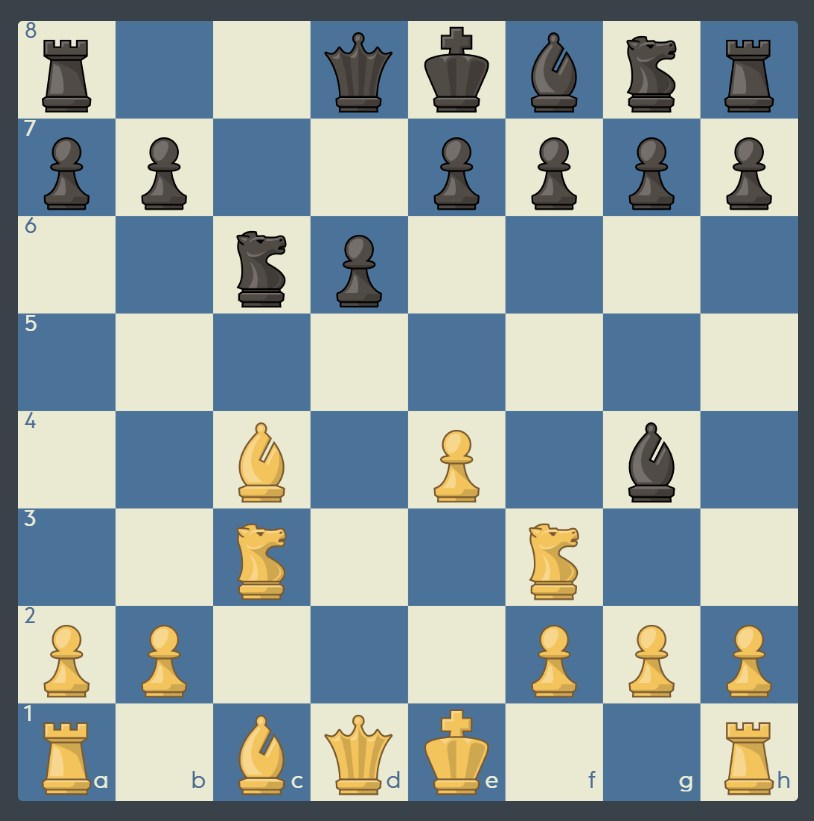
TOPIC 3
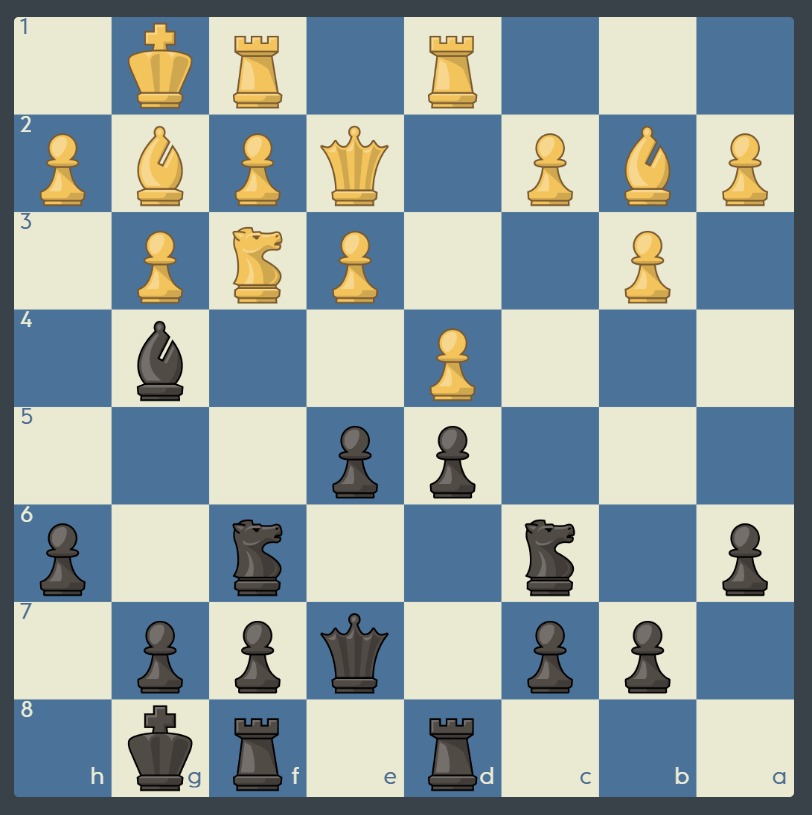
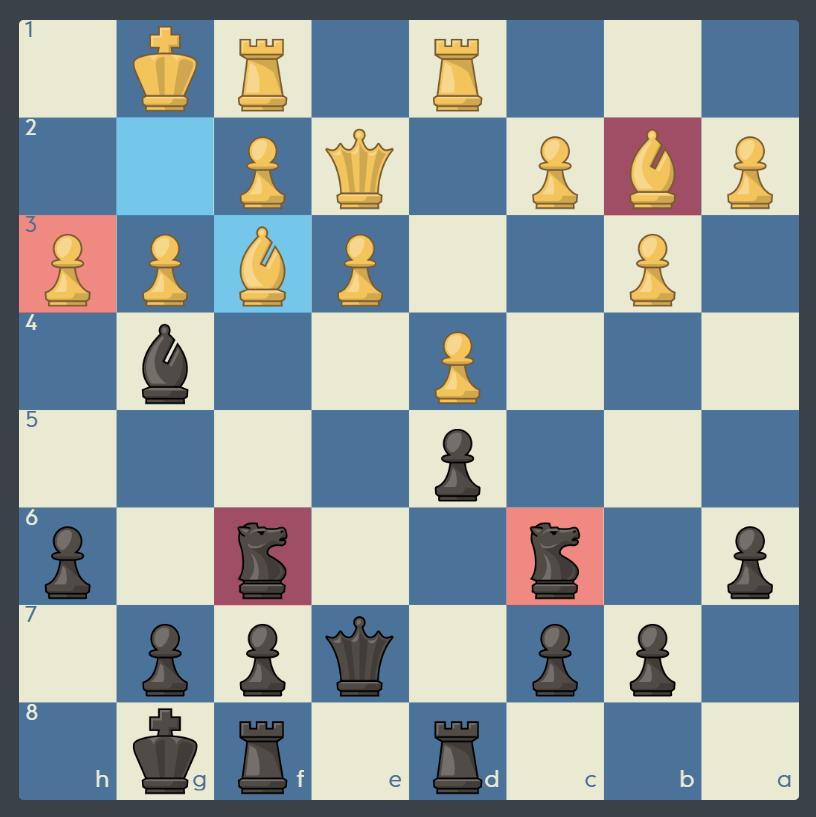
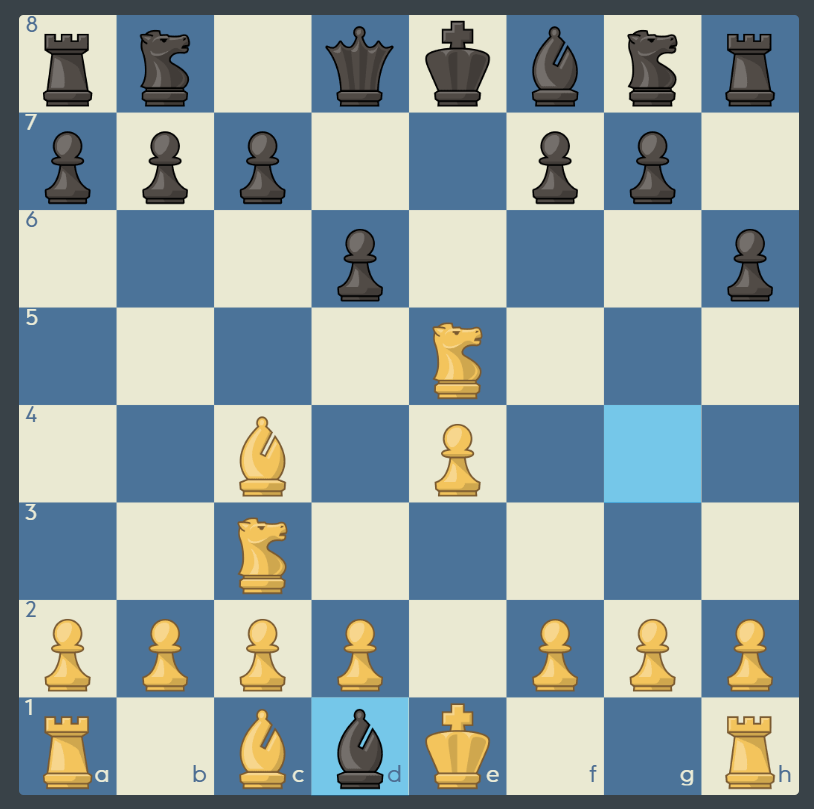
A relative pin is where a piece technically CAN move, but doesn’t want to because it is shielding a more valuable piece. How can Black now take advantage of a relative pin?
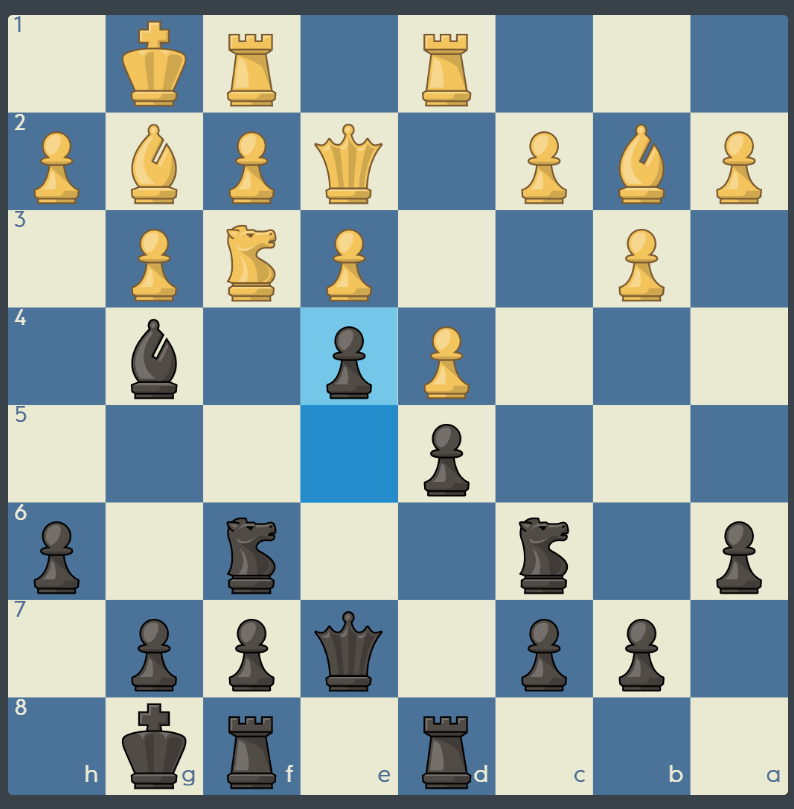
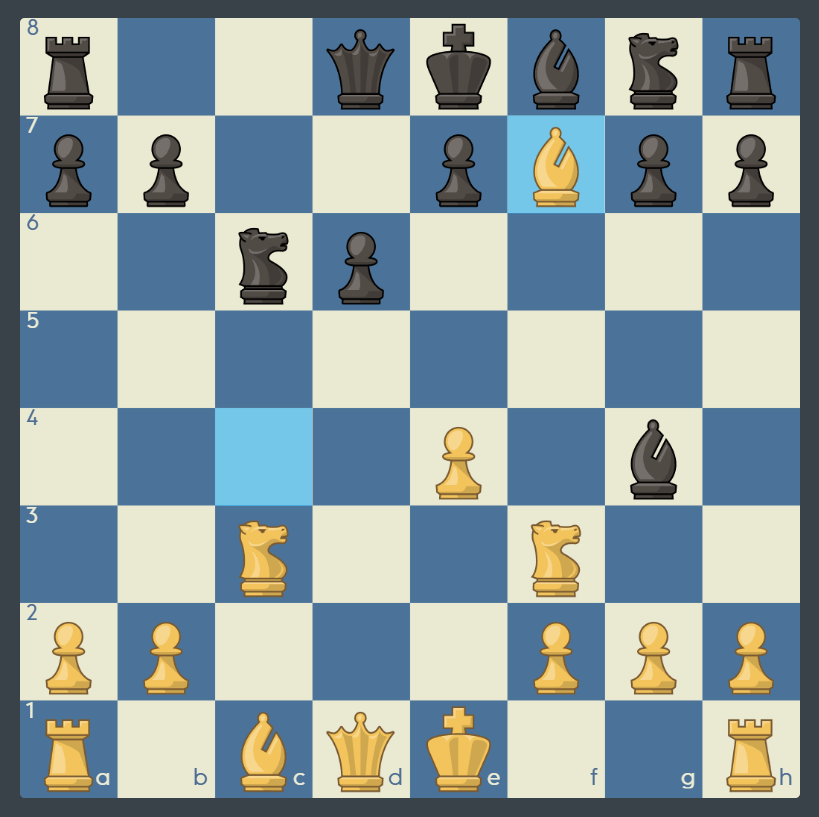
Super! The knight on f3 is pinned, since if it moved the black bishop would capture the white queen. So Black gangs up on the pinned piece, attacking it by a less valuable pawn.
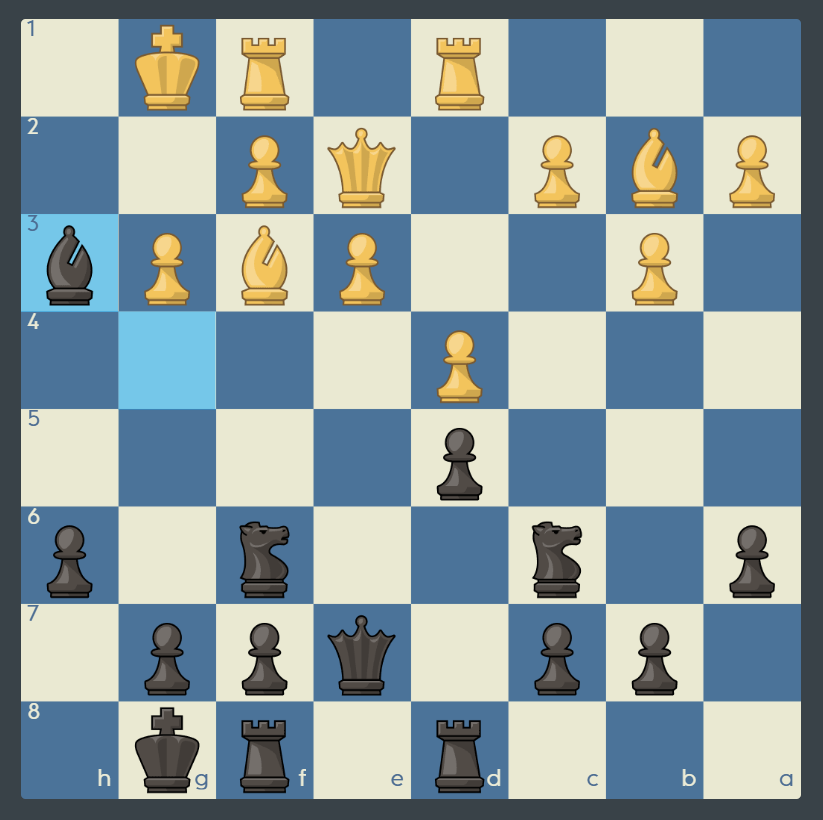
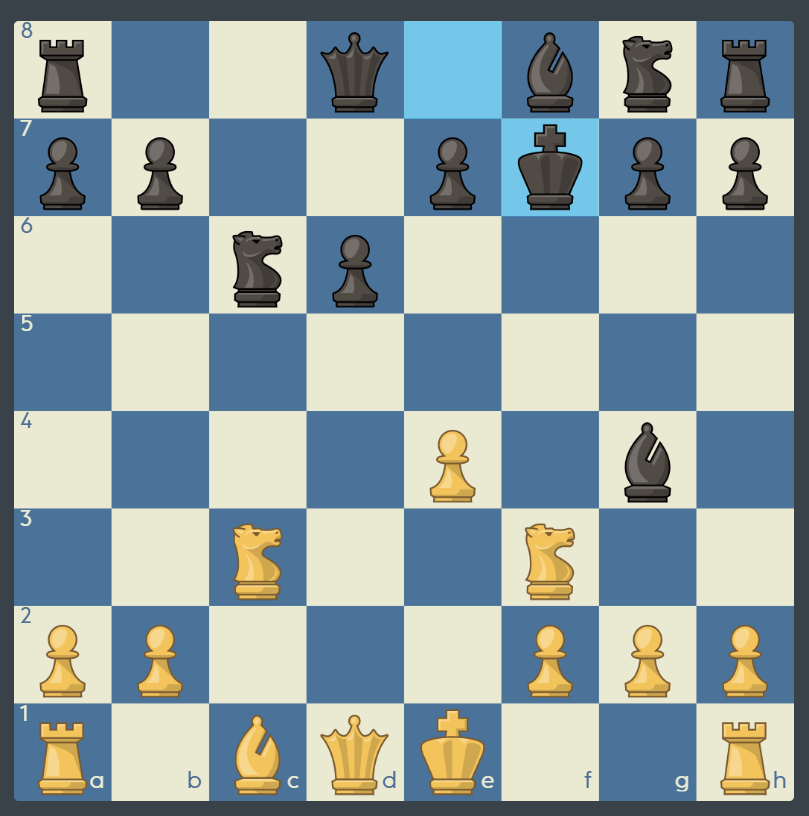
White is trying a counterattack, hoping to break the pin and move the knight away. Lets see what is the correct way to capture on f3
Taking with the bishop was also OK, since after …Bxf3, Bxf3 exf3 Black would still win a piece for a pawn.
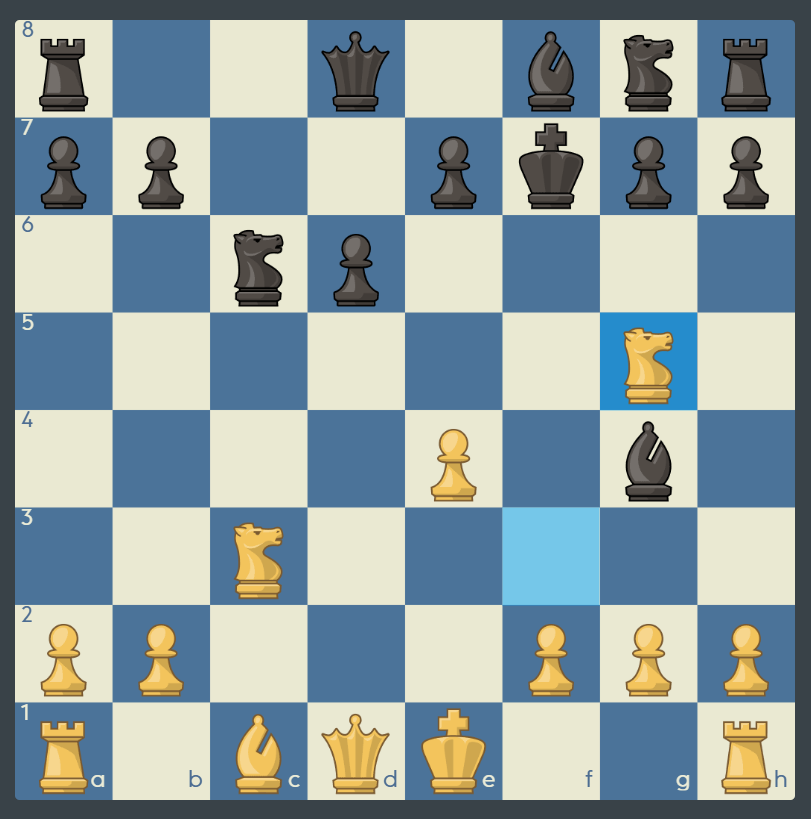
White’s queen and bishop are forked by the pawn, so unless he wants to lose even more material, he better take it!
Even better than trading bishops is to grab yet another pawn. So in the end, Black won a piece by attacking the pinned knight on f3. Remember: the best way to take advantage of a pinned piece is to bring up new attackers on it, since it cannot get away!
TOPIC 4
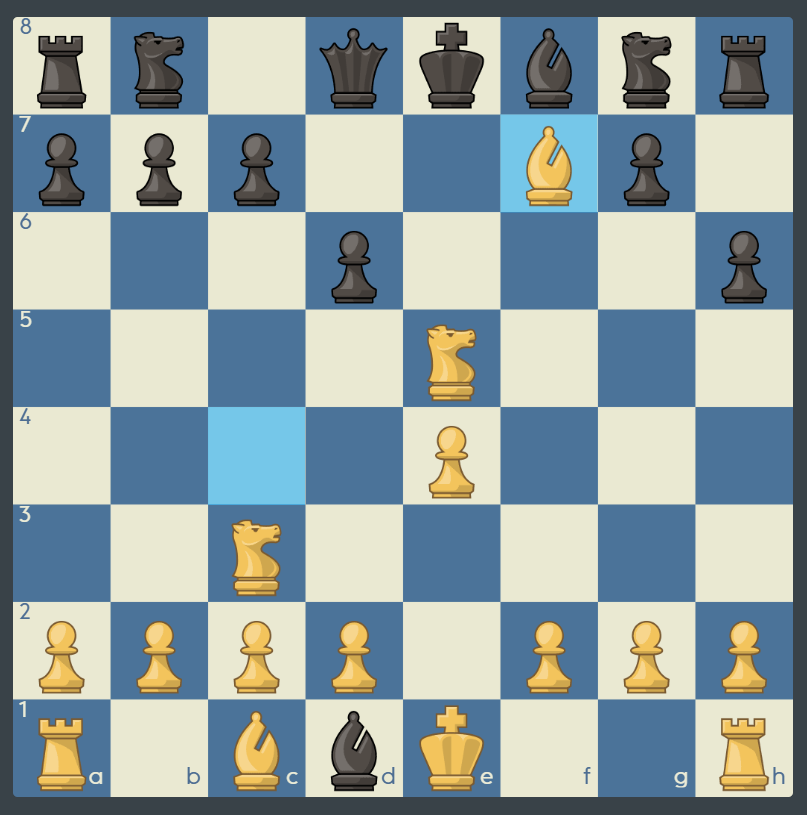
A pinned piece might LOOK like it is defending something, but since it cannot move, it cannot recapture the piece it is supposedly defending. Is there a way to take advantage of a pinned defender here?
Great job!! Normally capturing this pawn would be a no-no, since the queen would be captured by the pawn on g7. But since here the pawn on g7 is pinned by the bishop on b2, it cannot capture the queen no matter how much it wants to.
Since Black cannot capture the queen, this is the only way out of check.
White has already done pretty well, winning a pawn with check. But now is not the time to pull back and count your winnings — go for checkmate instead!
Congratulations, you found it! The pin allowed the white queen to capture h6, and checkmate was forced on the next move. So remember — a pinned piece might not actually be defending what it looks like it it defending!
TOPIC 5
There’s a big difference between absolute and relative pins. With an absolute pin, the pinned piece cannot move at all, but a relatively pinned piece can move if there is a big enough reason. Sometimes the pinning piece itself can come under attack. Click through to see what we mean!
Starting off this way, White draws the black king onto a vulnerable square. He loses the bishop, but has a tactic in mind.
Black has little choice, since if the king goes the other way, not only would he have lost a pawn, but also castling rights.
How does White justify the bishop sacrifice, and turn the pin on f3 on its head?
Congratulations, you found it! The pinned knight moves out of the pin with CHECK — so Black does not have time to capture the queen (…Bxd1) and it turns out that the pinning bishop will be the one in trouble.
Black would love to capture the queen — this was the point of the pin on the knight, after all — but he cannot, since getting the king out of check is required by the rules.
As a result of his tactic, White has won a pawn, weakened the black king’s position, and prevented castling. A very good outcome! So remember: relative pins are just that — relative — and sometimes the pin can be forcibly broken.
TOPIC 6
This famous short game is called LEGAL’S MATE, and illustrates a spectacular method of breaking a relative pin. Click through to see it in action.
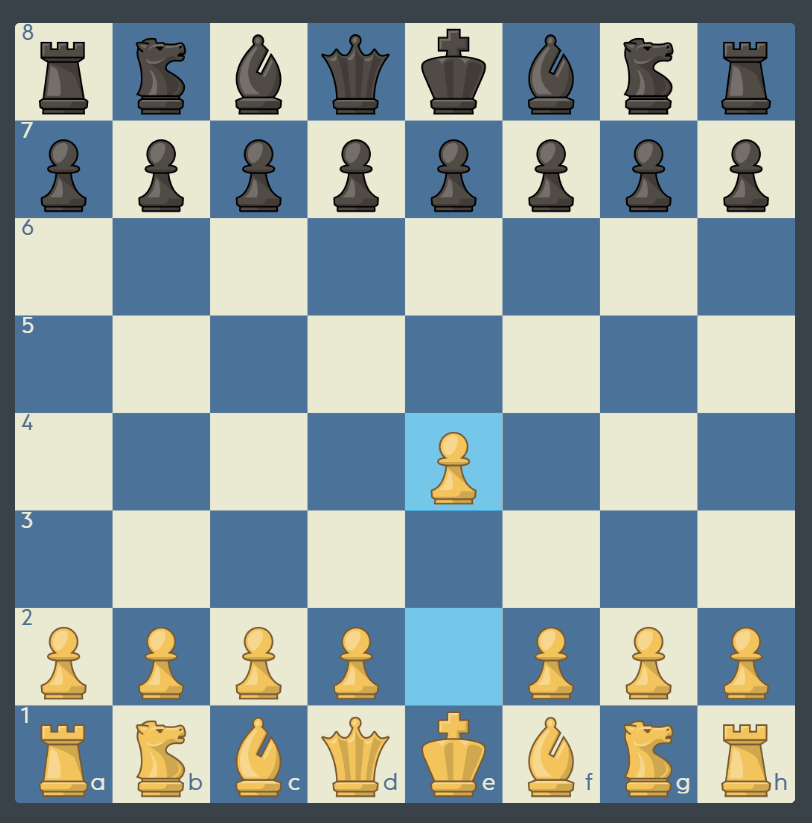
White begins with a King’s Pawn Opening.

A standard move to continue in the Open Game.
Philidor’s Defense — Black solidly defends e5 with a pawn.
Bringing out the knight toward the center.

Not the best move — Black defends the g5-square, but he should instead concentrate on developing pieces.
The bishop comes out, pointing toward f7.
A mistake! It looks good at first, since Black pins the knight on f3 and develops the bishop. But since the pin on the knight is relative, not absolute, it turns out that White can actually take advantage by turning the pin on its head!
Now we will see a famous kind of tactic — similar to the last lesson — where there is a bishop pinning a knight on f3, and the white bishop aiming at f7.
A very surprising move! Not only does White put his knight under attack, but by moving the pinned knight, he also puts his queen under attack. What is the meaning of this madness?
White’s last move, while losing the queen, did create its own threats. For instance, the queen was attacking the bishop on g4, so if …dxe5 then Qxg4 would follow, and White would have a winning position.
Now White is down a queen, but the jump by the knight to e5 brought in a dangerous invader!
The knight supports the bishop in capturing f7. Remember — early in the game the f7-square is a vulnerable point.

The only legal move — the knight on e5 covers the other escape on d7.
Now it is your turn to find the finishing touch.
Super!! This beautiful position — with the two knights side-by-side — is checkmate. So remember that while a pin is strong, sometimes a relative pin can turn out to backfire, since the pinned piece CAN move if there is a good enough reason.