BRING YOUR VISION INTO ACTION
The “windmill” tactic is when you repeatedly check your opponent’s king using discovered attacks – capturing pieces as you go round.
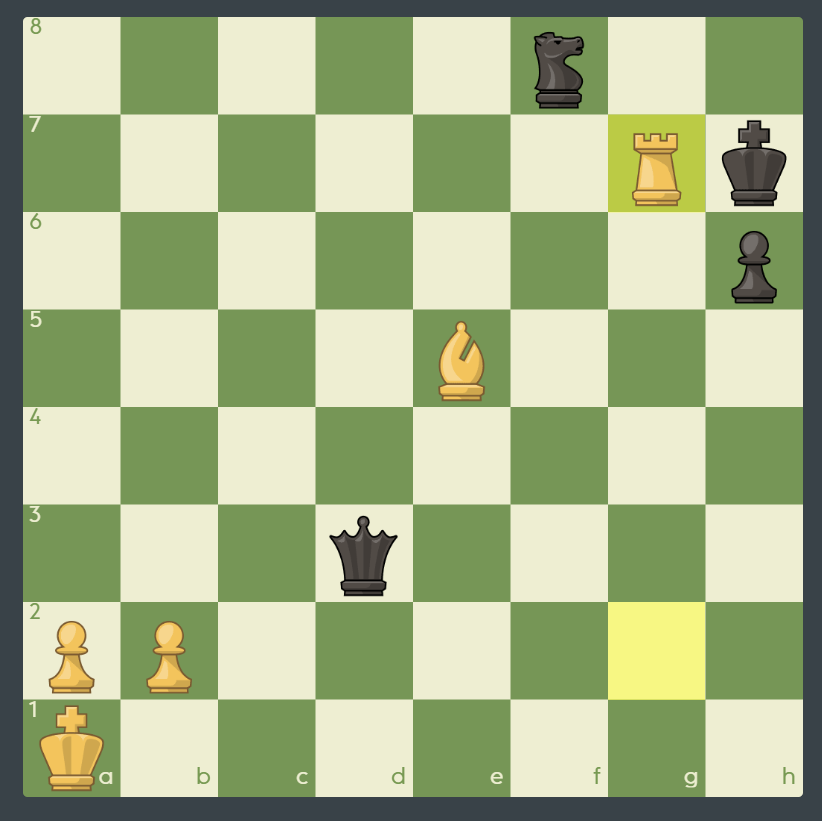
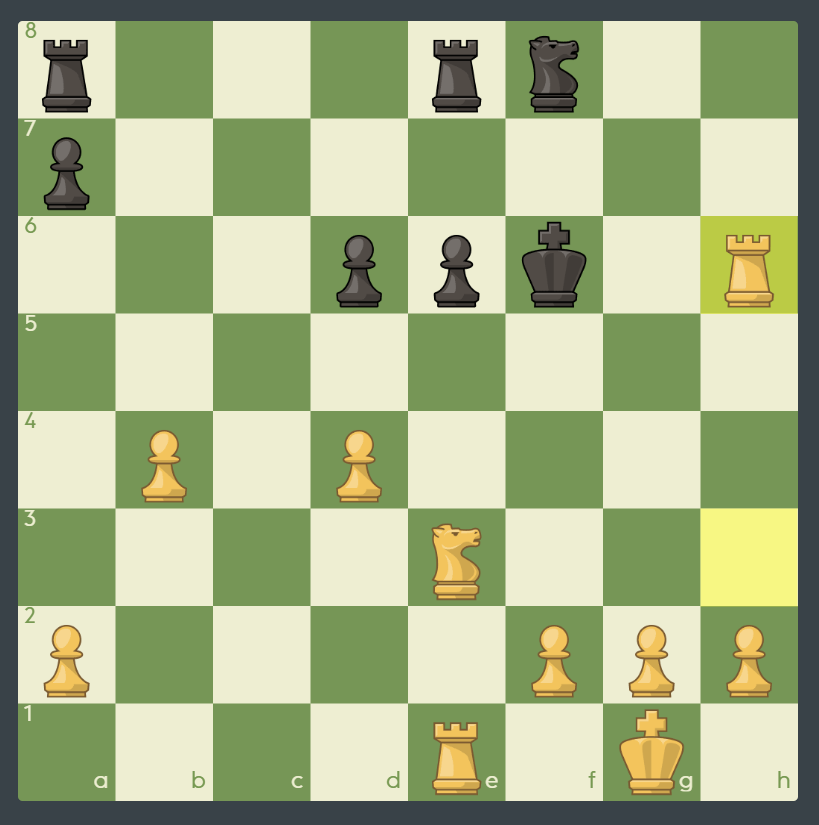
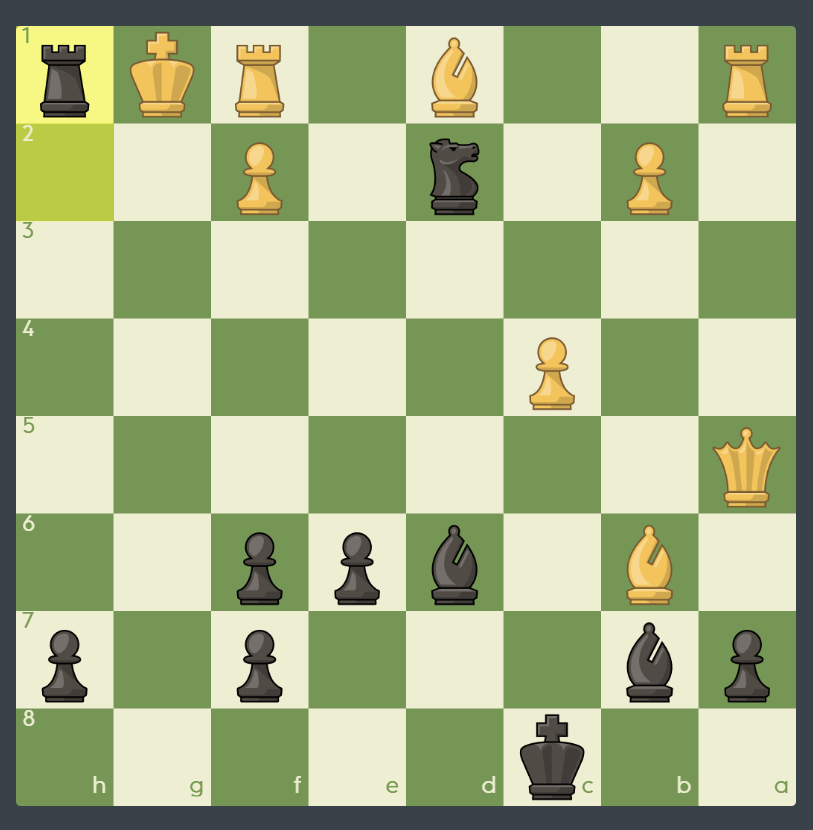
Topic 1
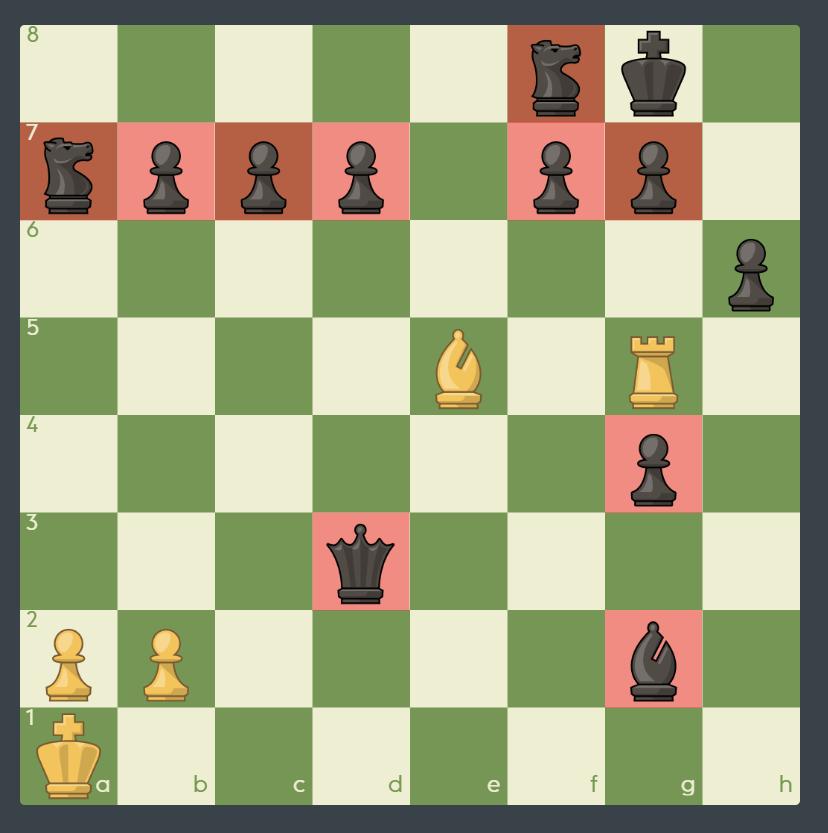
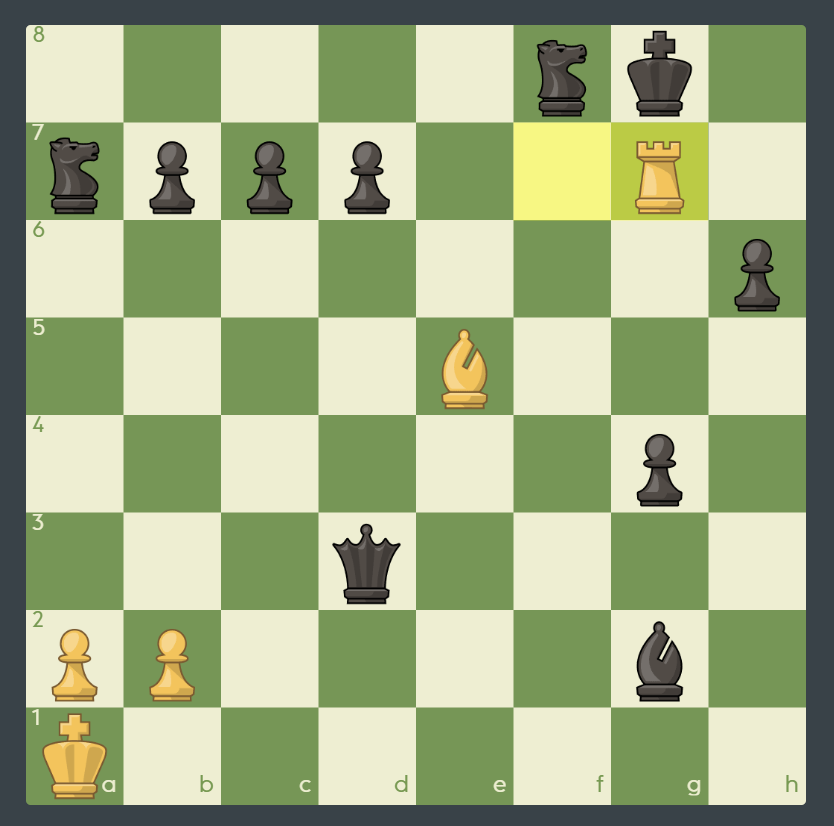
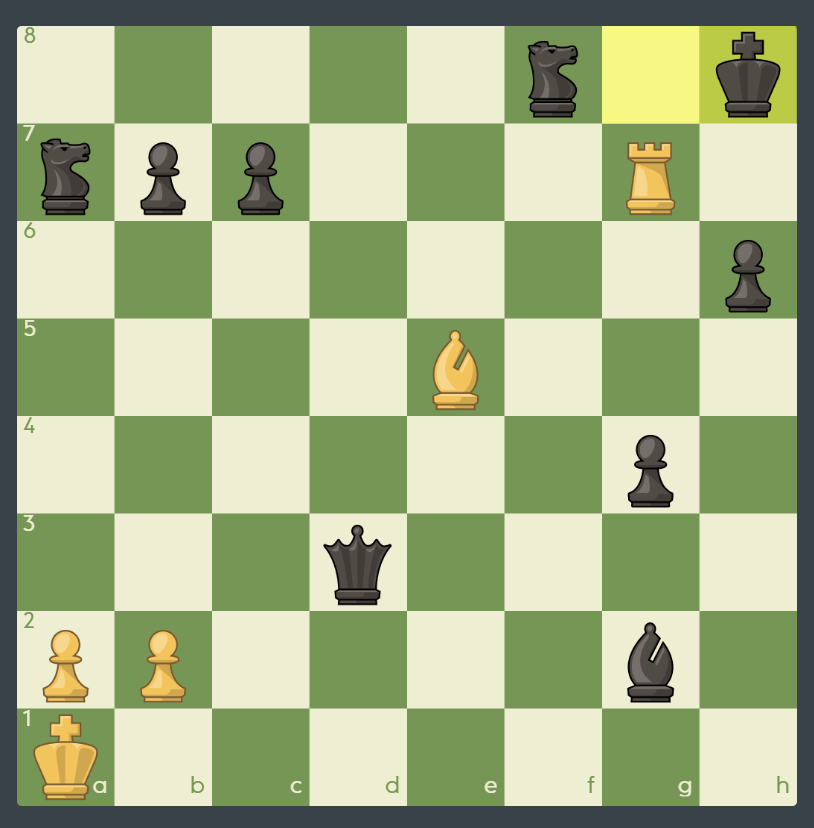
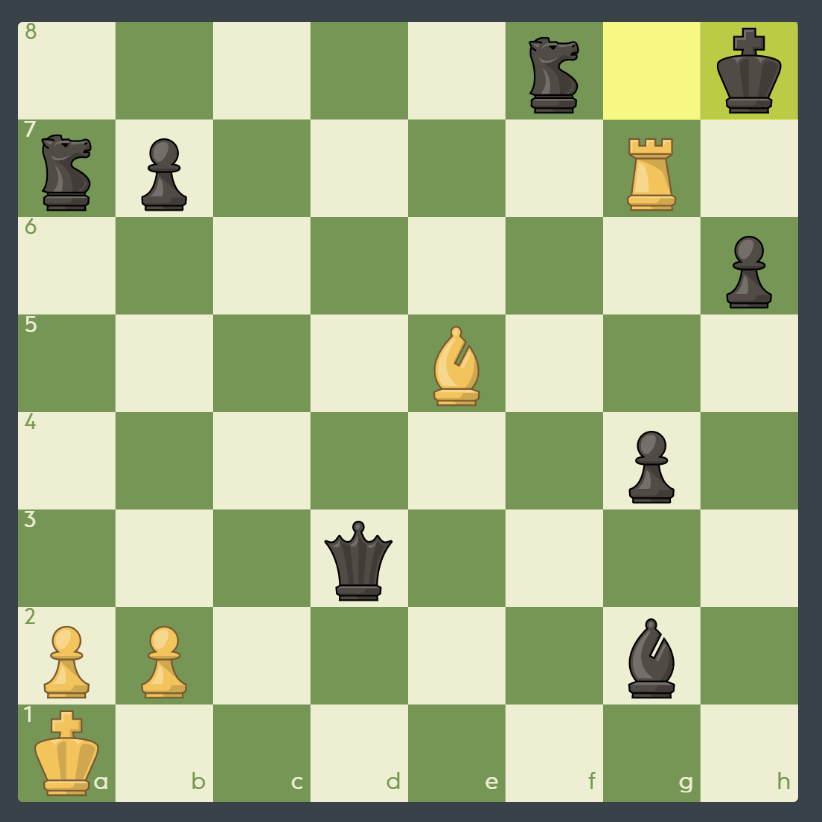
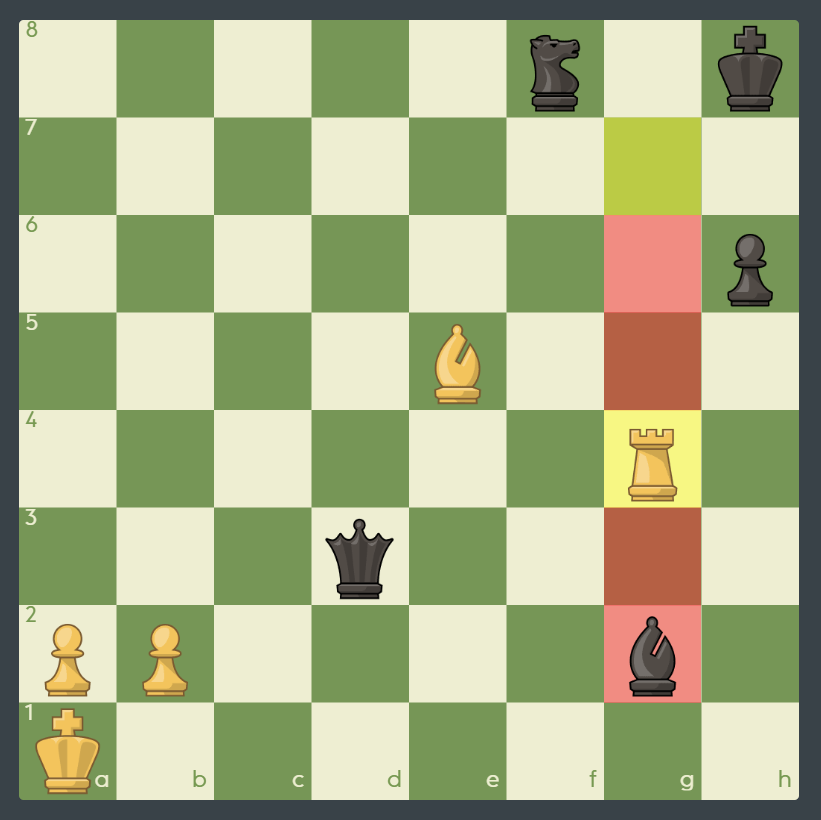
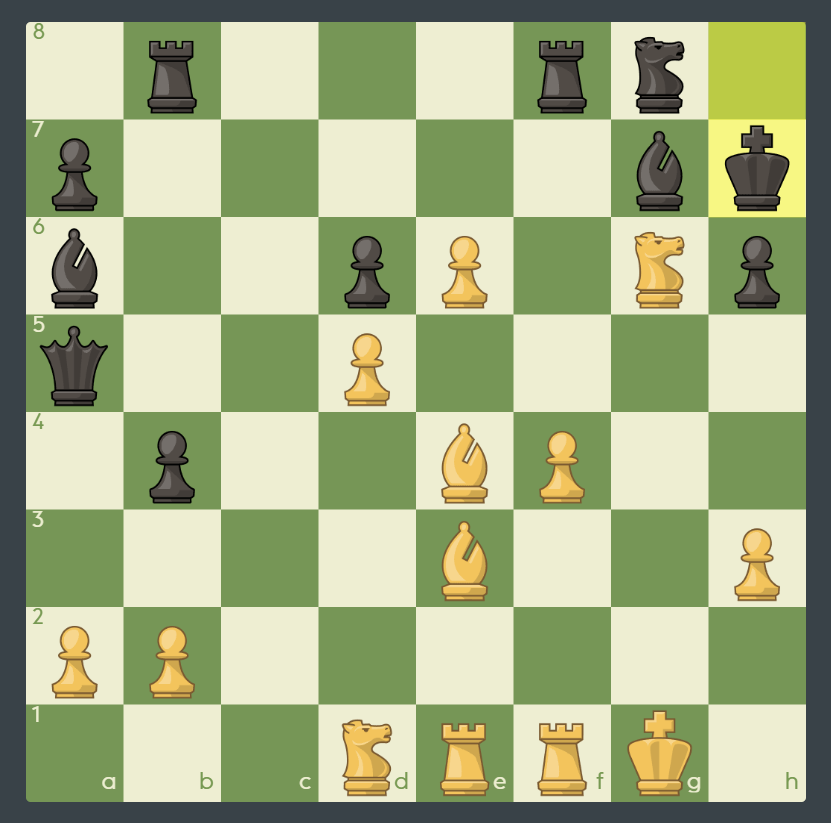
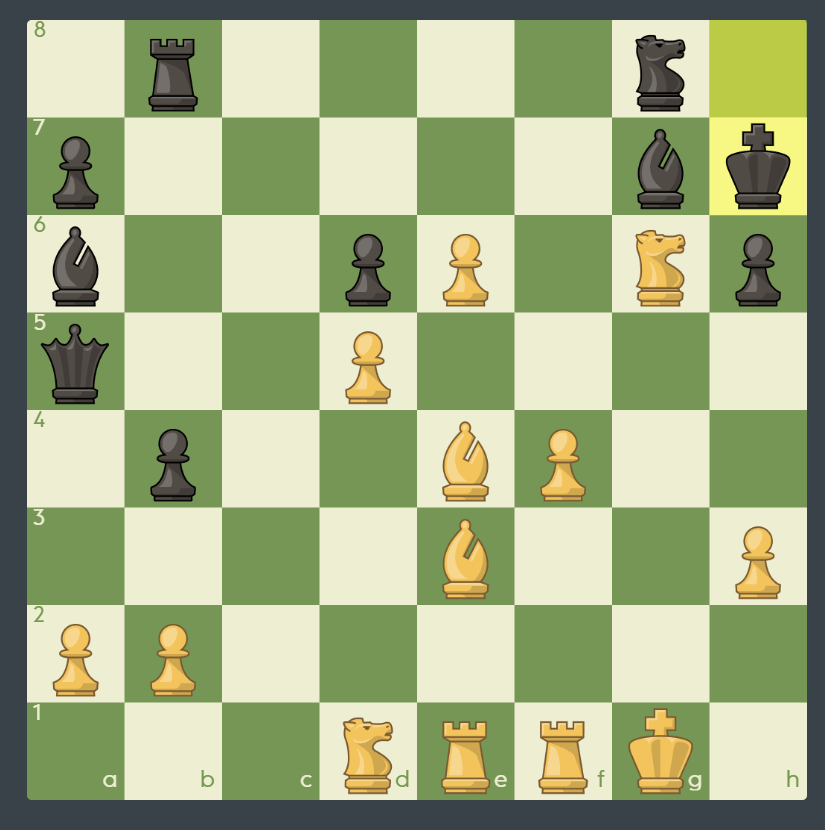
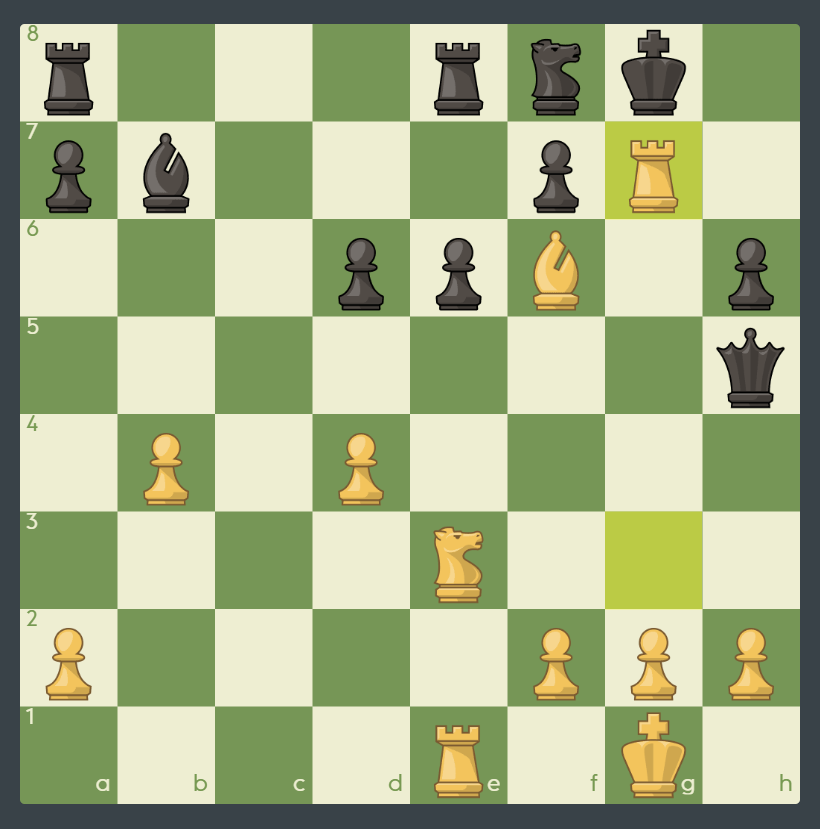
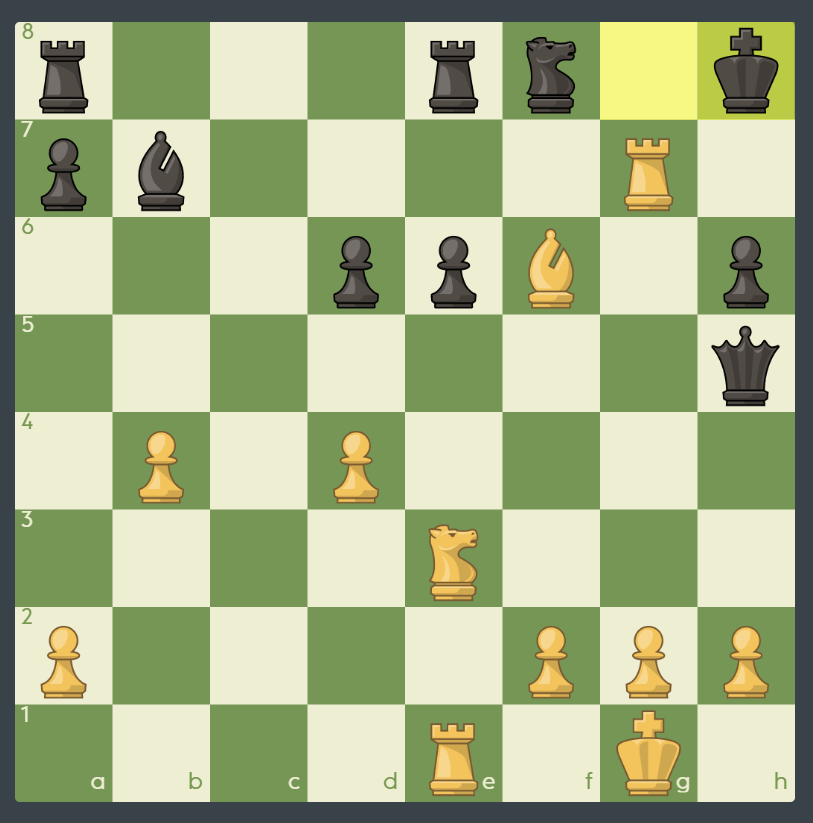
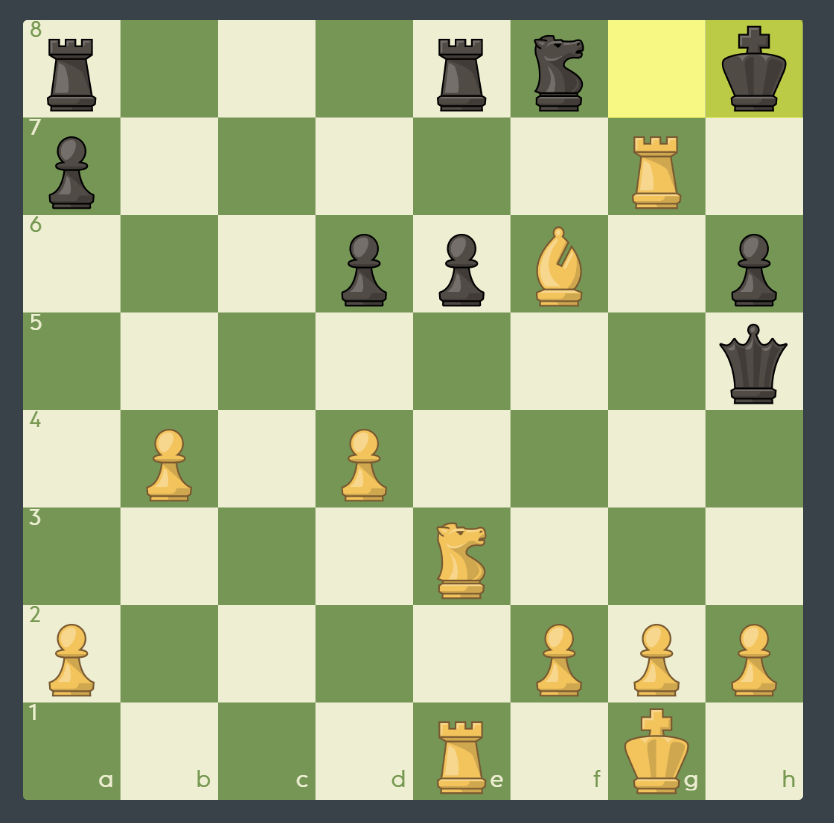
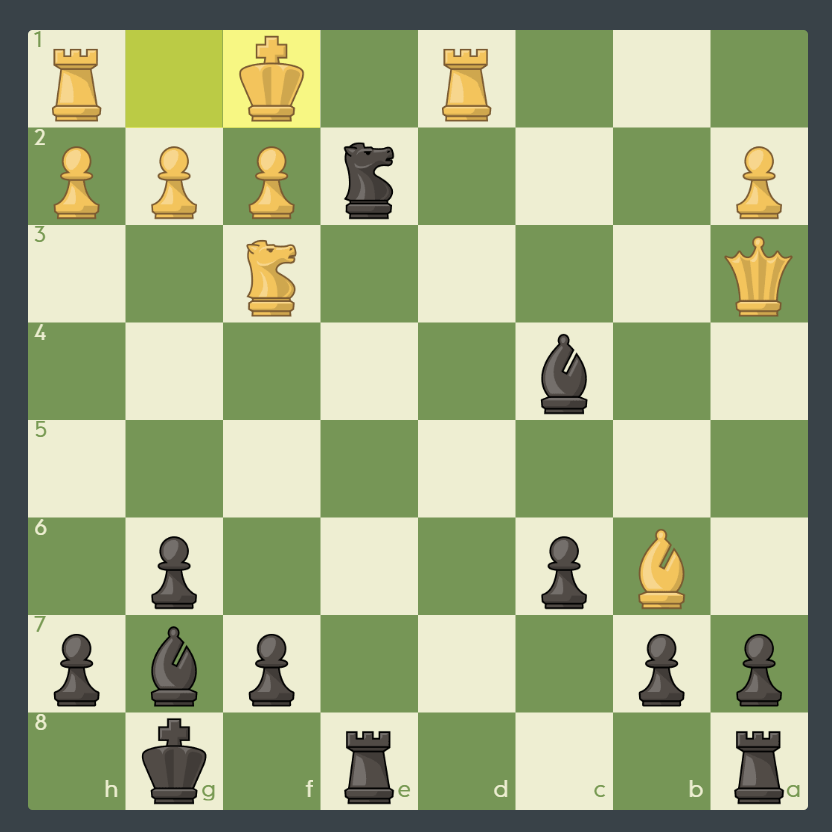
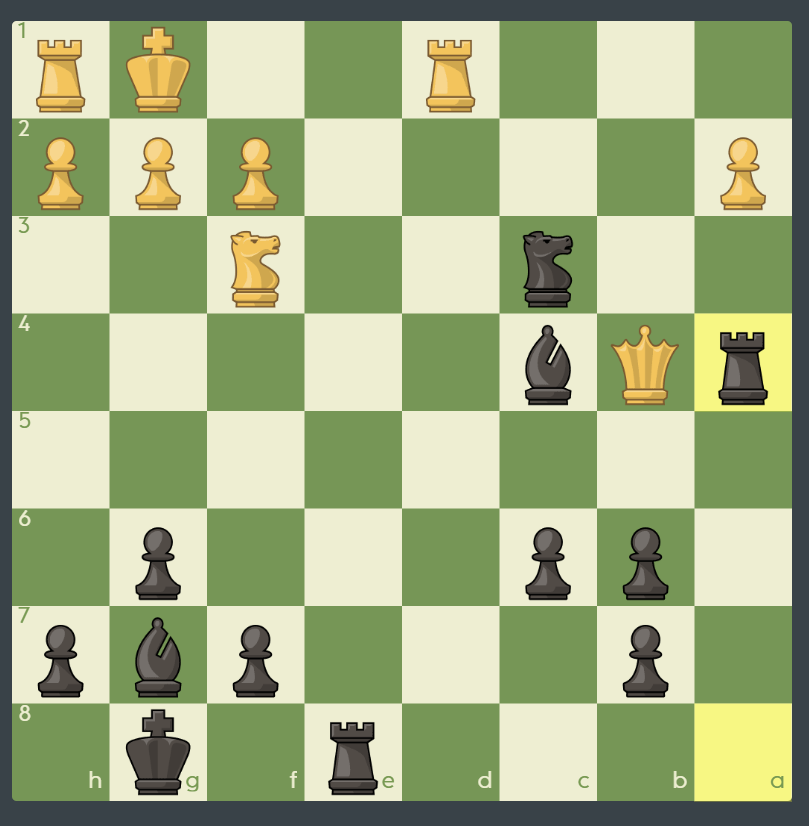
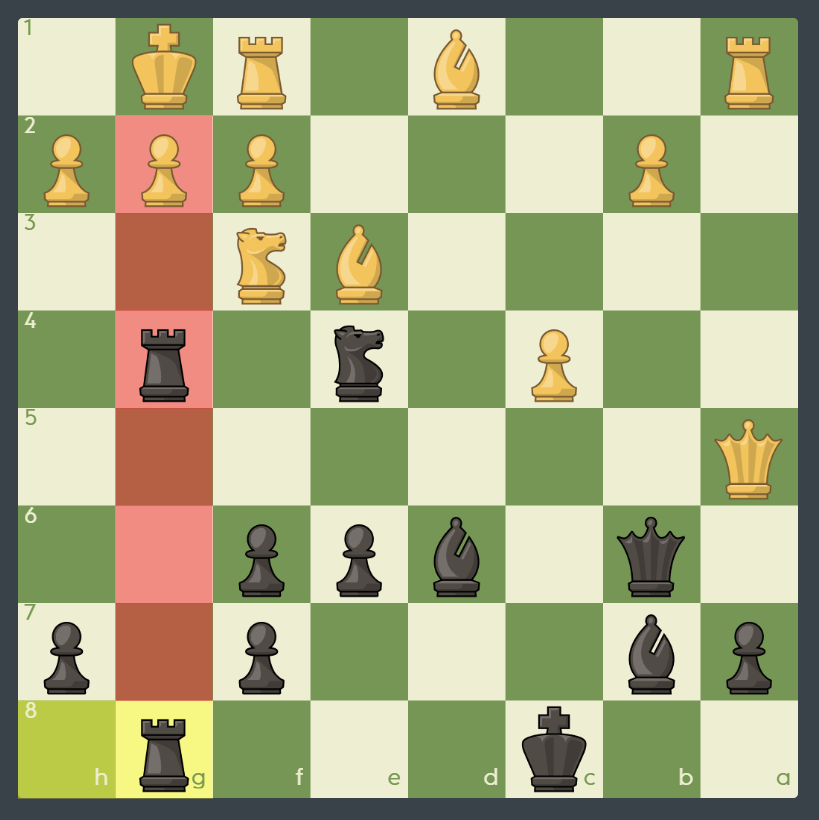
Here’s how the “windmill” works. Just sit back and watch the Black pieces get swept off the board!
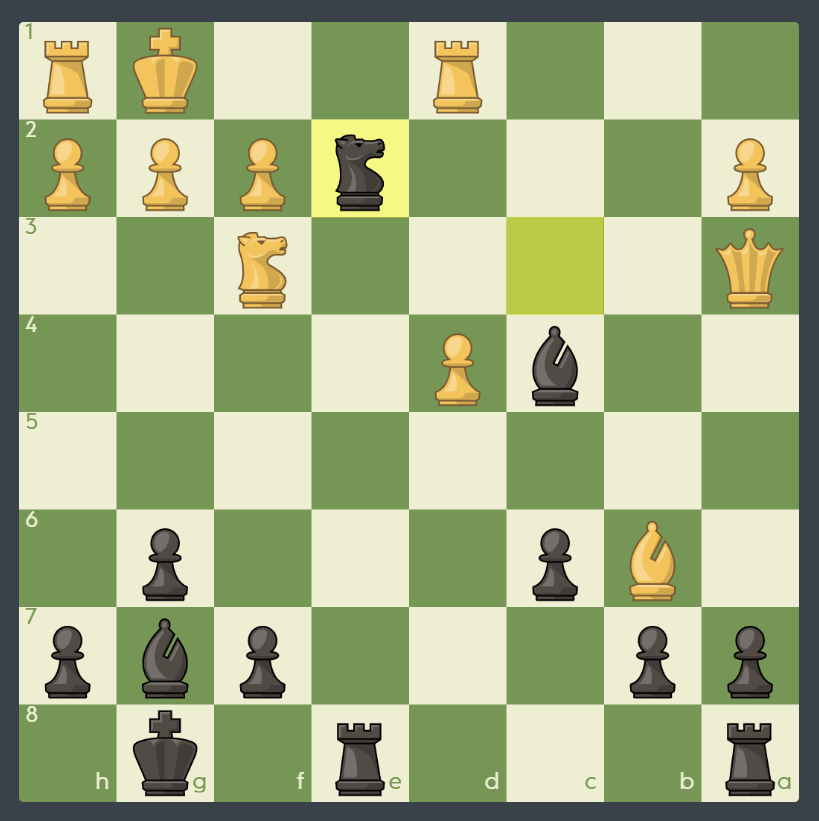
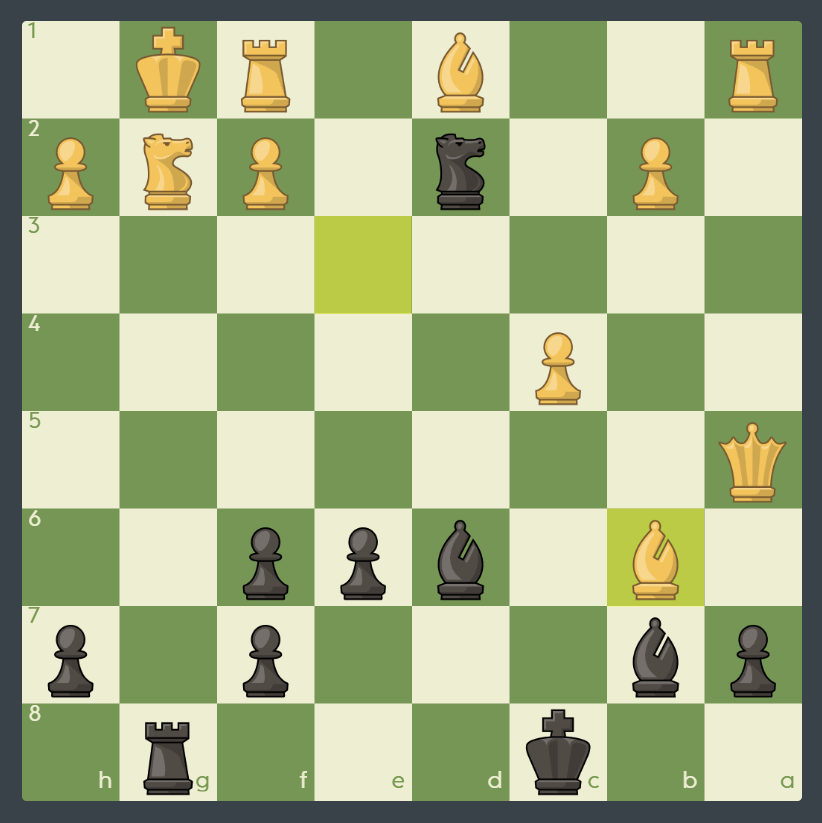
White begins with this strong check.
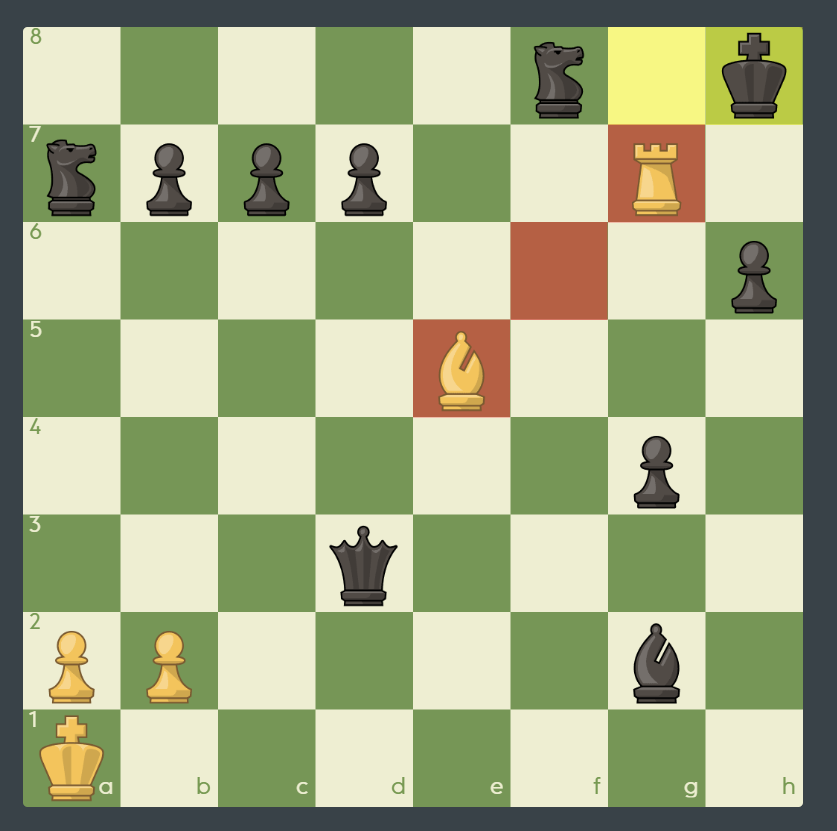
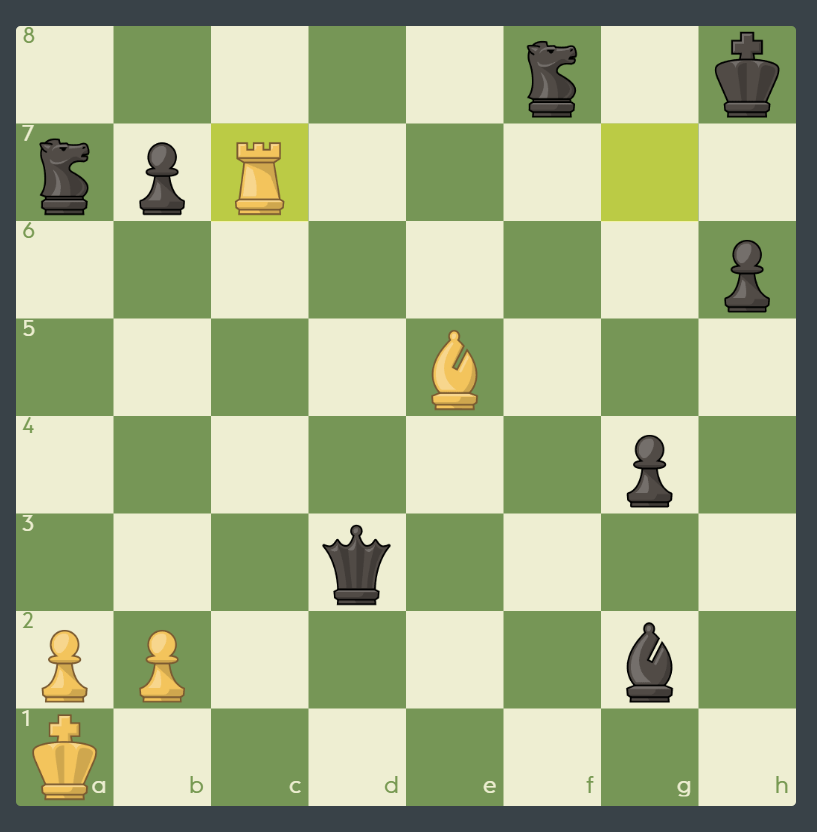
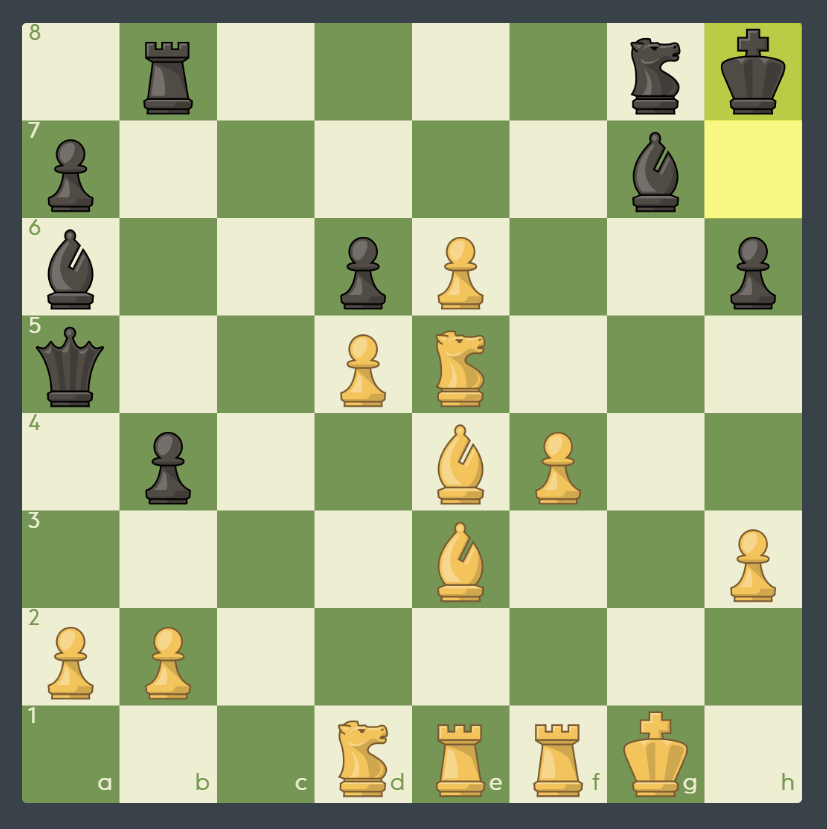
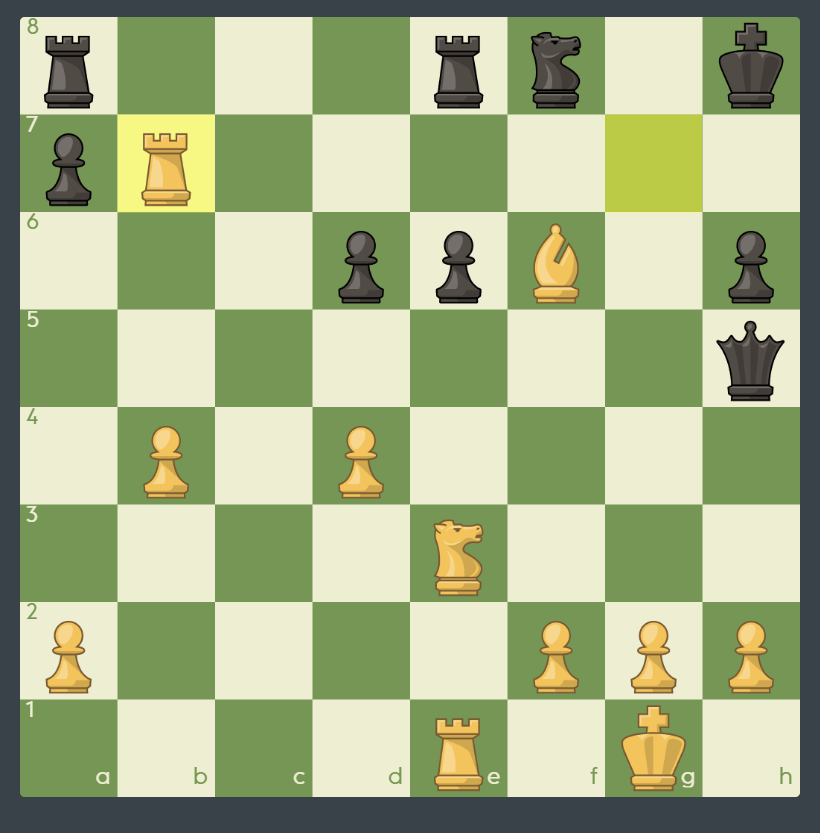
The only response.
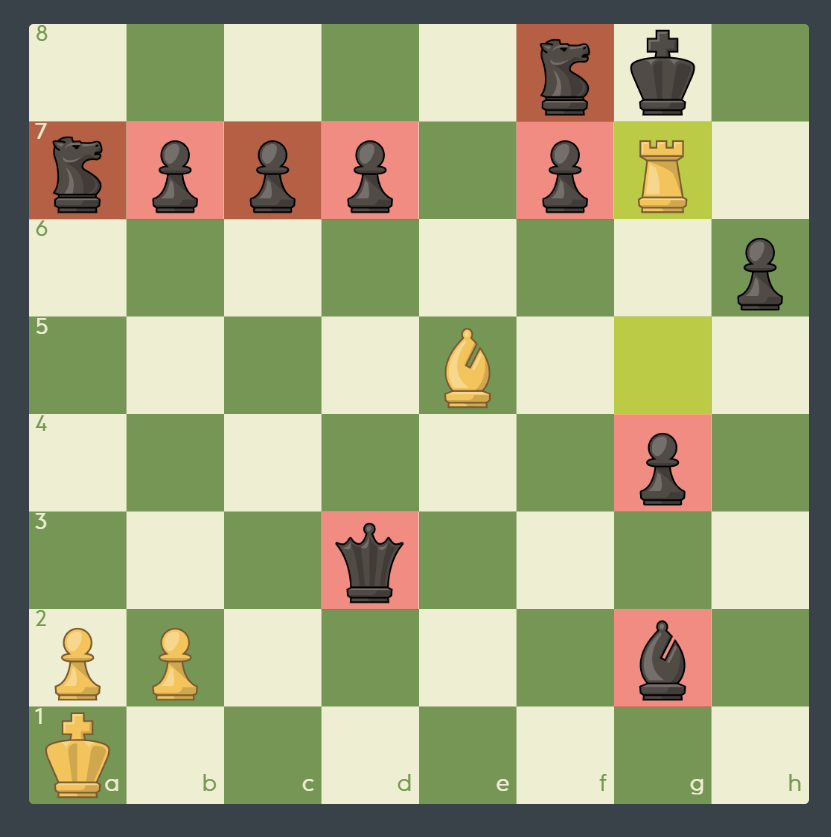
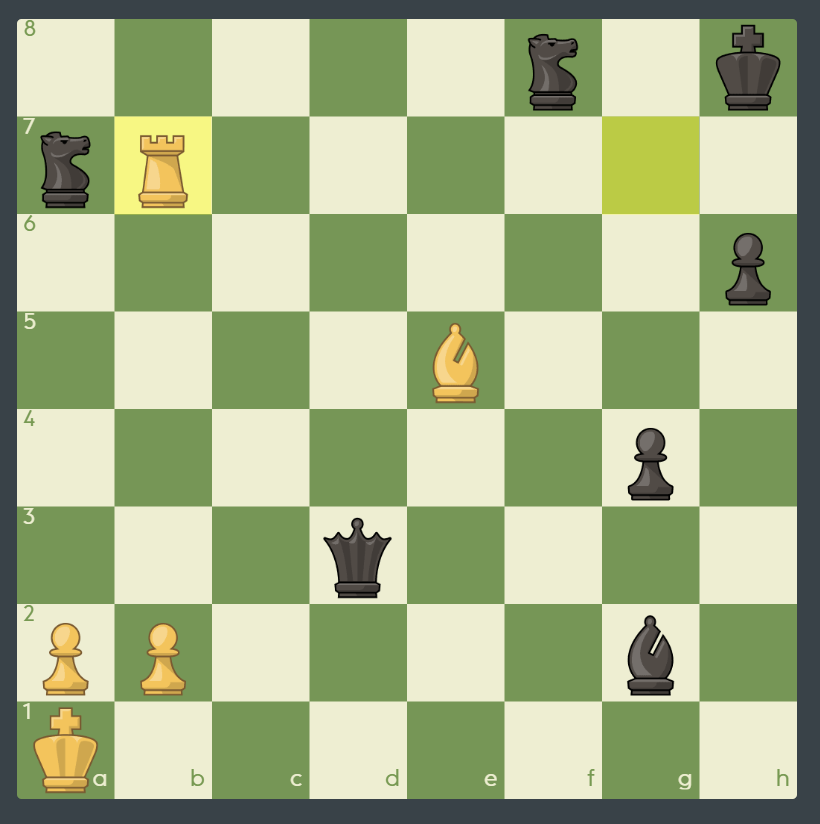
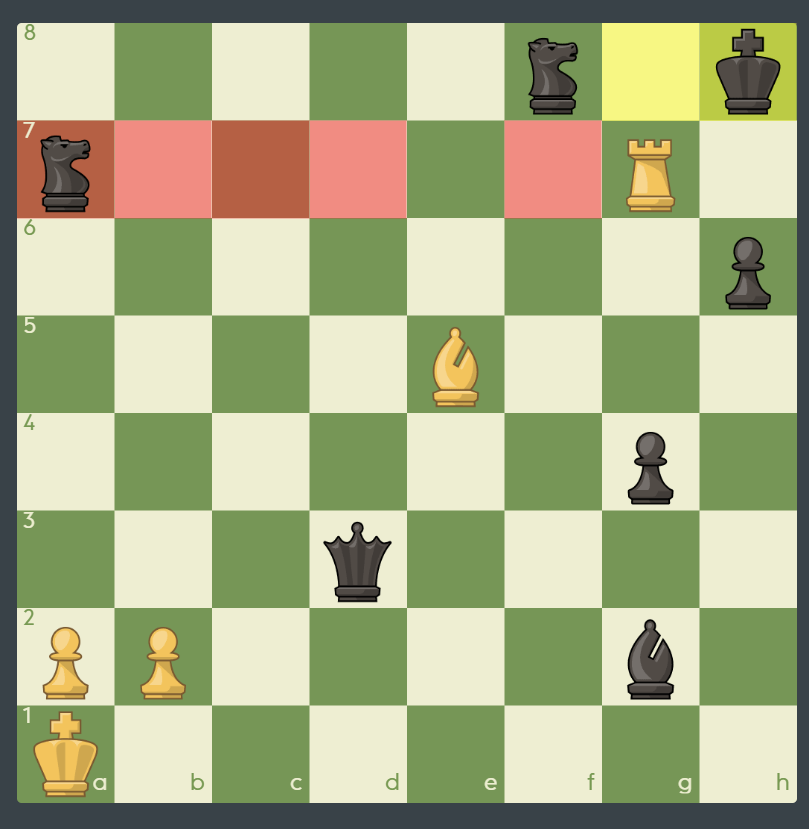
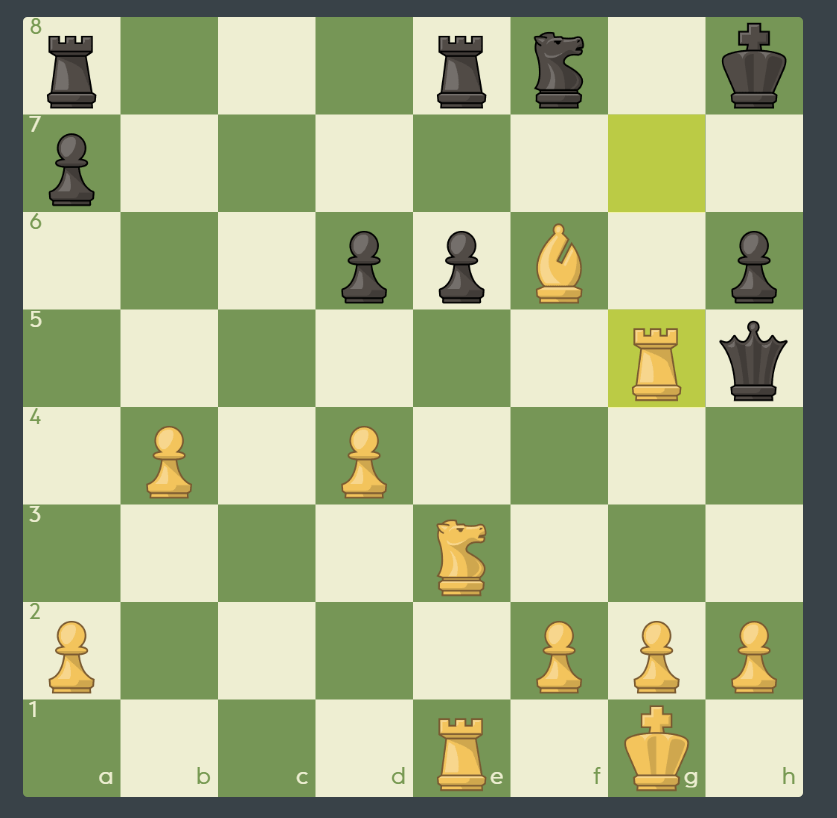
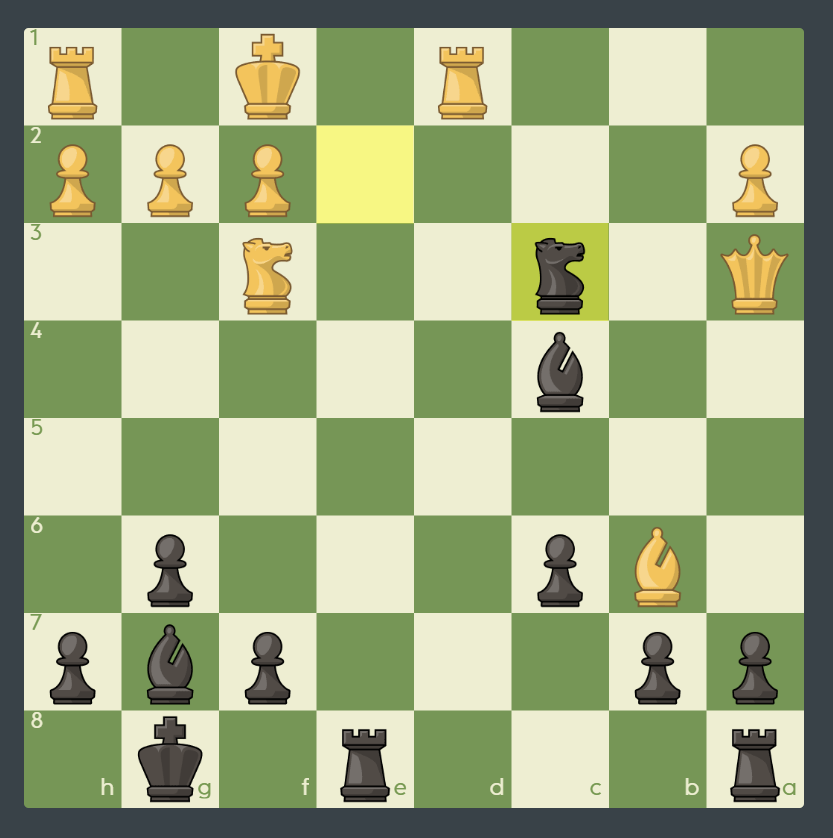
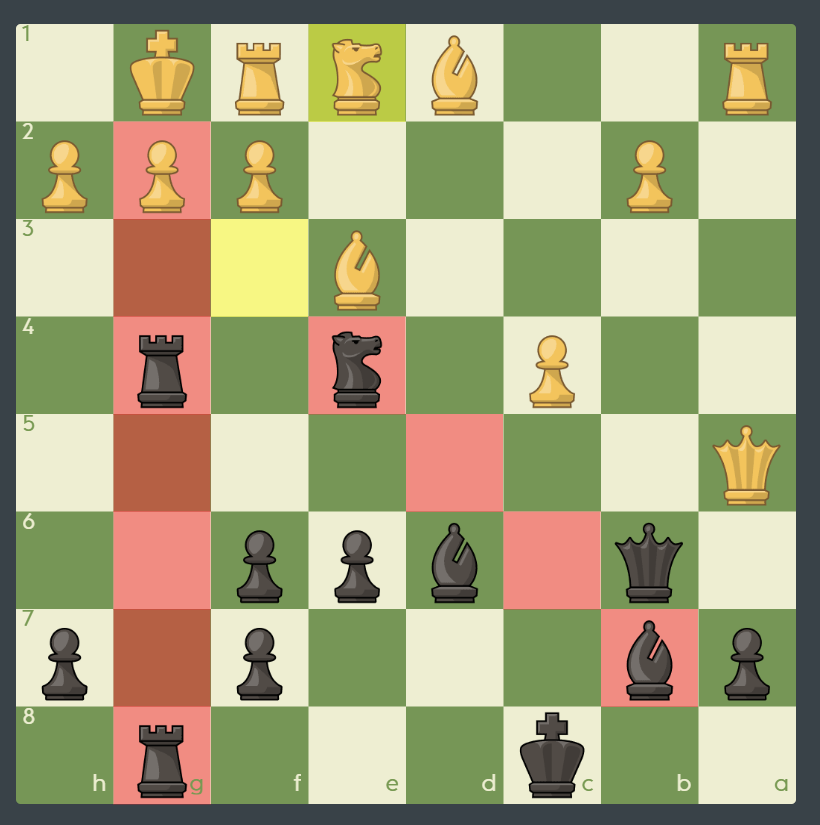
White is now set up for a discovered check and the windmill picks up speed.

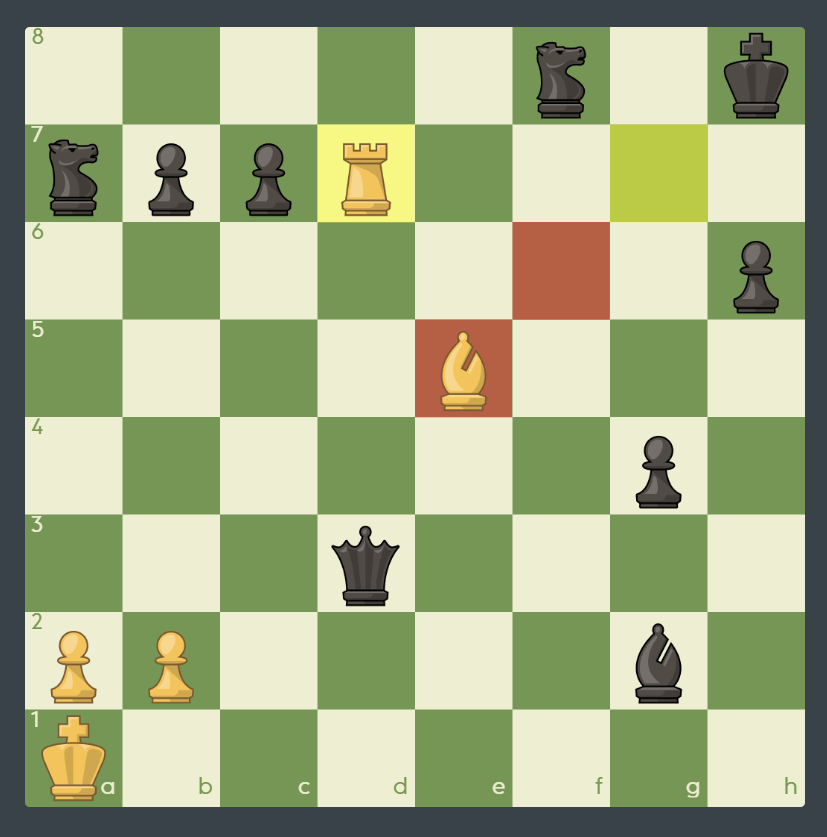
It was also possible to start by capturing the pawn on g4. Eventually White will capture everything, using discovered checks.
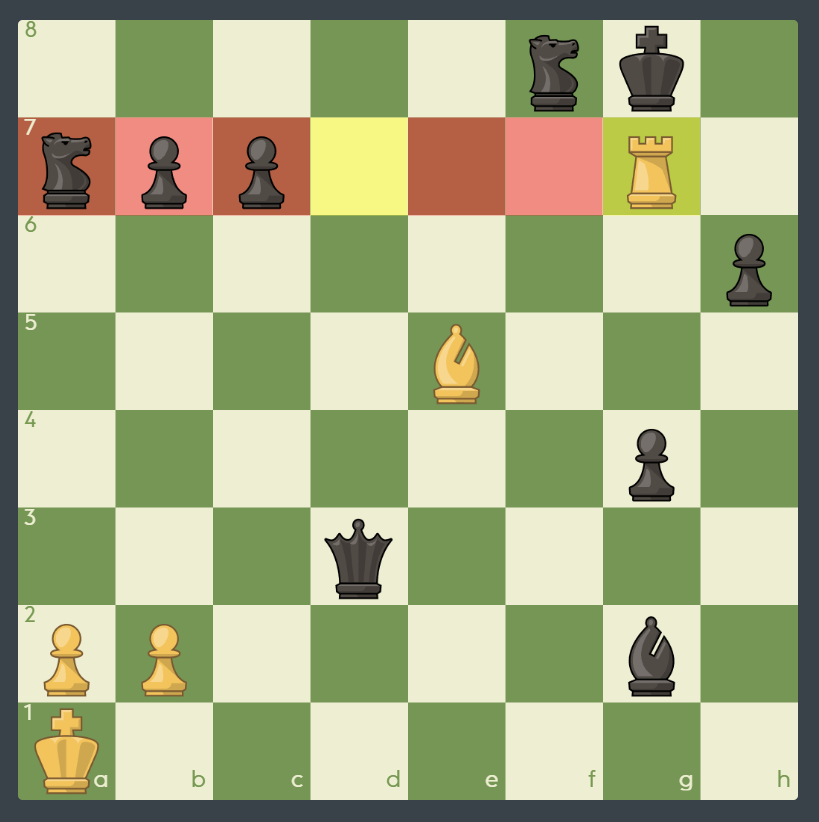
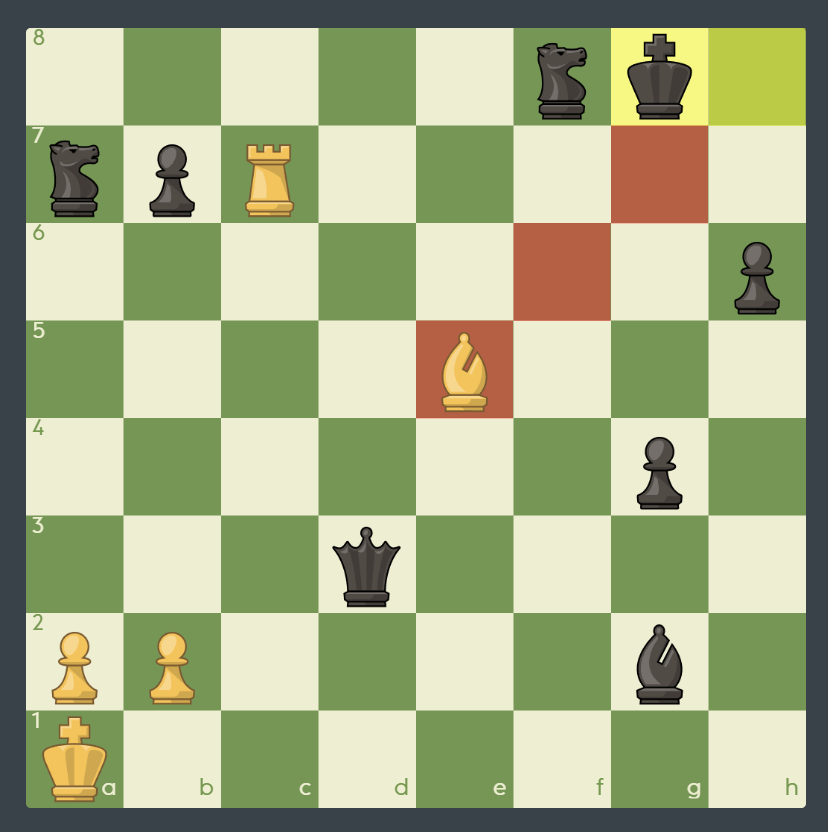
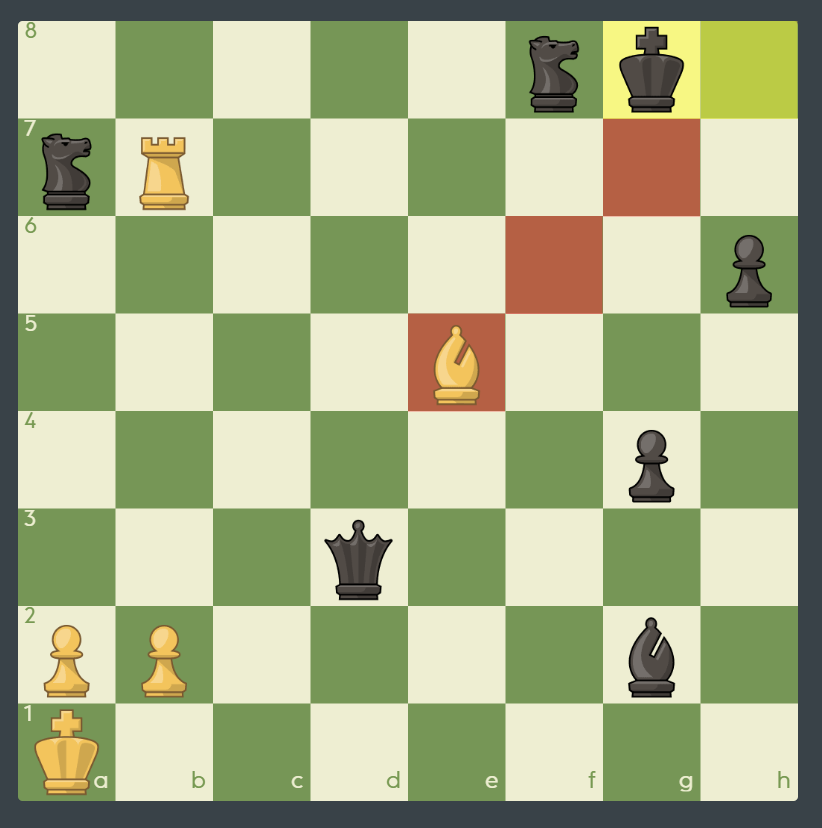
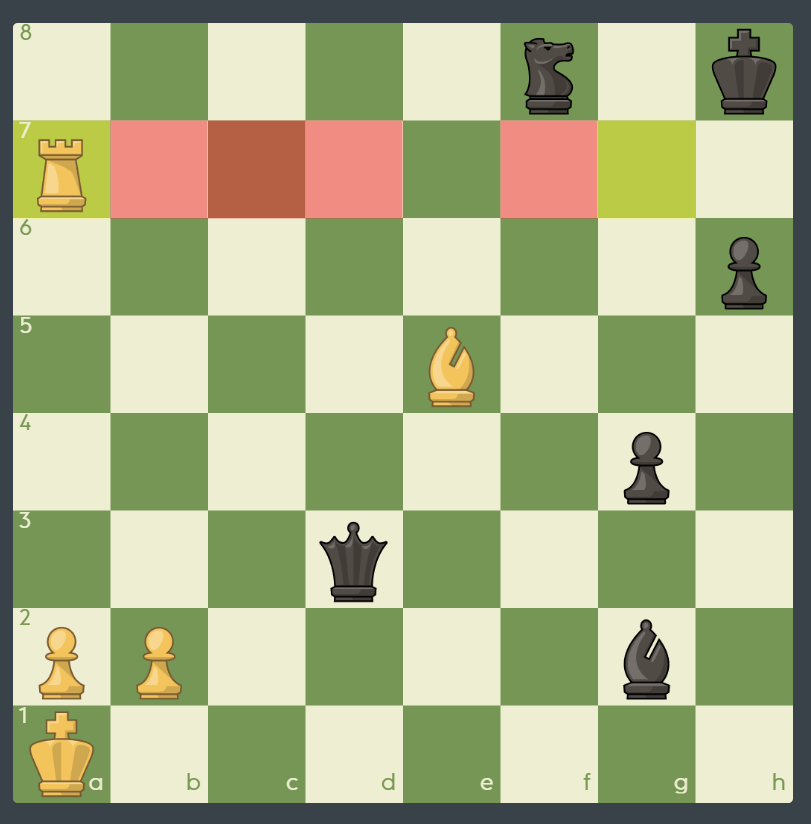
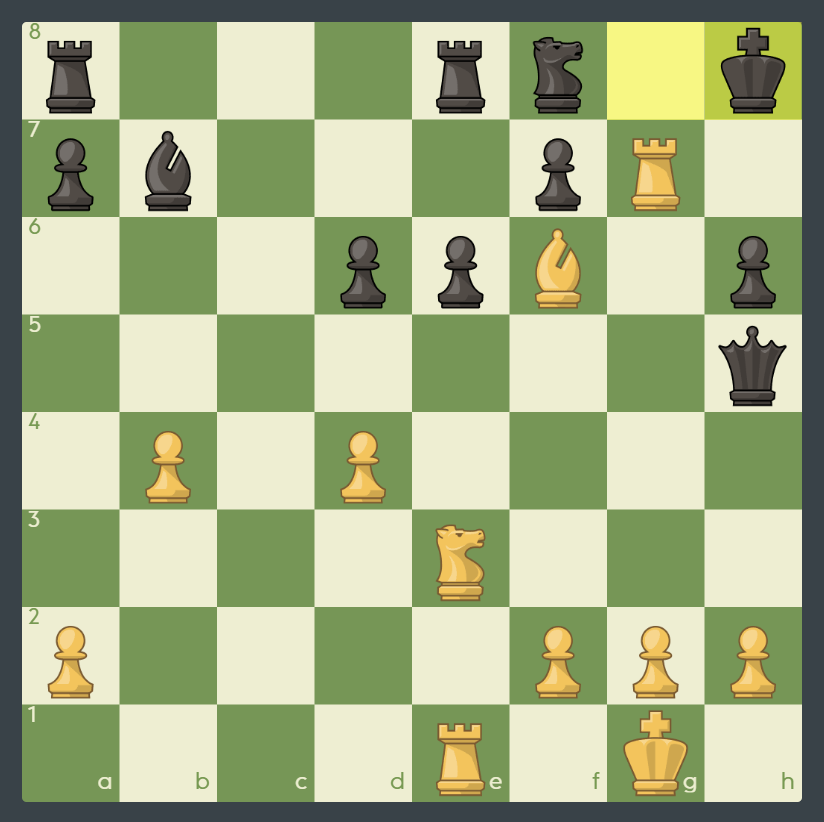
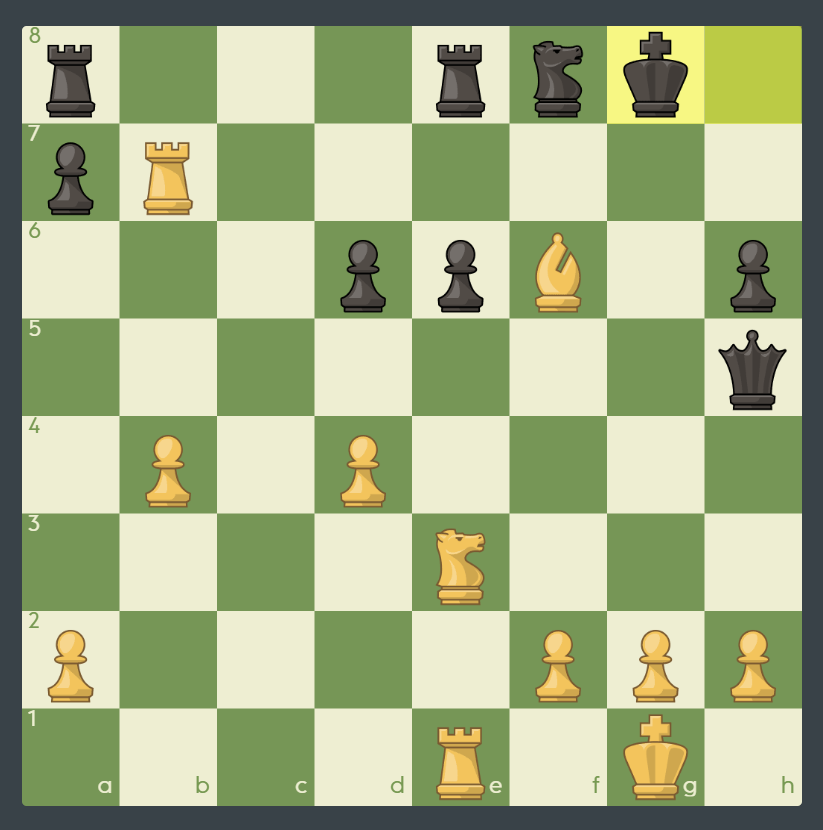
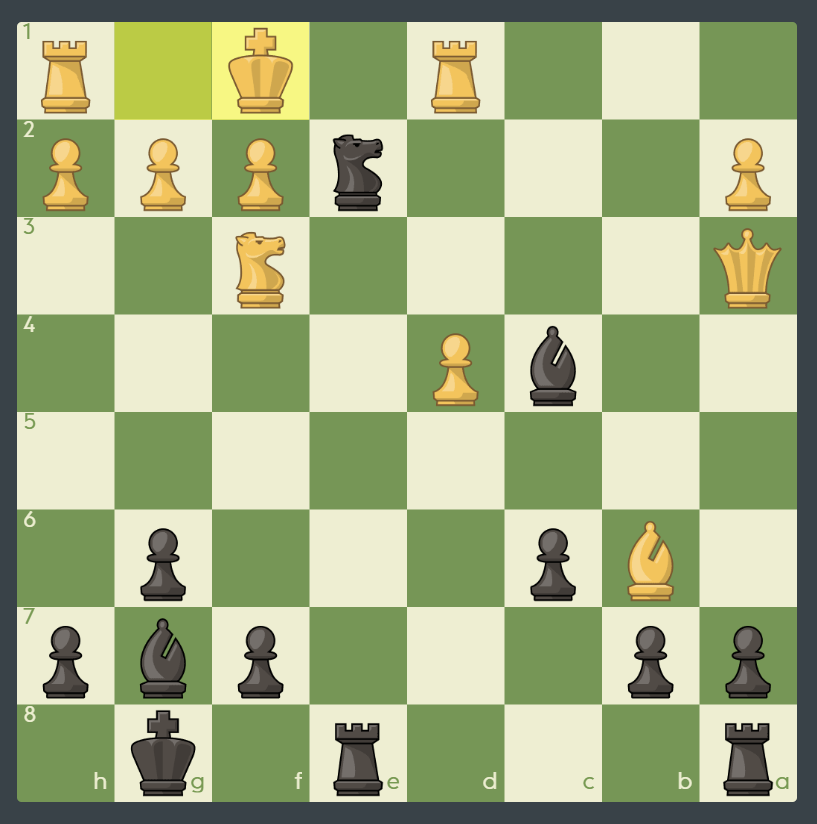
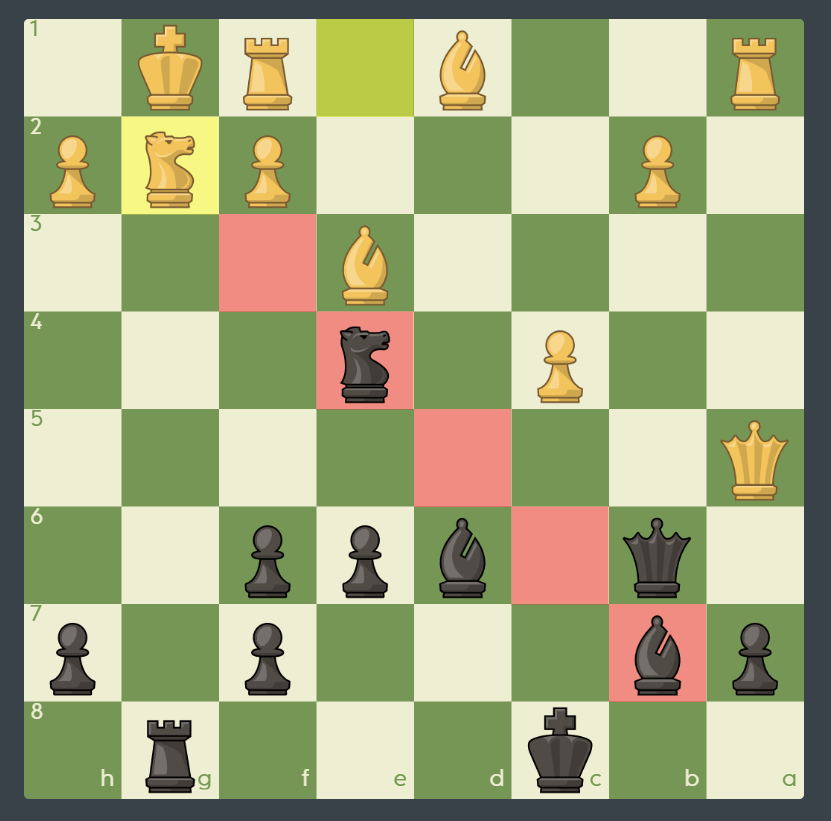
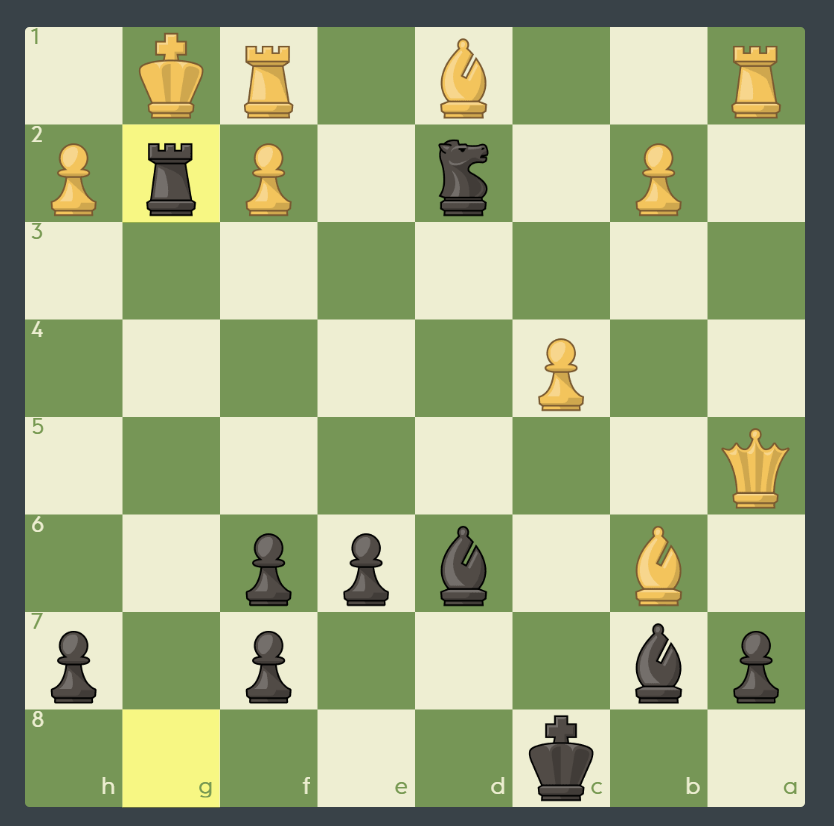
The only way out of check is to go back.
It is key that White always go back after capturing something, just like a windmill going in circles.
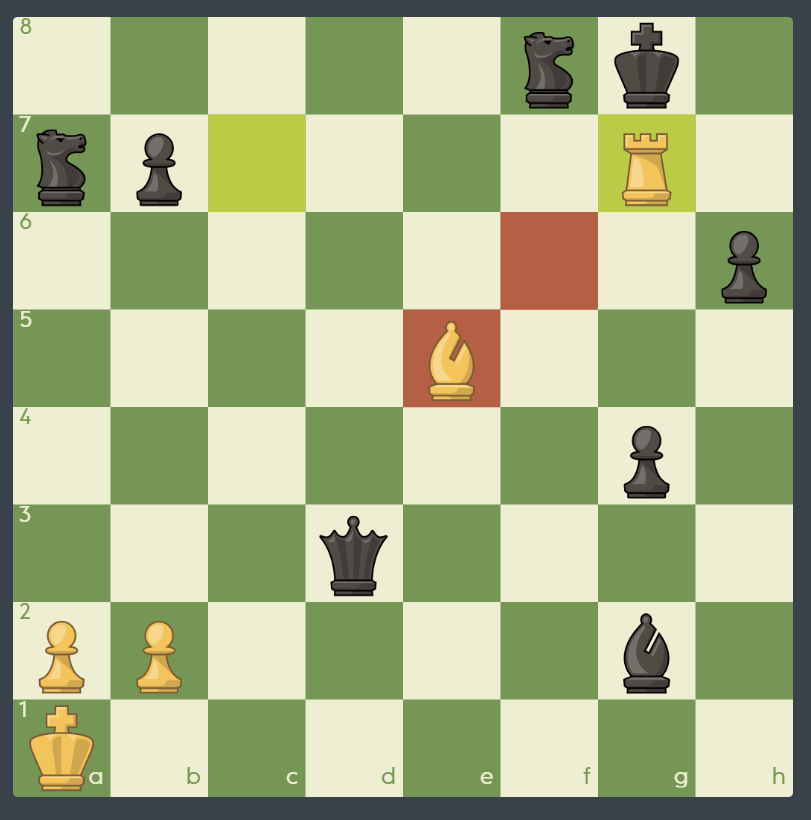
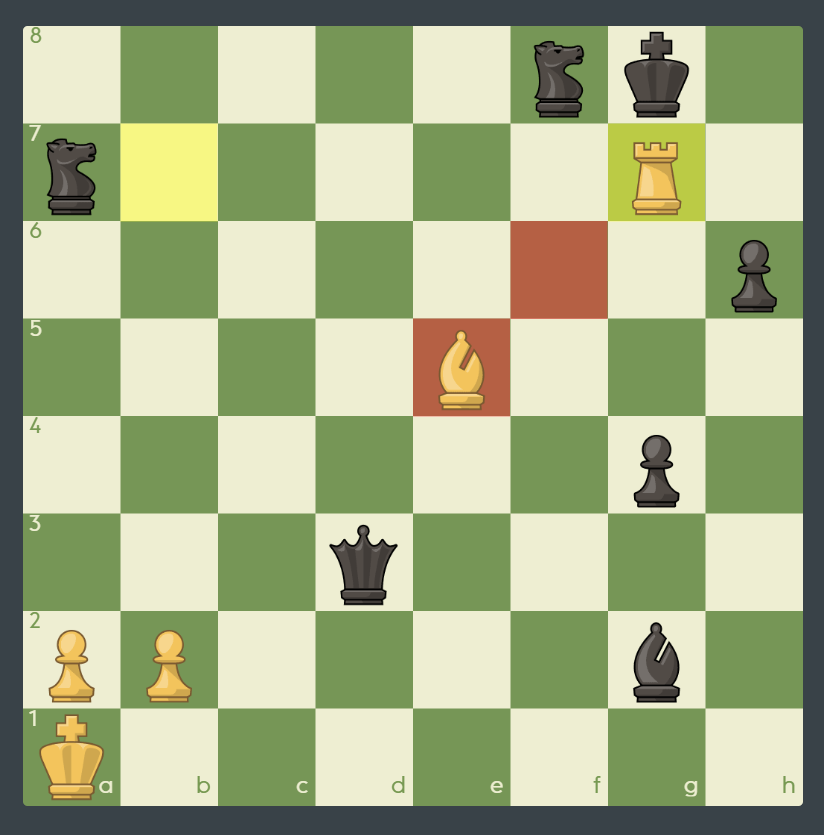
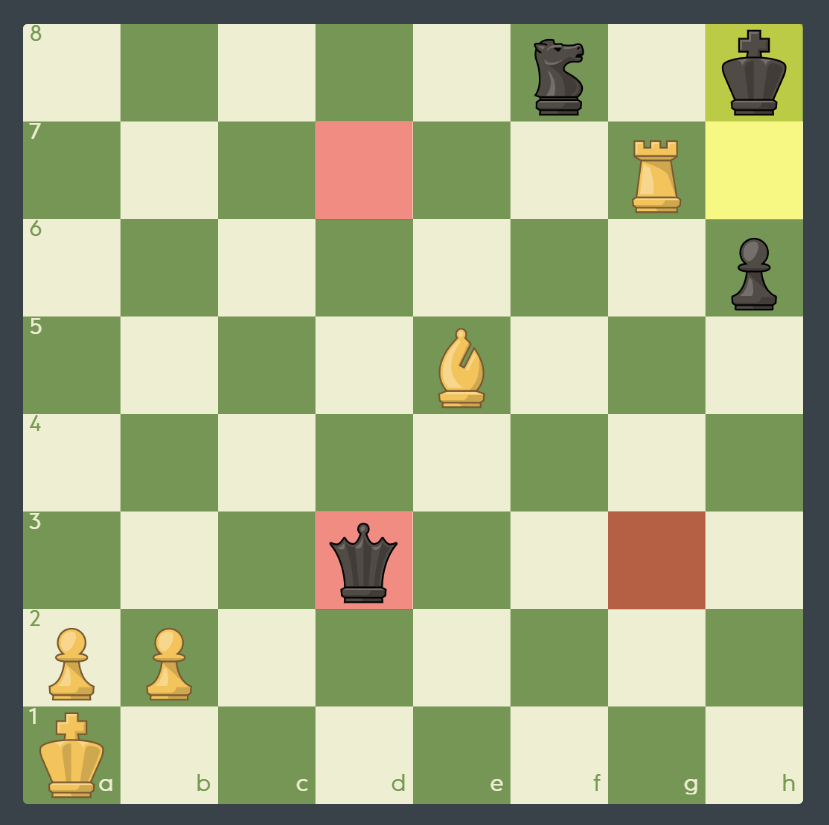
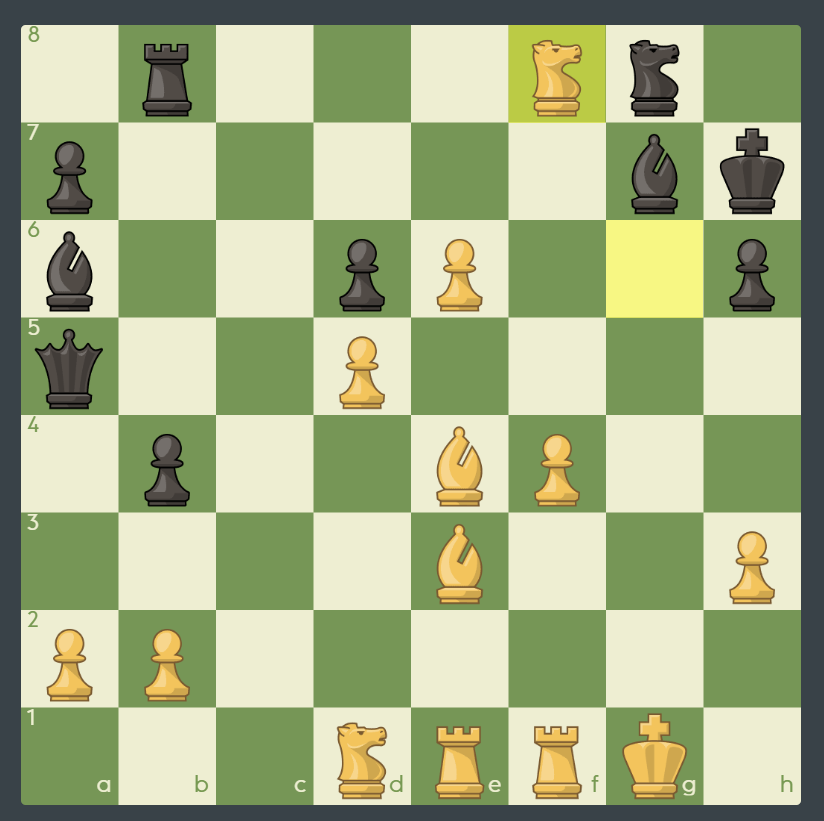
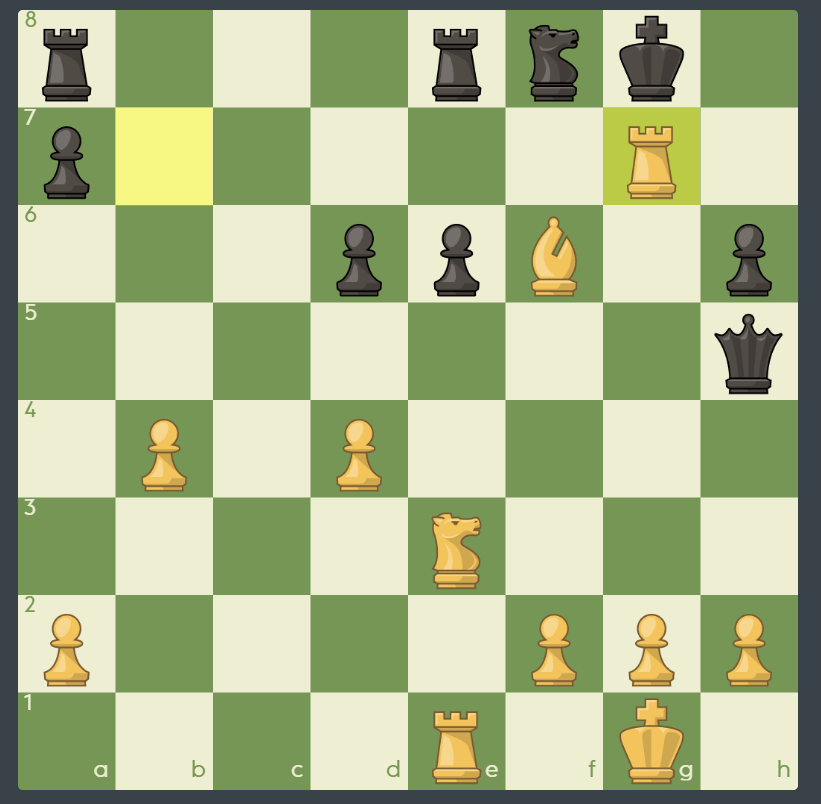
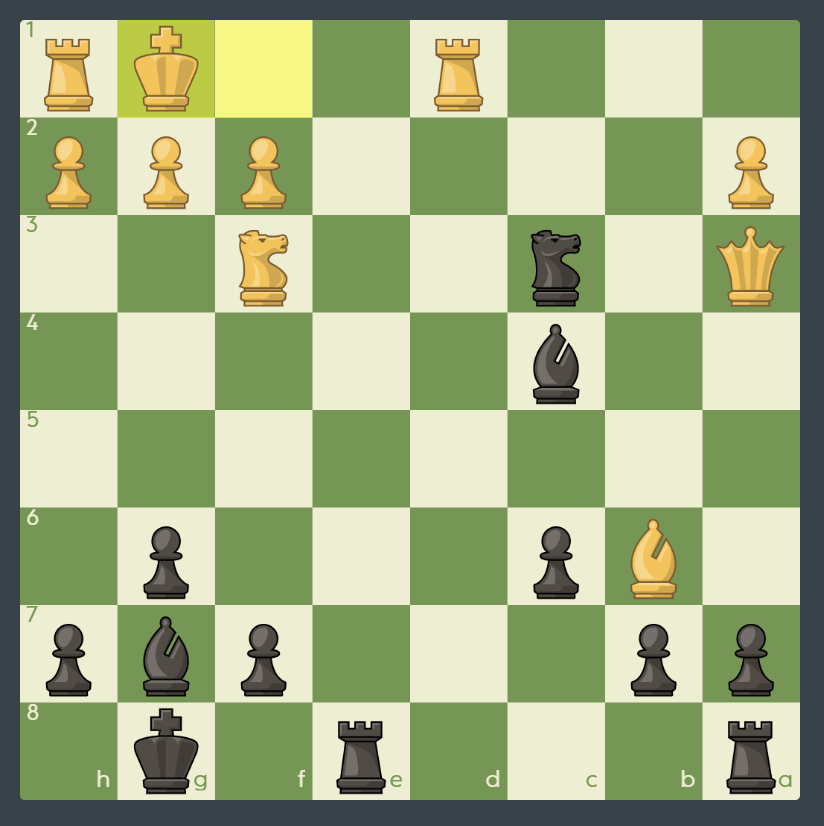
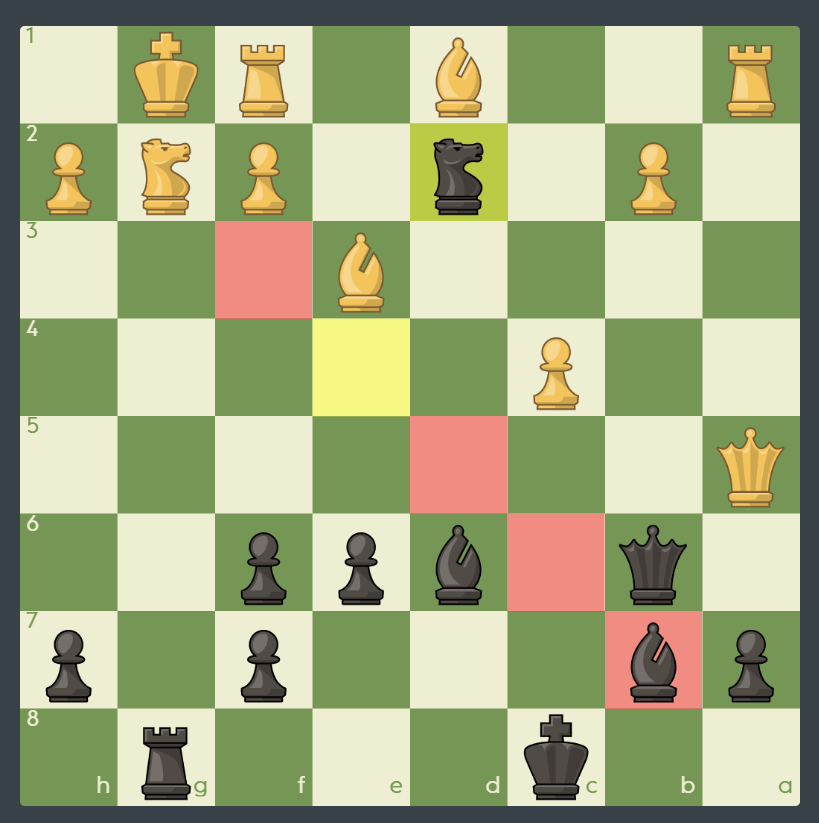
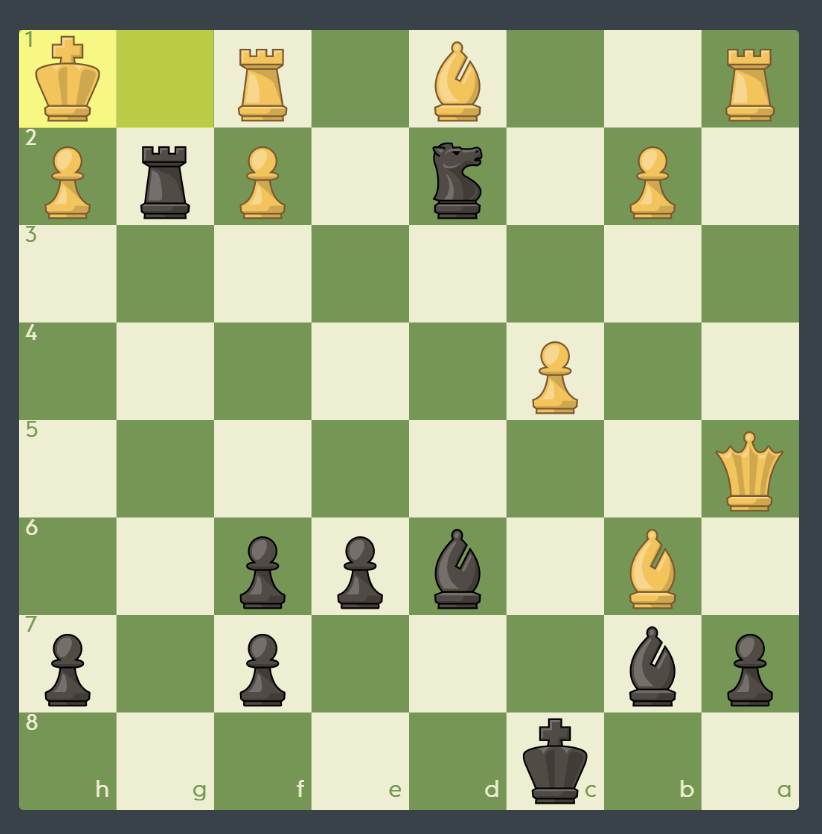
White forces the black king back into position for the discovered check.
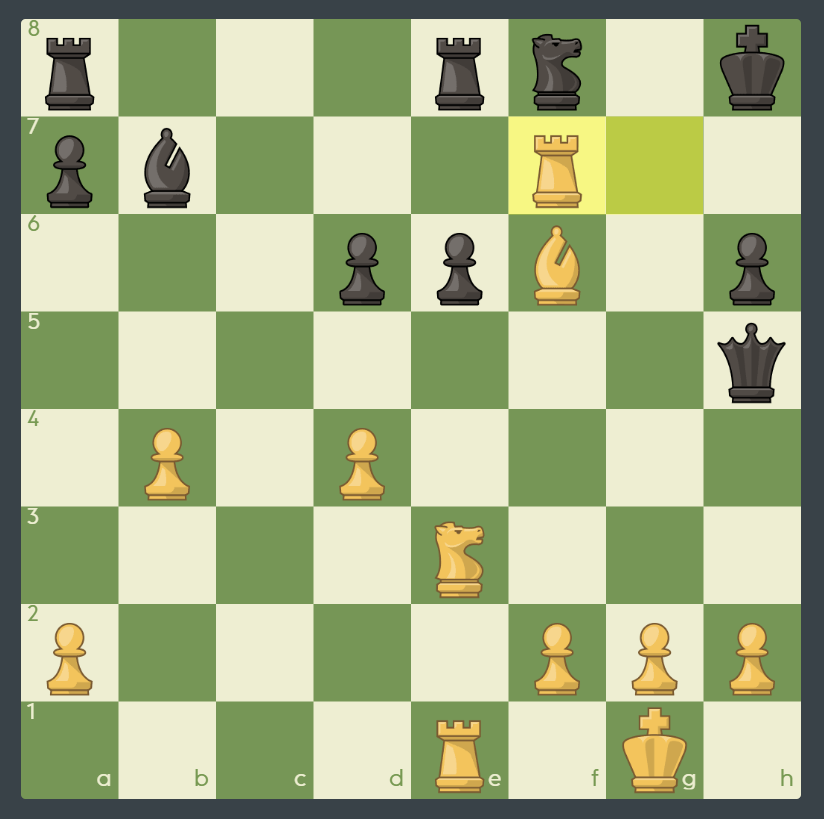
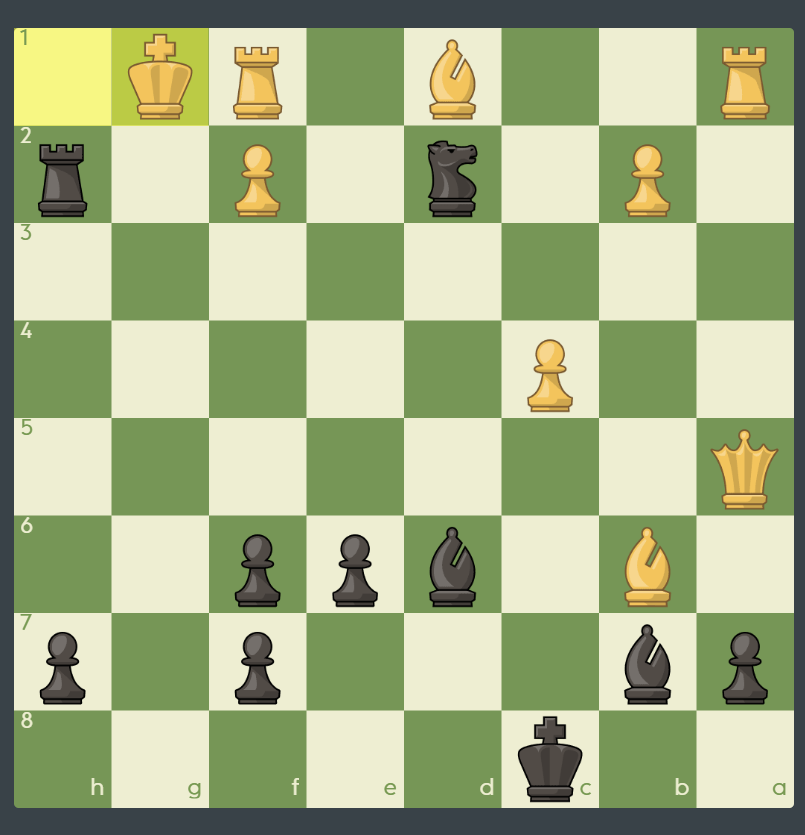
Now White continues the milling.
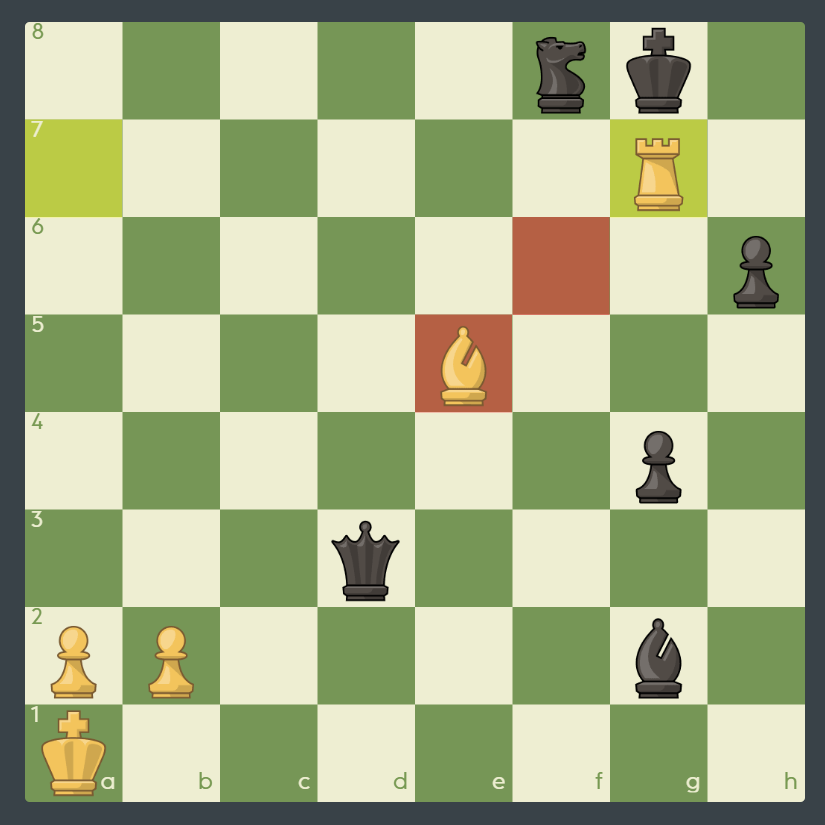
The pawn can be captured without harm to the rook, since the black king is in discovered check.

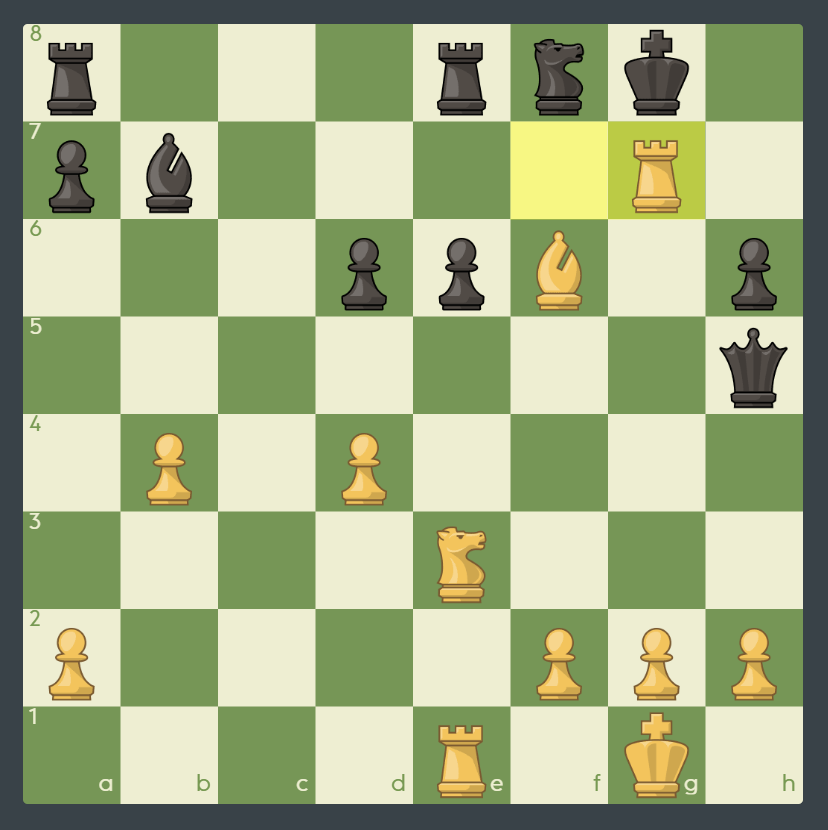
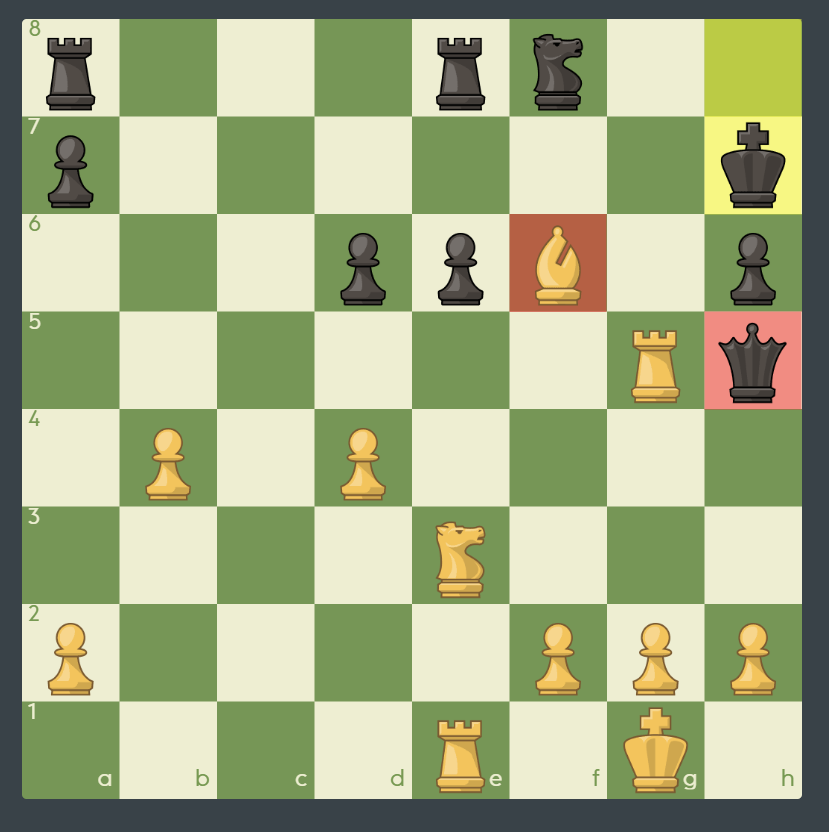
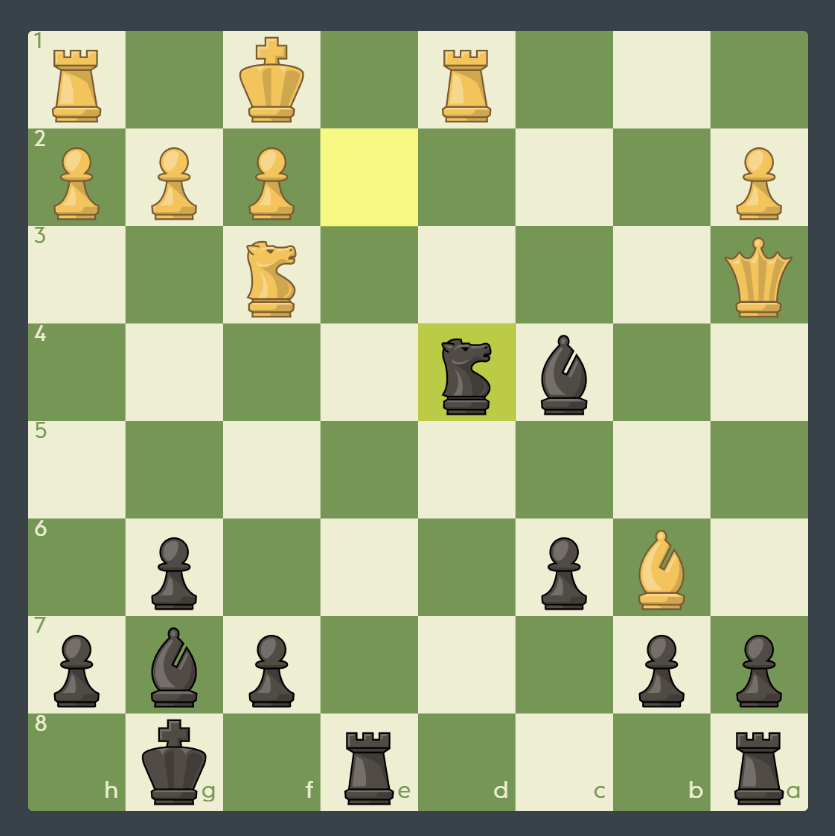
White could now capture the queen, but that would still leave Black up in material. Instead, the queen will be captured later!
It is nice to capture a queen for free, but by thinking ahead, White realizes she can do even better.
Once again, time for another discovered check. It’s not a draw by repetition since each time the rook returns to g7, a different position arises!
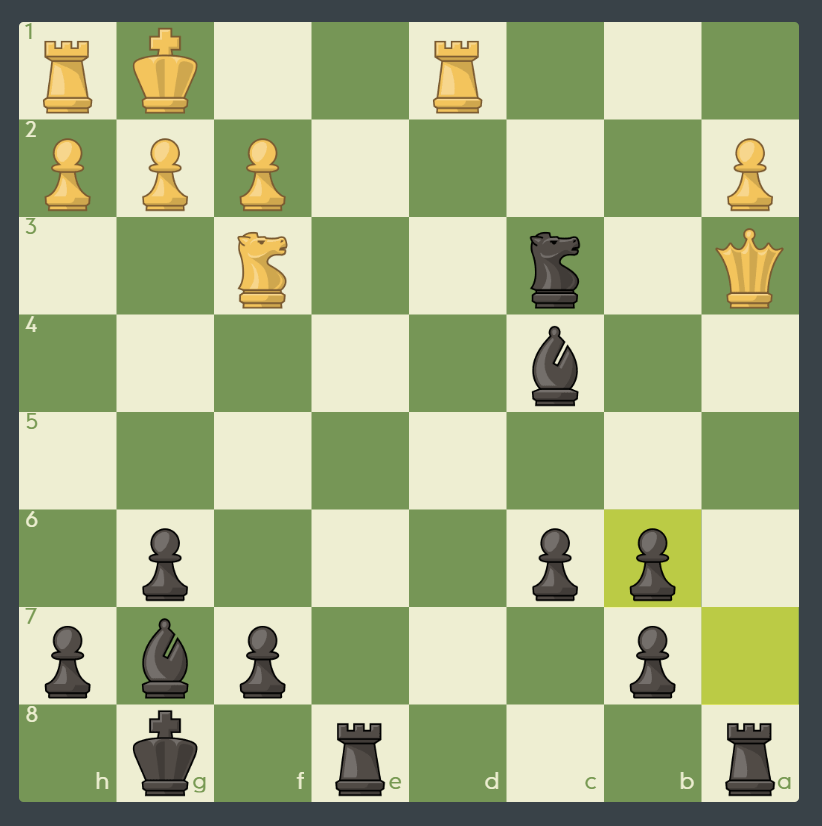
Another pawn leaves the board, and Black is again in check.
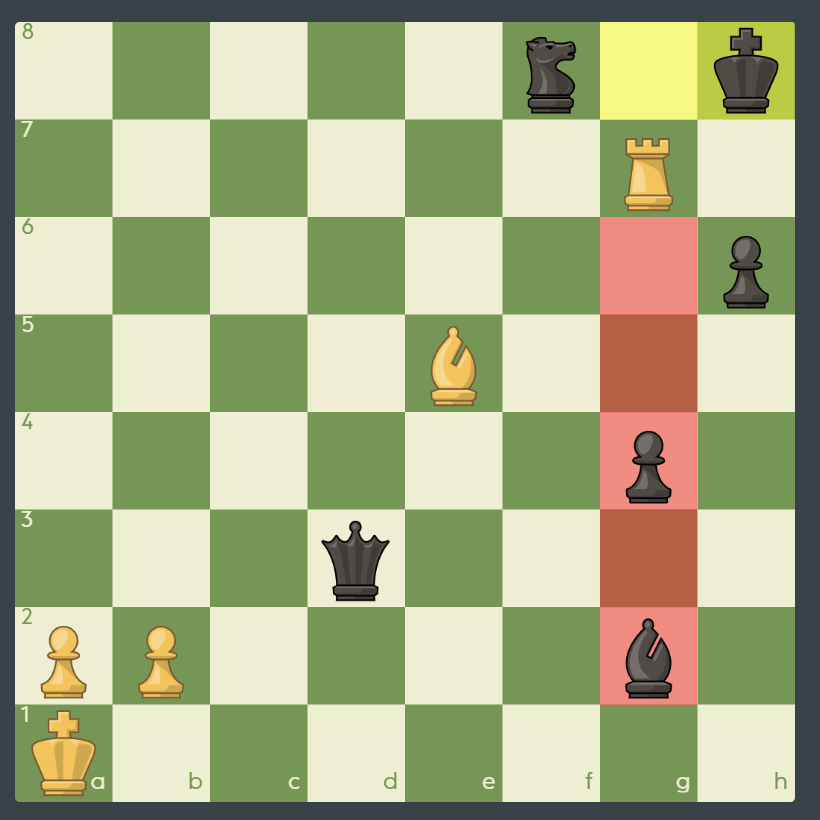
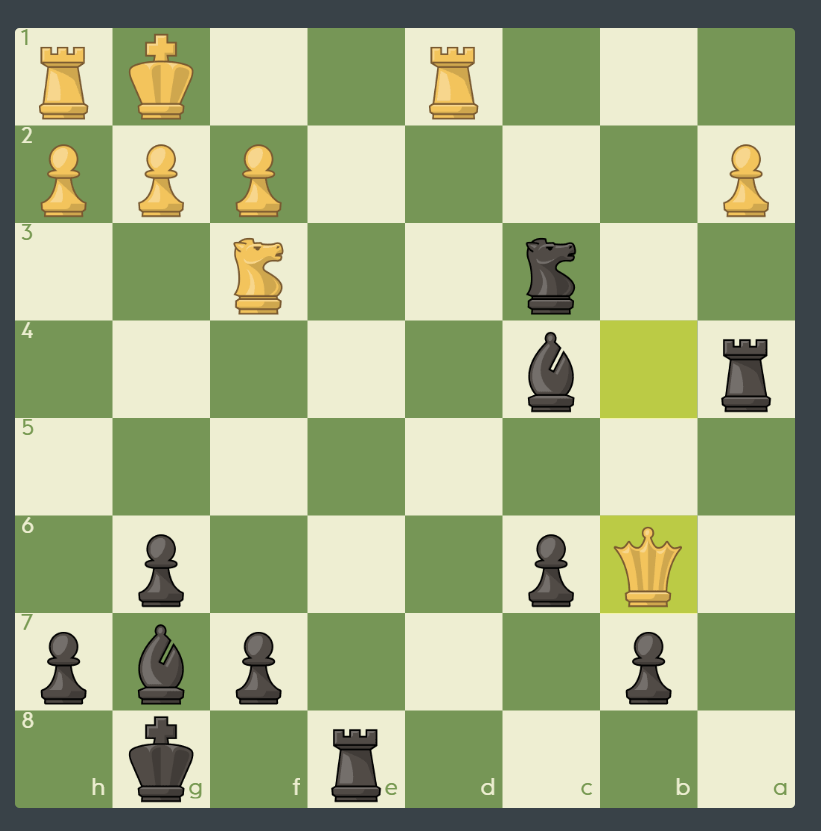
Let’s not capture b7 yet. Remember we have to keep returning to g7 to keep the windmill turning!
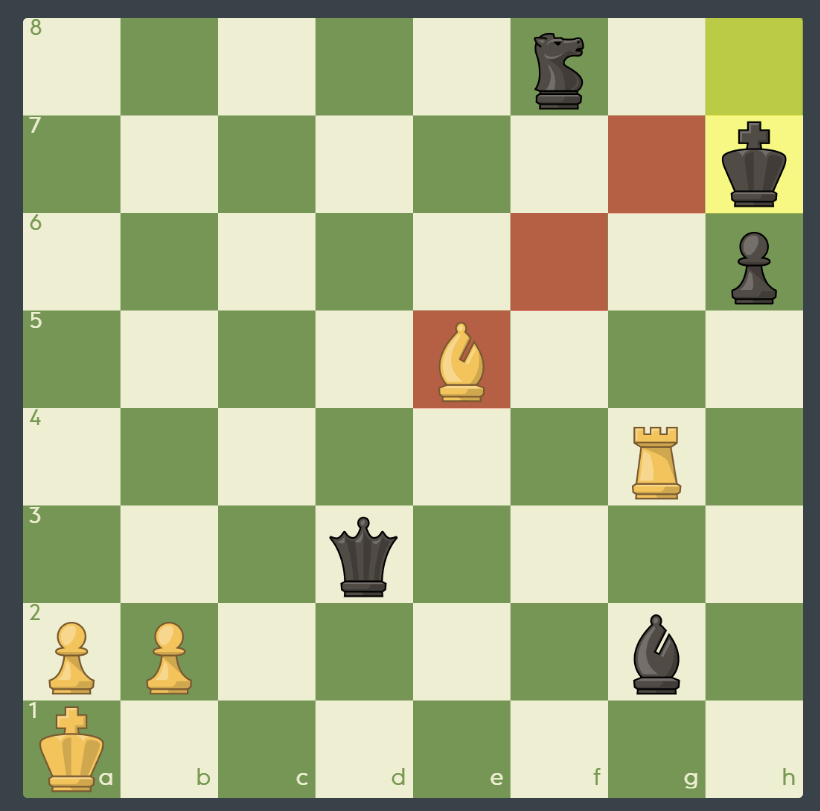
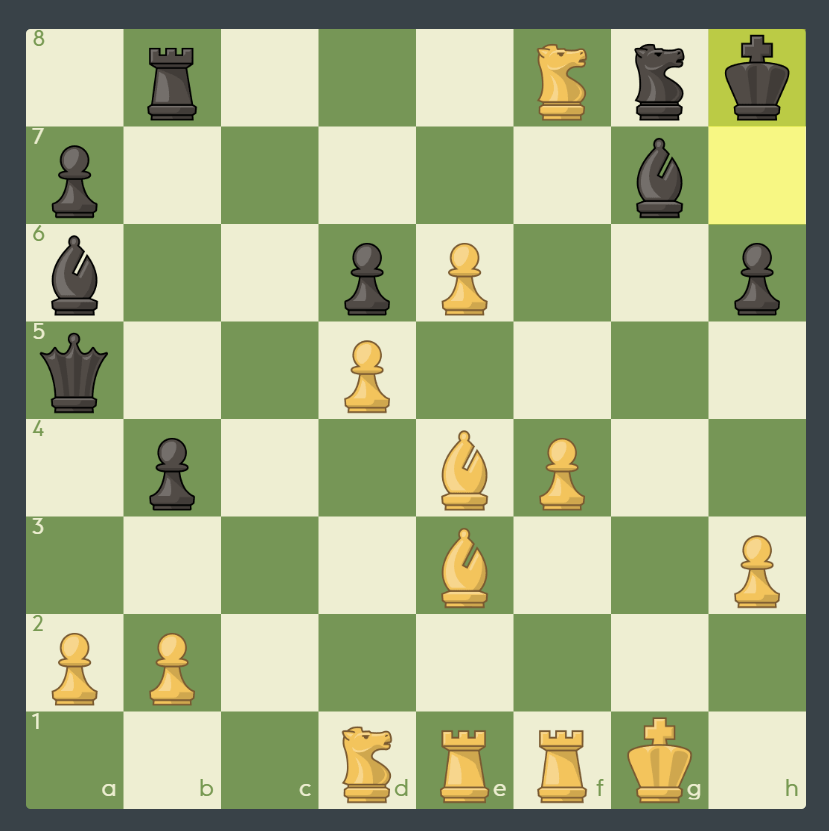
Black sure does wish the knight was not on f8. If it were not there, the king could run that way and avoid further discovered checks.
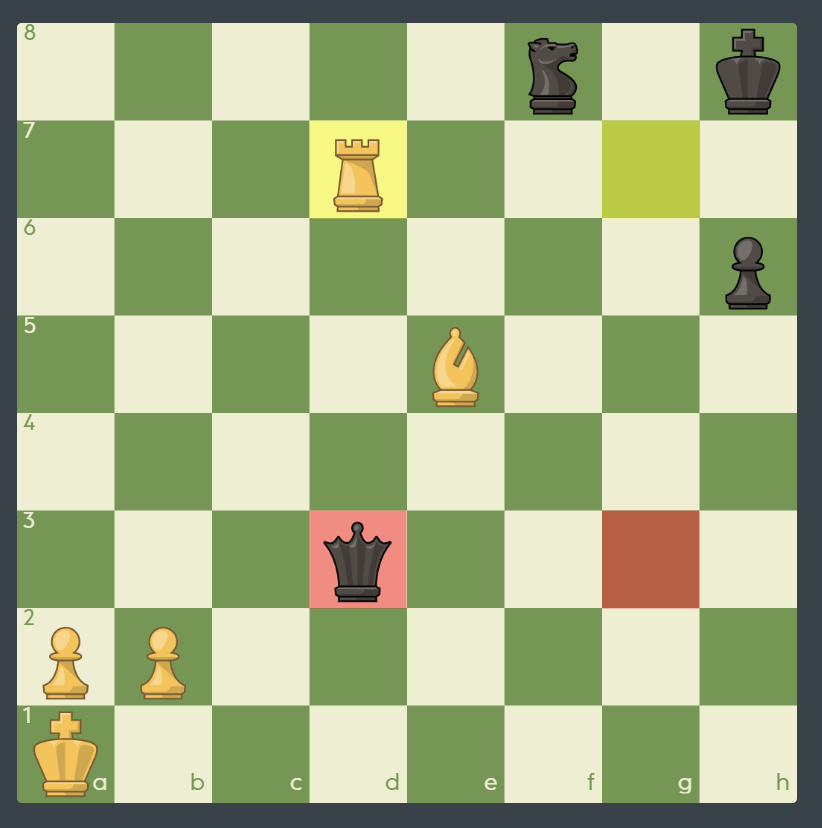
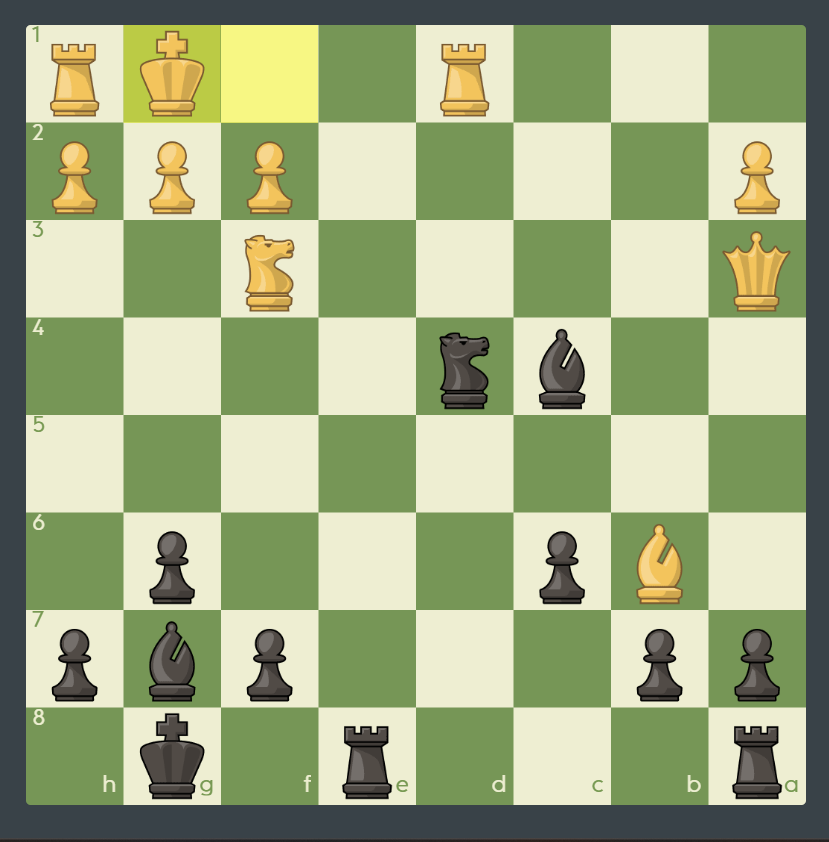
Thus the king again has to go into the corner.
Still more of Black’s material advantage disappears…
Again it is discovered check.
The free knight should not be captured yet. White instead forces the black king back into a discovered check.
Repeating the pattern.
Now White gains a whole piece, again with check.
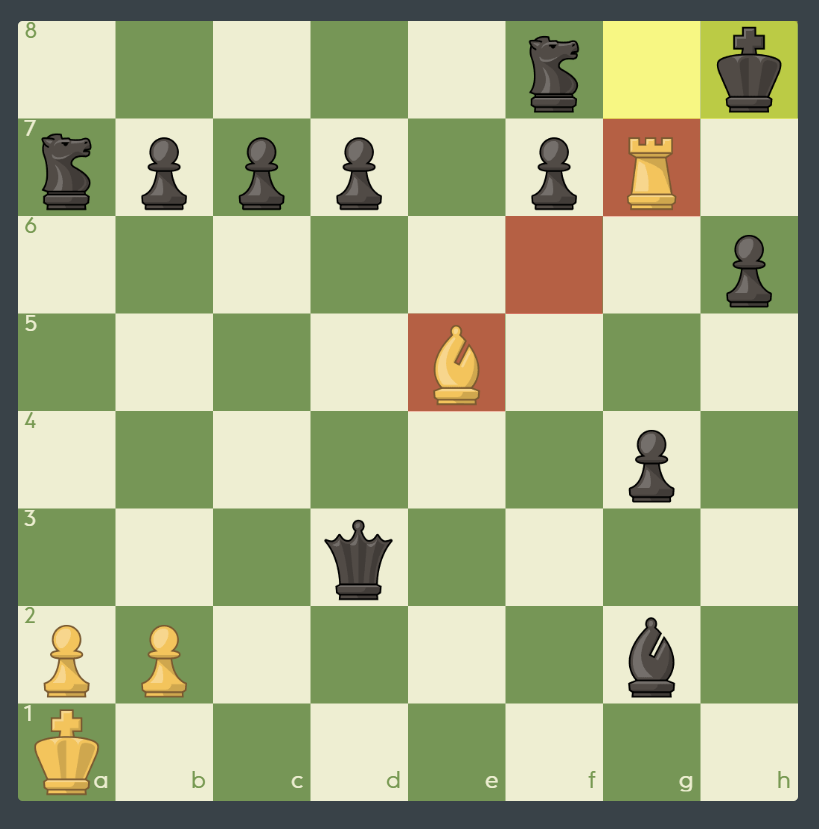
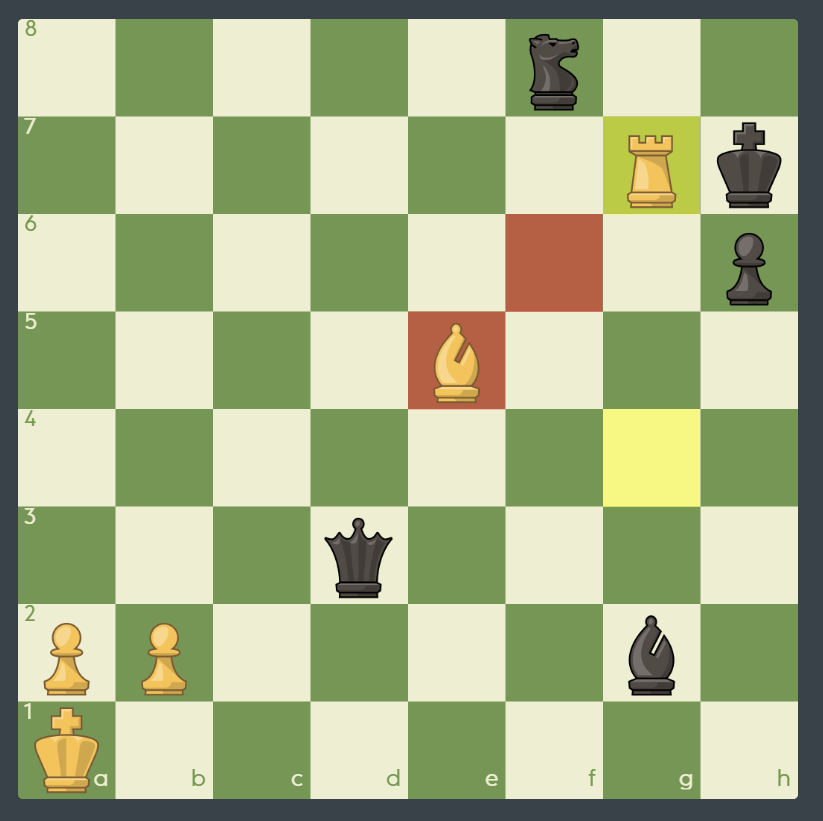
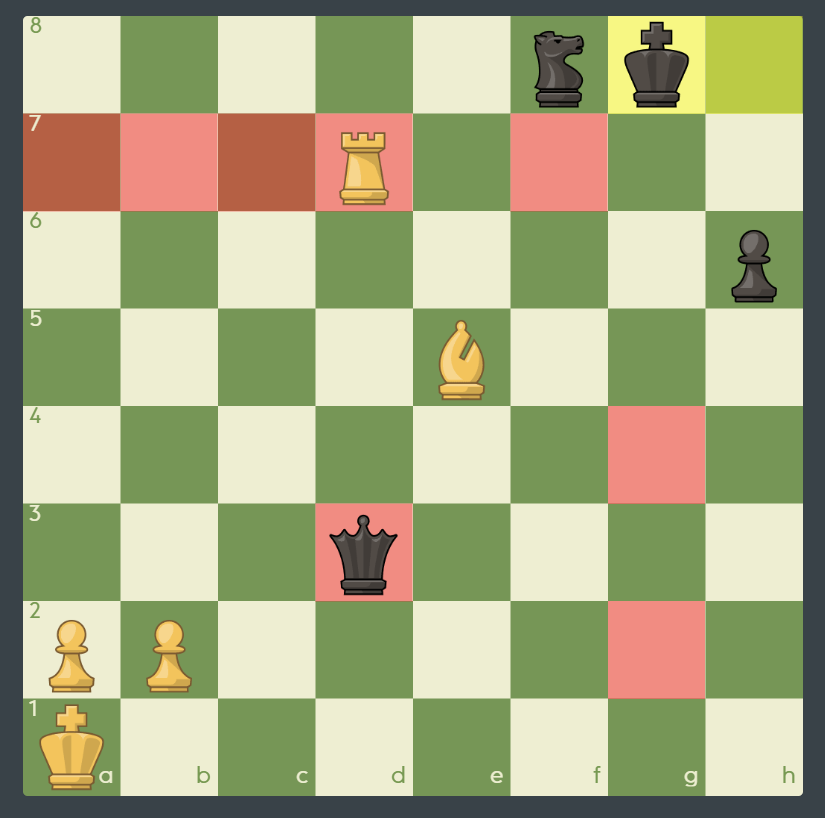
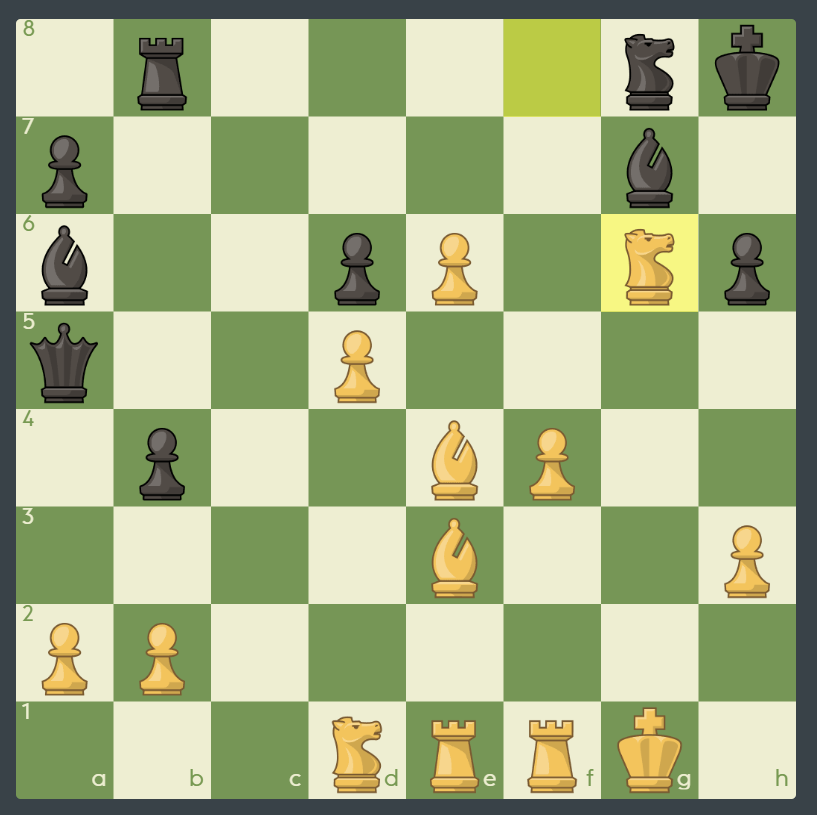
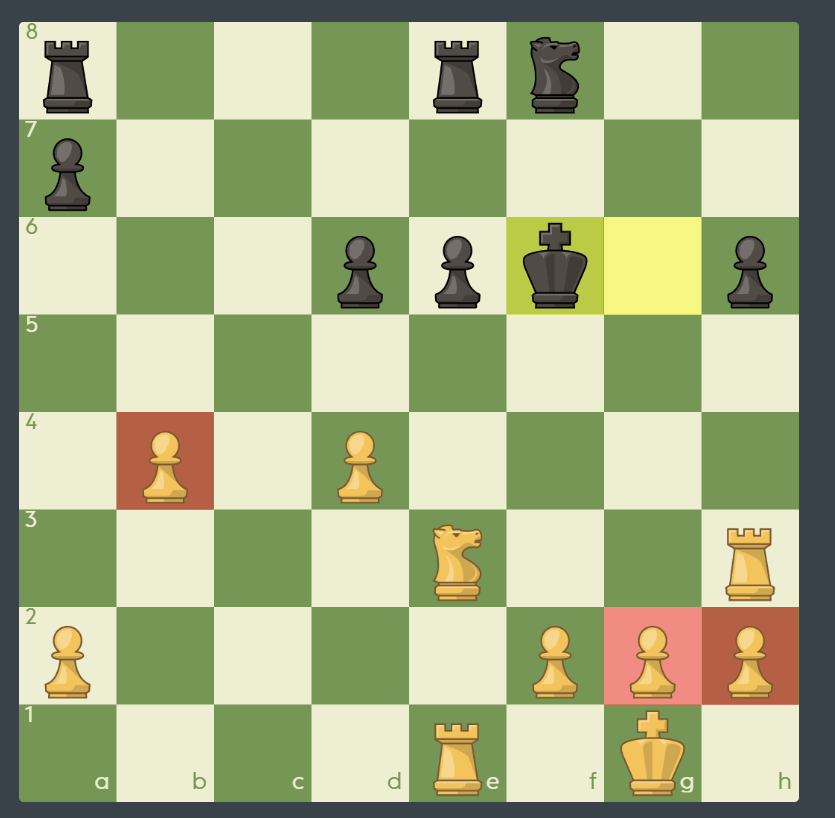
The entire seventh rank has been cleared out!

The king is forced back to the corner. Note that every one of White’s moves has been a check and black has had no time to do anything!
White still has use for the discovered checks to come.
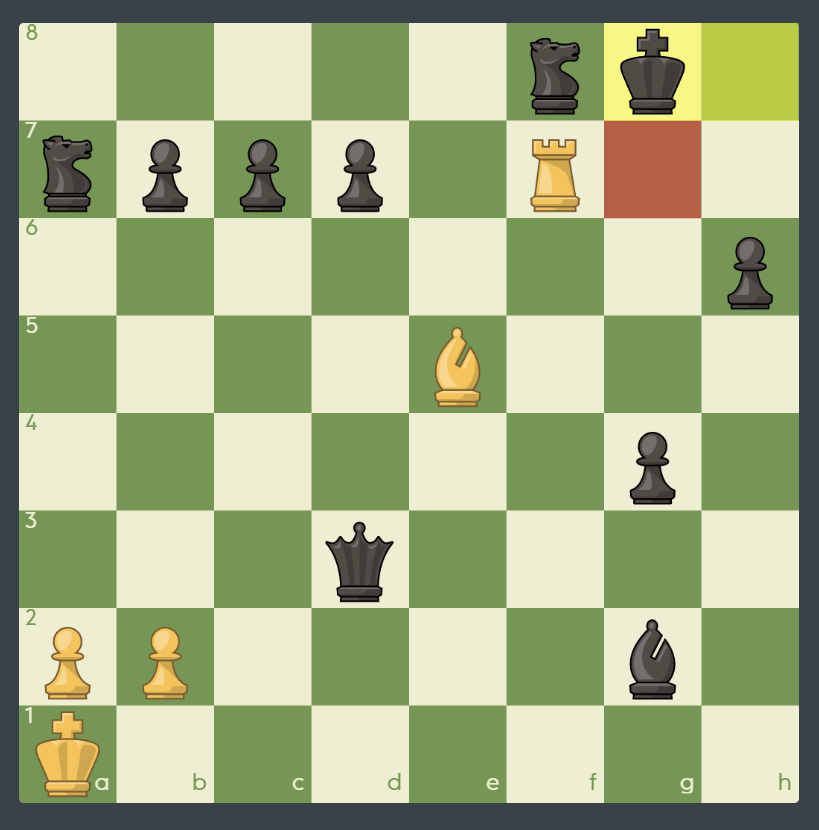
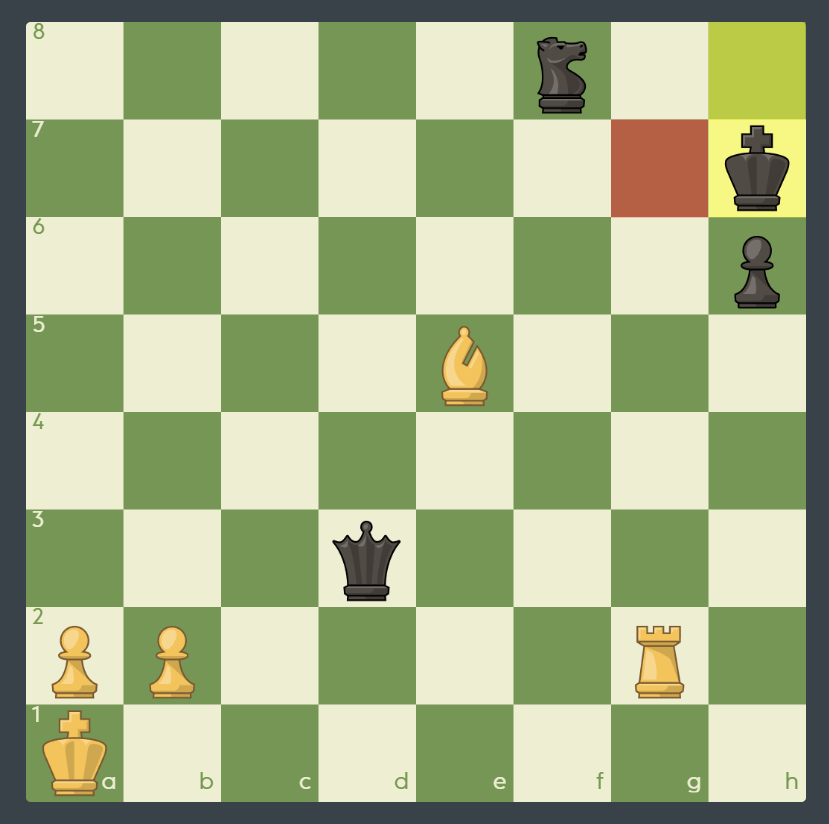
There are no more pieces on the seventh rank. So what is White to do now with the discovered check?
Just when Black thought the torment was over, White begins the same thing on the g-file!
This time the king has to move up the board, but there is little difference. The same pattern will be followed.
As before, White has to chase the king back into the corner. Black is still threatening checkmate, and still has the queen.
Essentially the same thing as before

Due to the pawn on h6, the black king has to go back into the corner. We have seen this before!
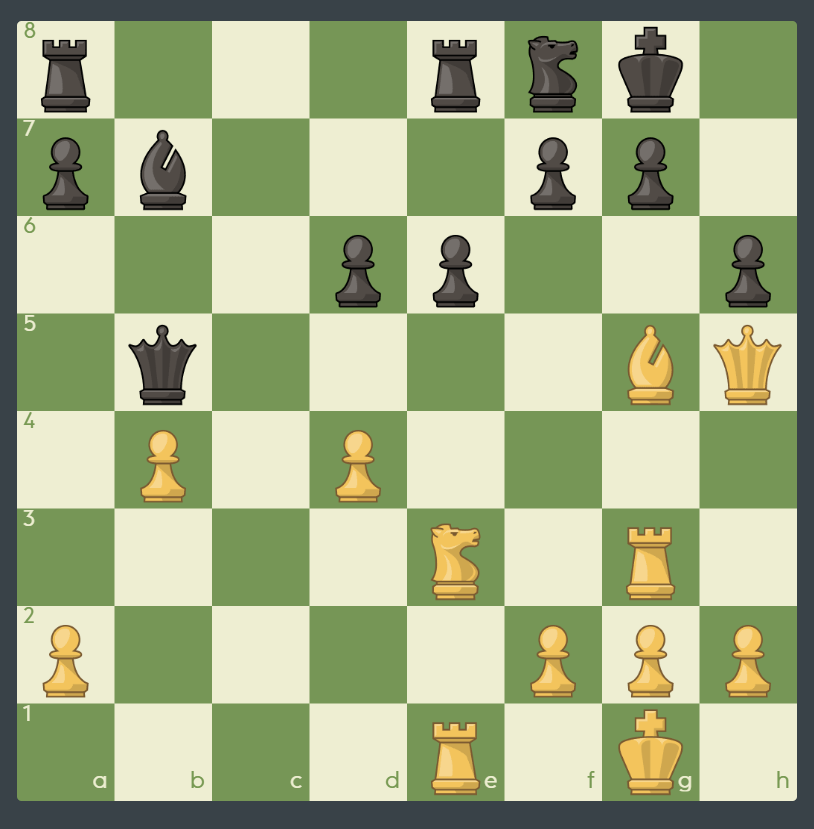
There is still something else to capture, before going after the queen

The bishop is now taken. White is now “only” down a queen, and that too will soon disappear.
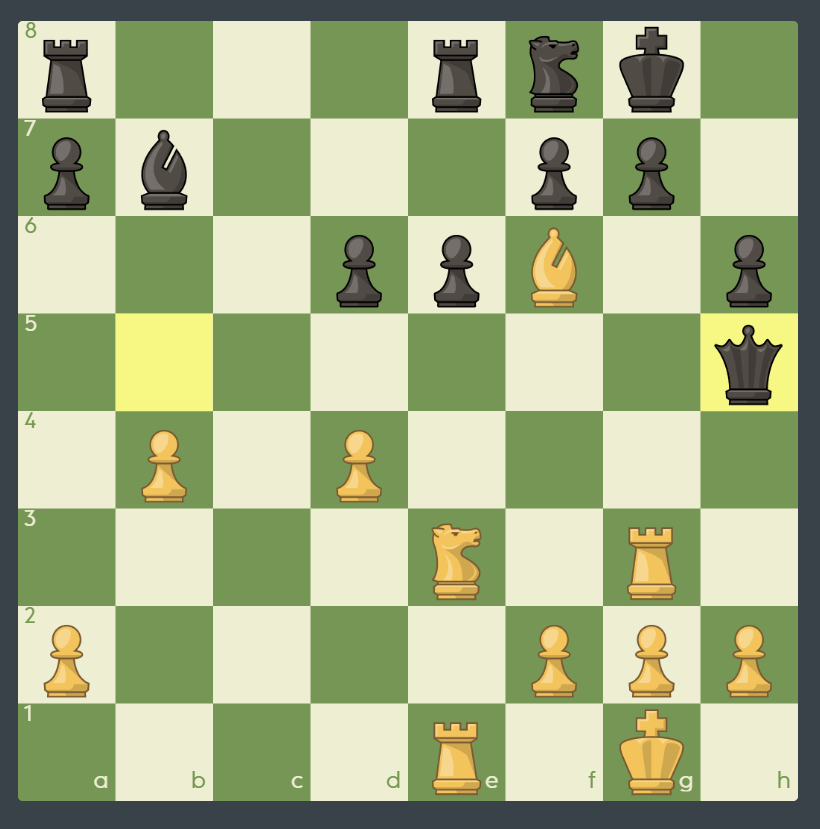
Everything that can be taken has been. Now is the time to prepare one last discovered check to win the queen.
The king is forced back in the corner one last time.
Finally, the time has come to capture the queen. There are two equal ways to do it.
Right – this is the standard use of the discovered check. Black has no time to save the queen, since the king is in check. Rg3+ also worked.
Finally White finishes off the windmill maneuver.
This windmill really generated some energy! All of Black’s pieces have been blown off the board. Now White is up a rook and wins.
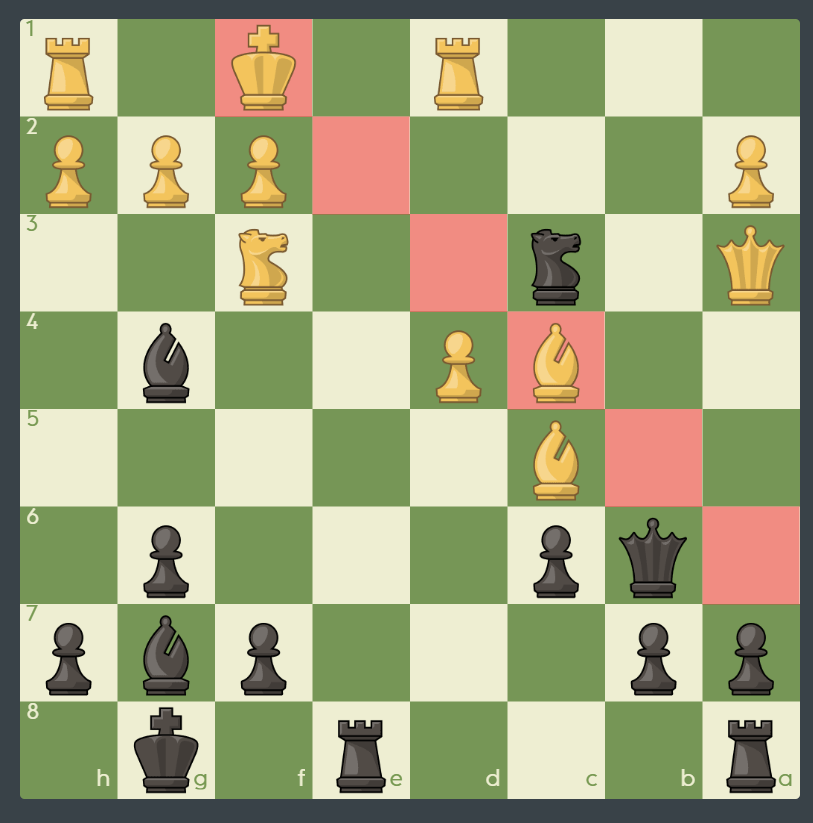
Topic 2
Now it is your turn. Can you see something happening on the b1-h7 diagonal? Start with a queen sacrifice.

Great job! White forces the diagonal open, since Black pretty much has to capture the queen.

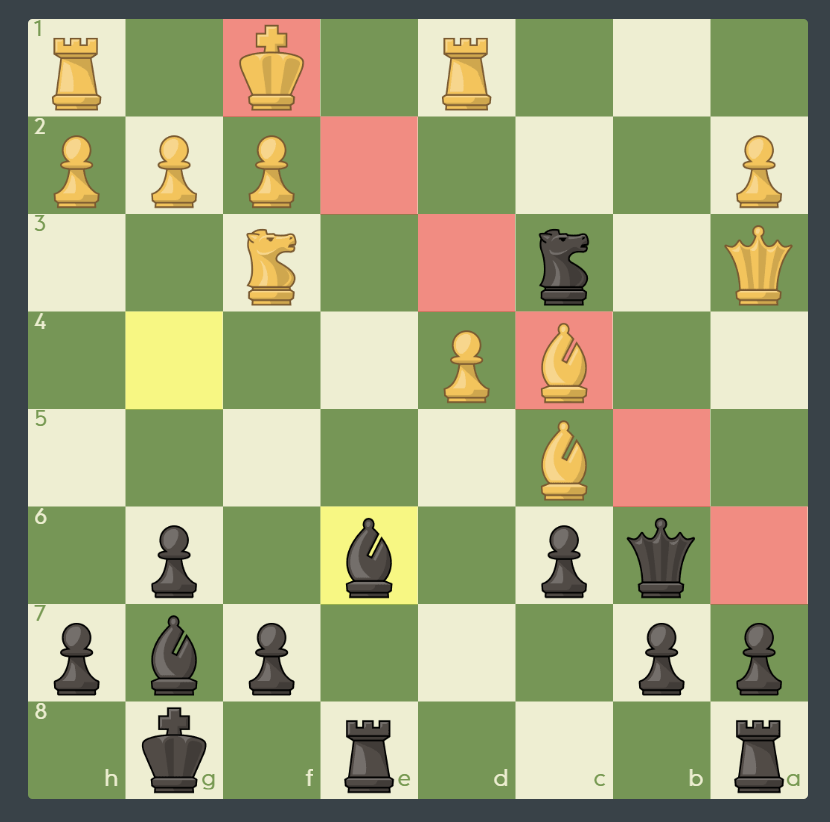
If Black played 1…Bxf1 then after the simple 2.Rxf1 capturing the queen would lead to the same thing, while otherwise White has a winning position.
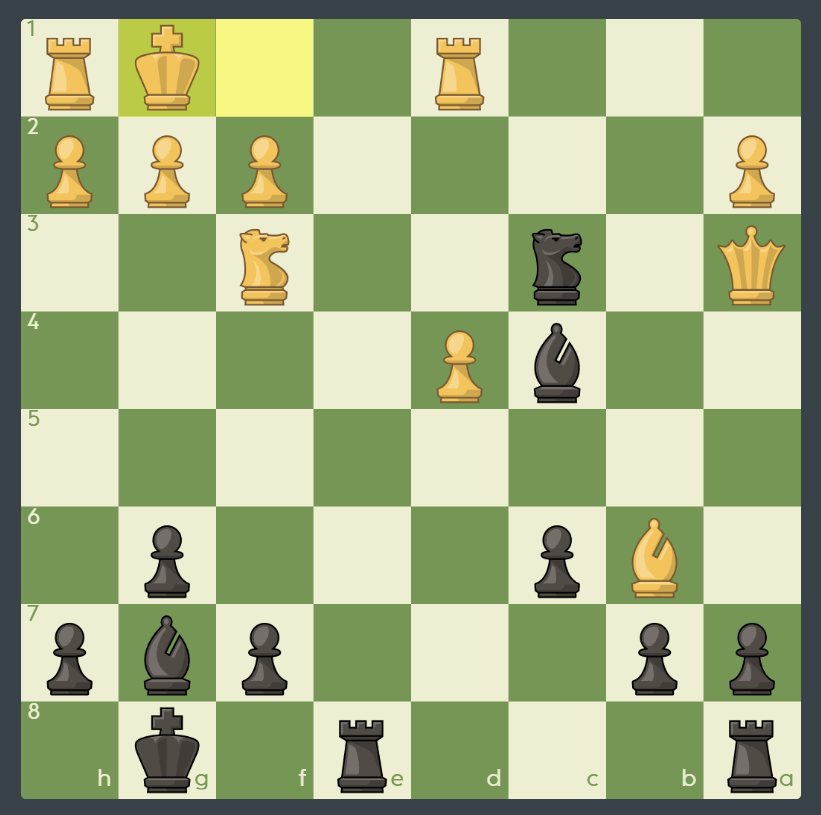
White has sacrificed the queen, but now makes forcing moves which lead to the windmill.

Right. Black is in check.
2…Rf5 3.Bxf5+ would only be doing White’s work for him.
In true Windmill fashion, White can now set up the discovered check. Look for forcing moves!
Right. The black king is in check and forced to return to h7, where it faces the discovered check.
White now has a choice of discovered checks. Which one is best?
Good job. White removes the rook, since it was guarding f7.
The only way out of the double check.
White has captured the rook. Now it is time to force the king back into position for the discovered check.
Good job. The king has to go back to h7, and the same position has been reached, except there is no longer a black rook on f8.
Unlike in the first example, this time the windmill will lead to a checkmate! It only takes two more moves. Can you find it?

Right! This is another discovered check, and now White is ready to checkmate next move.
The only way out of check. Black’s pieces on g8, g7, and h6 are very unfortunately placed!
The black king has no moves, and White can deliver checkmate. Can you find it?

Good job. It was necessary to first remove the rook on f8, which was guarding f7. Thanks to the windmill, White was able to do that without Black being able to “say” anything in the meantime.
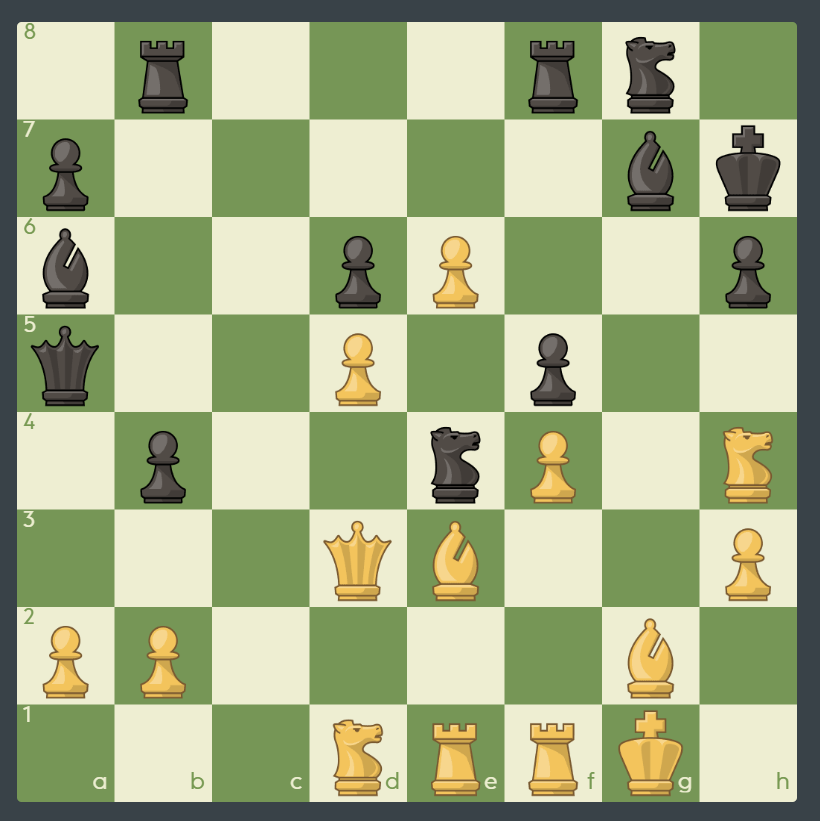
Topic 3
This is the most famous windmill in history! To set up the trick, begin with a discovered attack on the black queen, while sacrificing your own.

Brilliant! White has put the black queen under attack while also creating a threat against g7.
There was little choice. Any move which defended g7 would simply allow White to capture the black queen.
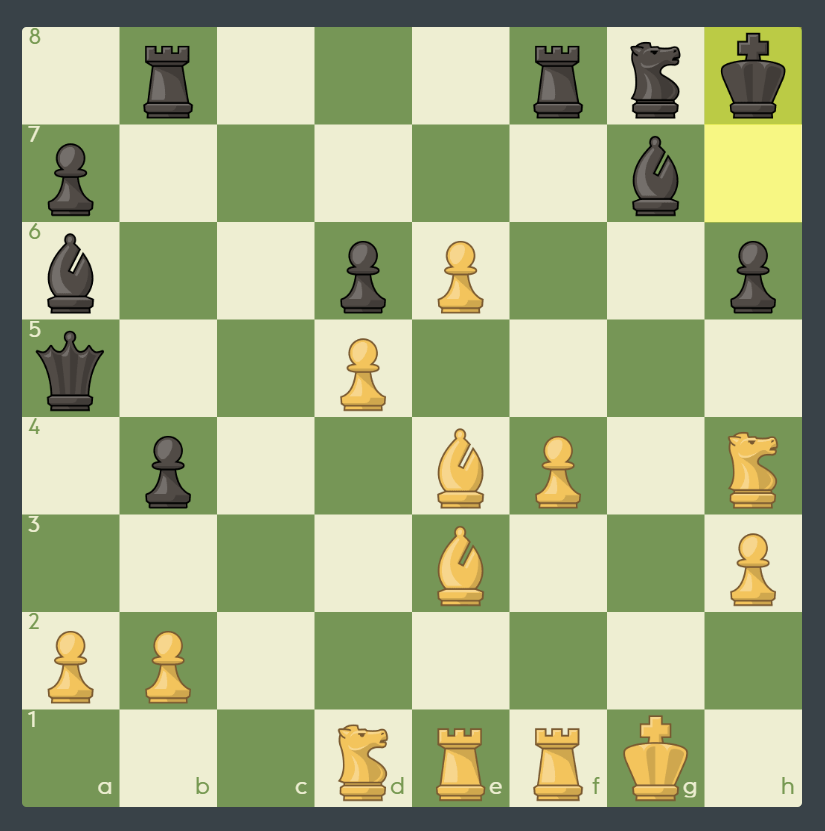
Black is up a queen. But now the windmill begins. Remember to make forcing moves at all times.
Right. The king is forced into the corner, and into a discovered check.
Black has no other way out of check, thanks to the position of the knight on f8.
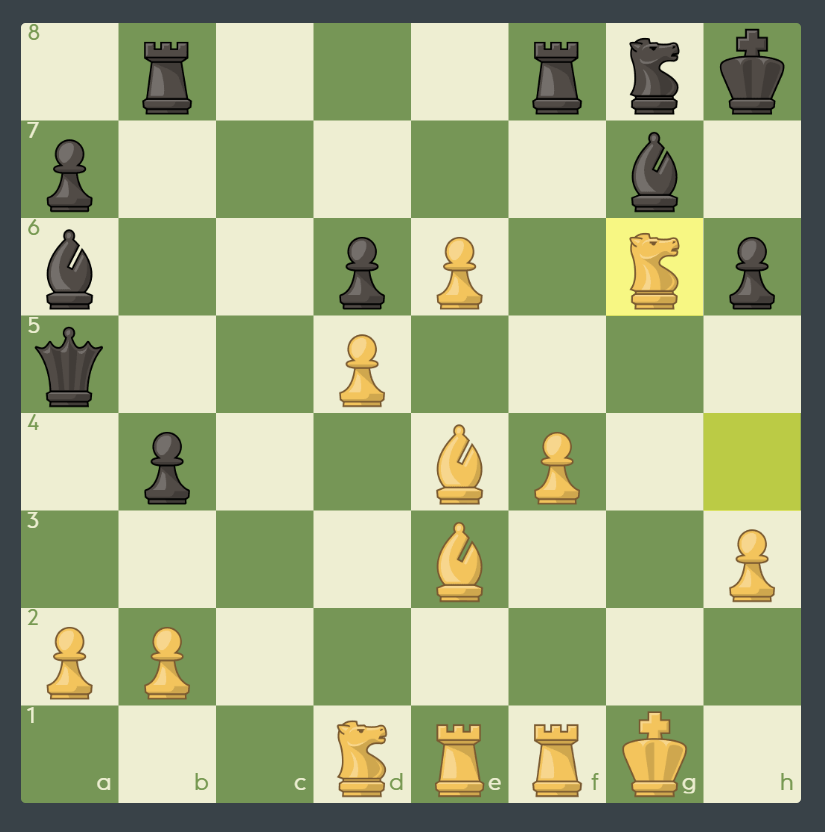
Start sweeping the black pieces off the board. Remember, don’t go for the queen immediately. See if you can grab other pieces first.
Right. The black king is in discovered check, and must return to g8.

As you have seen before, White should force the black king back to the corner and prepare another discovered check. Return Mr. Rook!
Good. The king must go back, and then we will have another discovered check.
Let’s see what else we can get with our windmill.
Correct. The bishop is captured, Black is in check again, and still has no chance to “say” anything.
The only legal move, again.
As before, we need to continue with forcing moves. Force the black king back into position for another discovered check.
Right. This is how the windmill operates. First a discovered check, then a simple check, forcing the king back, followed by another discovered check, and so on.
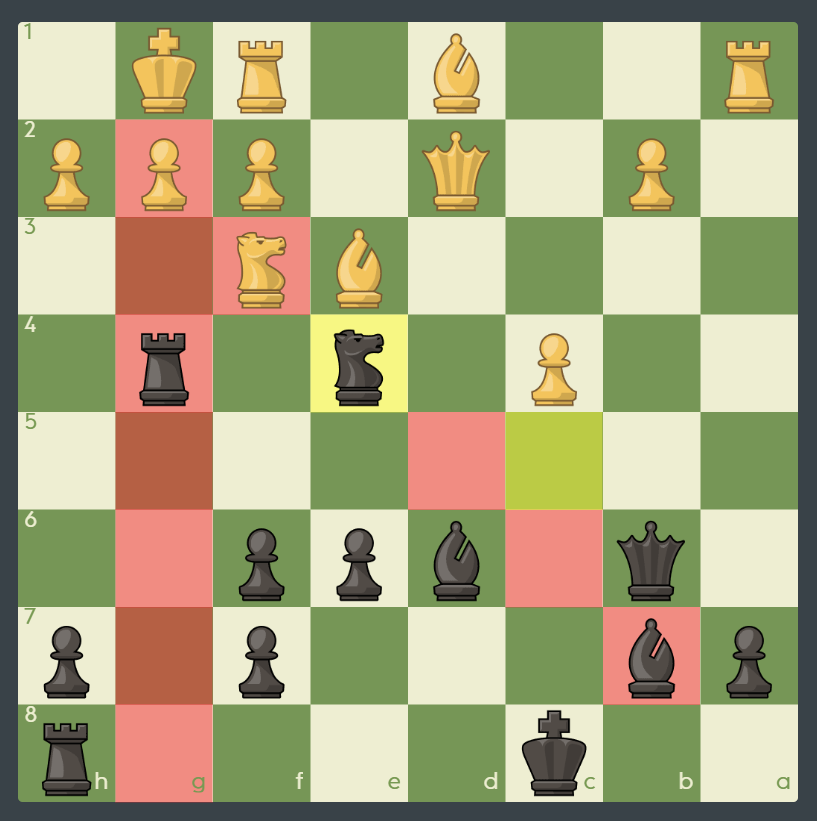
You might be inclined to also capture the a7 pawn, but much later on, Black’s rook will invade a2. So, White went after the black queen right away. How can that be done?
Right. The bishop checks the black king, keeping him busy, while the rook attacks the queen with impunity.
The only legal move.
Now the windmill finally comes to an end.

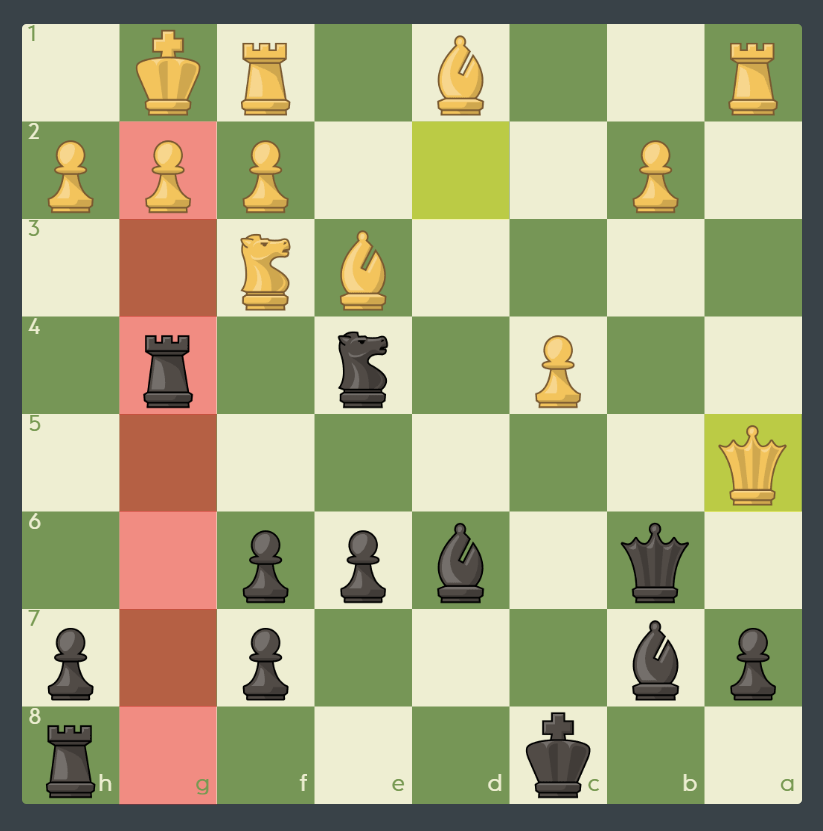
After all that, White is up a bishop and two pawns. However, Black now has a fork which had to be taken into account.

Black wins back a piece. Still, it will not be enough.
White is losing the bishop, but will get a third extra pawn.

The rook of course had to be saved. White keeps it aimed at h6.
White captures another pawn and emerges with a winning position.
White did all that to end up with three pawns more. However, that is plenty enough to win. Black soon resigned.
Topic 4
The so-called “Game of the Century” was played by teenager Bobby Fischer. The black queen and knight are both in danger, but Fischer saw more!
This was the key move. Black leaves the queen under attack, but disturbs the bishop on c4, which is holding the f1-a6 diagonal.

If instead 18.Bxe6 then 18…Qb5+ leads to a smothered checkmate: 19.Kg1 Ne2+ 20.Kf1 Ng3+ 21.Kg1 Qf1+! 22.Rxf1 Ne2#. Or if 18.Qxc3 Qxc5! makes use of the pin by the Bg7.
Black has sacrificed the queen, but will gain a key diagonal and begin an attack on the white king. How to begin it?

Right. Black captures the bishop with check.
There are a couple of tempting moves, but only one is winning. Black should try to find a way to win the most material, even if it takes a few more moves.
Excellent! Black is not in a hurry to capture either the rook or bishop on b6. The goal is to get the most out of the position as possible.
The windmill is working — the white king is forced into discovered check.
Now Black has many checks, but concentrate on finding the one which wins some more material while also opening the diagonal for the Bg7.
Good job. Black wins another pawn, but more importantly secures a defense for the knight later on c3.
21.Rd3 would not help after 21…axb6, attacking the white queen, followed by later taking the pinned rook.
Before ending the sequence of checks, Black should make sure the knight is in position to attack the white rook. Let’s go in circles again!

Right. Black prepares another discovered check, which will move the knight to the right spot.
Black should now put the knight, with tempo, into position to later capture the white rook.
Good job. Only when all preparations are made will Black capture the bishop on b6.
Black is finally ready to reap the harvest. What is the best way to do that?
Good — it is better to capture this bishop, since the rook attacks the white queen. The white rook on d1 will not escape capture.

White hopes, by counterattacking the bishop on c4, to limit his loss of material.
Patience! Now an intermediate move saves the black bishop before the rook on d1 is captured. Can you find it?
Excellent. The queen is threatened and you can take the rook next turn.
If instead 25.Qd6 then 25…Nxd1 26.Qxd1 Rxa2, and White cannot stop …Ra1 next.
Finally, Black can capture a last bit of material.

Black is still without a queen, but look what he has for it: two bishops and a rook! This was enough for Fischer to win the game easily.
Topic 5

Black’s powerful pieces attacking g2 can lead to a windmill mate! Let’s first see how the combination developed.
Black attacks the white queen, opening his own to attack.
If instead 20.Bxb6 Nxd2, White’s position is collapsing on the long a8-h1 diagonal.
Black had no way yet to break through at g2, but he could add some pressure.
Black attacks g2, leaving his queen hanging! But now if 21.Bxb6 Rxg2+ 22.Kh1 Rxh2+! 23.Nxh2 Nxf2#! is a beautiful double-checkmate.
Also, if 21.g3 Black has an overwhelming force aimed at that square: 21…Nxg3 22.hxg3 Rxg3+ 23.fxg3 Qxe3+ with a crushing attack.
Now the black queen and rook on g4 are under attack. But he had a fantastic way to crash through.

This move has to come first, because otherwise White can remove the rook.
Now White made an amazing move — discovering an attack on g2!
The knight just gets out of the way. However, the square had to be chosen carefully. After 22…Nc5 23.f3 White blocks the attack on g2.
In desperation, White played 23.Qd5. But after 23…Bxd5 Black quickly won with the extra queen. Instead, let’s see what would have happened if he went queen grabbing.
Now it is your turn. How does Black justify losing the queen?
Correct. Black captures the knight with check. After all those sacrifices, Black finally crashes through on the target square.
Now the windmill begins its turn. But for this one, notice that many discovered checks could be met by 25.f3. So we need something special!

Right! This is double check. The white king only has one move.
Double check must always be met by a king move, so 25.f3 doesn’t work here.
It was a short but violent windmill. Now, there is checkmate.
Right. This short little windmill is a frequent tactic on the kingside.